This article is either a continuation or a predecessor to the "Hinge Construction for Medieval Armour" article, depending on whether you are trying to decorate a hinge you have already made, or are trying to replicate a specific hinge design and need to know what is involved before starting the project. While making armour hardware may seem to be difficult, this series of tutorials in intended to demonstrate the "tricks" to do it easily in a minimal amount of time, and these details make a striking difference in the visual presentation of your armour, whether you are reproducing a minimally decorated Milanese harness, or an intricately detailed Maximilian. If you are new to doing this sort of thing, I hope that it will set you out on the right path, if you have a better way to do this then please let me know your "cheats" so that I can use them and improve my techniques
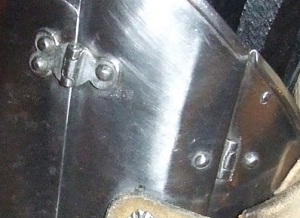
Even if the hinge is going to be applied on the inside of the armour you may be surprised at how much needs to be done after building the rough hinge. At a minimum you will need to cut to fit, punch the rivet holes and tidy the edges up. Some examples have decorative punch marks along the edges of the hinges, or even engraved or chased outlines decorating the areas around the hinge knuckles.
For hinges that are going to be appearing on the outside of an armour, making sure that the hinge matches the patterns seen on contemporary pieces is critically important to making the harness look correct. Note that I do not have any good photos (which are not copyright protected) of hinges earlier than the 15th century (1410) so you will need to do a bit more research for correct hinge patterns in this period. Following are a few examples from various periods (by century) showing hinges with typical lobe patterns as well as punch and file-work details, which add greatly to the aesthetic of the hinge. Note that there can be significant regional differences to hinge design and construction - many Greenwich armours have 5-lobed hinges, which are atypical on other armours that I have seen which tend to favor even numbers of lobes (4 and 6 lobes) for anything other than the "minimal" hinge, which required 3 lobes. many of the photos have been taken of (and from) Wade Allen's collection which can be found at Allen Antiques. Many of the others from the Kelvingrove museum in Glasgow have been graciously provided by James Elmslie.
The specific pieces from Wade's collection include:
The Photos from James Elmslie come from:
Some additional places to look on the web, which have good photos of armour include
And some places with excellent collections and not-as-good web presence include:If you have some decent resolution photos of decorative hinges from the 14th - 18th centuries, I'd love to add them to this page, since most of my photos are under copyright restrictions
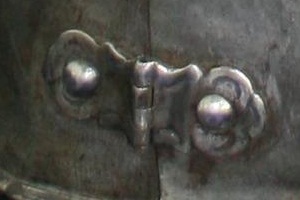
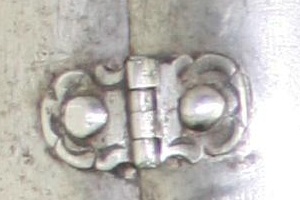
| 15th Century Hinges | |
|---|---|
| |
| Damaged Maximillion greave hinge (1410) | The "Avant" breastplate (1440) |
| |
| The "Avant" fauld (1440) | Lower hinge from the "Avant" cuisse |
| |
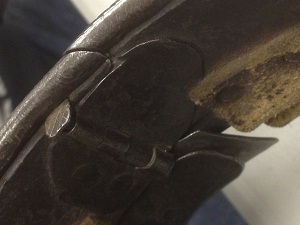
| Upper hinges from the "Avant" cuisse | Gothic gauntlet thumb hinge (1480-90) |
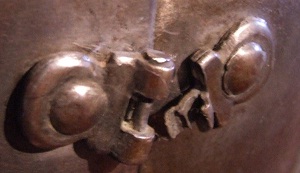
None of these hinges are particularly well decorated, which is a pity since many of the "finer" armours of this period were extensively decorated with file and punch work. Milanese armours (Italian) tended to be much more plain, while Gothic (German) armours had many more decorative details. Despite the lack of decoration, the overall form of the hinges is illustrative. The Maximillion hinge clearly shows the "folded" method of construction and the decorative elements of the avant harness are typical of Milanese harnesses. I personally find it interesting that the breastplate hinge is clearly not straight, but functions "well enough".
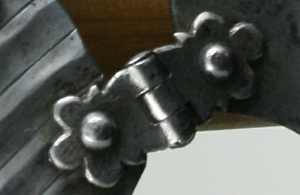
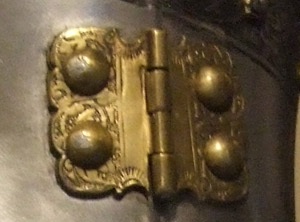
| 16th Century Hinges (1540-1560) | |
|---|---|
 |  |
| Gauntlet Hinge (1540) | Gauntlet Hinge (1540) |
 |  |
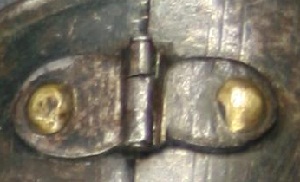
| Gorget Outside (1560) | Gorget Inside (1560) |
 |  |
| Top view of Gorget pin (1560) | Landshut Grosschedel thumb (1560) |
 |  |
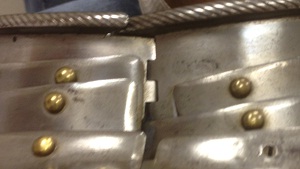
| Landshut Grosschedel gauntlet cuff (1560) | Landshut Grosschedel Vambrace (1560) |
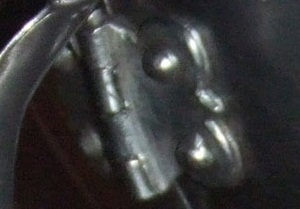
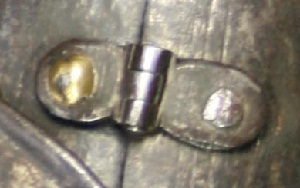
There is a huge contrast between the two gauntlet thumb pieces (which are munitions armour) and the rest of the hinges in this block of images, which are of excellent manufacture. Landshut Grosschedel was one of the pre-eminent armourers of his age and area, and the gilt and decorated hinge details and precision of the work are a contrast to the haphazard "gapping" of the A104 left hinge. The gorget illustrated was likely part of a garniture: while it is not elaborately decorated, the precision of the closure and continuity of the decorative elements suggest a high level of care not generally seen in "munition" armours.
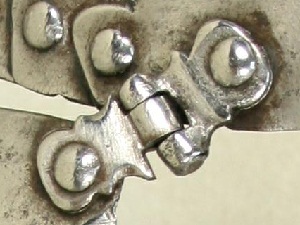
| Late 16th Century Hinges (1580-1600) | |
|---|---|
 |  |
| A124 Lower Greave Hinge (1580) | A124 Upper Greave Hinge (1580) |
 |  |
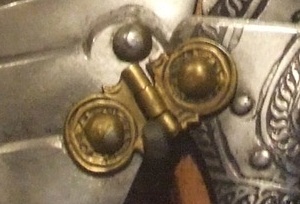
| A171 Vambrace Hinge (1580) | A174 vambrace hinge (1600) |
 |  |
| A173 upper vambrace hinge (1600) | A173 lower vambrace hinge (1600) |
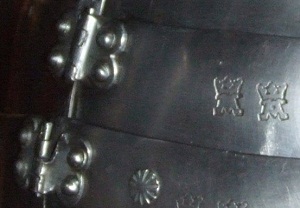
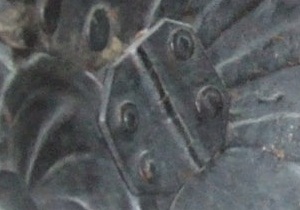
The greave hinges are very similar in form to gauntlet thumb hinges, including the overall size and decorative elements. A173 is a munition arm harness with a replacement rivet in the upper hinge. Note that the A173 and A174 were made at roughly the same time, but one has interior hinges, the other exterior hinges. They are both "munition" armours, and the 174 shows a distinctly asymmetric hinge cut-out next to a beautifully tight joint between the couter and the vambrace. A171 shows a similar lack of concern with precisely aligning the hinge pin with the vambrace cut-out, demonstrating that the medieval or renaissance armourer may have had different priorities to many reproduction armourers.
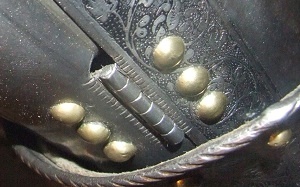
| Some interior hinge views | |
|---|---|
 | 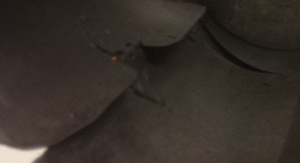 |
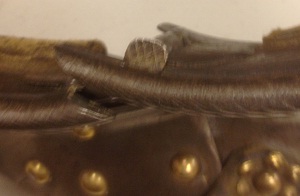
| Pembroke Burgonet cheek hinge (1557) | Interior of A171 Vambrace (1580) |
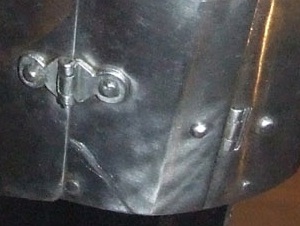
The Pembroke helm is a nice example of a "Greenwich" armour - and these armours have a lot of 5-lobe hinges, instead of the more typical 3, 4 and 6 lobe hinges that I expect to see in medieval armours. I don't know if this is a "signature" of a Greenwich armour, or if I just haven't seen other armours with 5-lobe hinges. The interior of the A171 shows the interior finishing - note the "odd" angles that the vambrace pieces have been cut to. While there are no rough edges, this demonstrates that modern reproductions probably worry a bit too much over component symmetry!
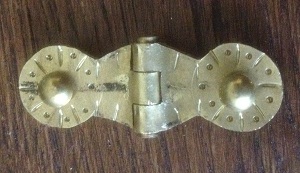
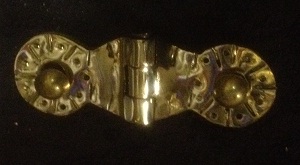
To demonstrate that the decoration of a hinge is actually a fairly trivial operation, I decorated a "plain" gauntlet hinge in a late gothic style, with the overall hinge shape being very similar to that seen in the lower cuisse hinges on the "Avant" harness. Note that if I were doing it again, I would make a complete "ring" of chisel marks around the rivet holes, and would not continue the chisel pattern down to the knuckle area of the hinge. Attempting to do this detracted from the visual appearance and distorted the hinge - 4 hammer strokes that should not have been made...
The total amount of time taken starting from the "rough" hinge to the final finished piece was about an hour, fully half of which was periodically stopping, getting out a camera and taking pictures. Note that the "rough and ready" hinge profiling detailed at the end of this article compressed this down to about 5 minutes (to rough finish) and I expect that the finished "eyeballed good enough" hinge is on the order of 10-15 minutes, a significant time savings.
Tools and Materials
The Tools and Materials that I used were:
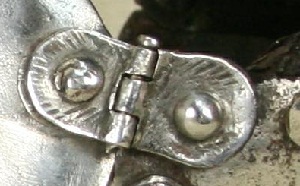
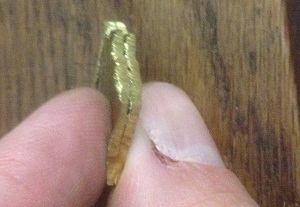
Starting with the hinge which we made using the tutorial here we draw add the centerline and locate the point at which we have sufficient space to make two circular ends. Once these are marked, they are center punched, and the circles are scribed - this can probably be done "by eye" for those more artistically inclined than I. Once the circular ends are done then a permanent marker (sharpie) is used to draw the taper for the metal from the knuckles into the circular ends.
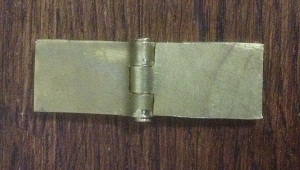 |  |
| The unornamented hinge | Centerline added |
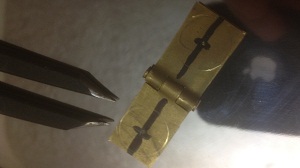 |  |
| circular ends scribed | hinge pattern marked |
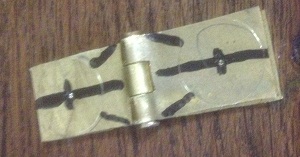
Now that the pattern is marked, we can start on the actual "work" of prettying up the hinge. For this example I used a jewelers saw to cut the excess material away from the hinge body, and then punched the holes for the rivets to pass through. Note that in the second picture we show the tools used to decorate the hinge, the chasing chisel and center punch
 | 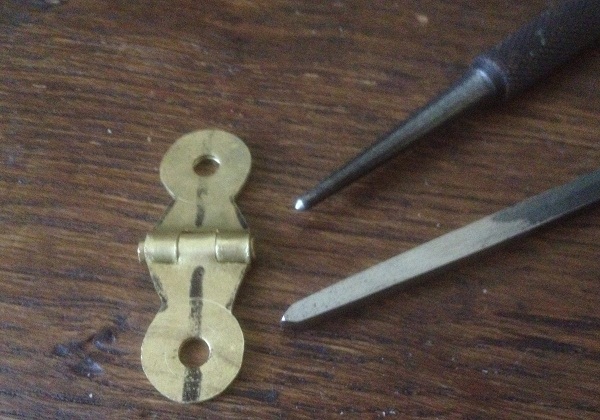 |
| Shaped and punched | tools for decorating the hinge |
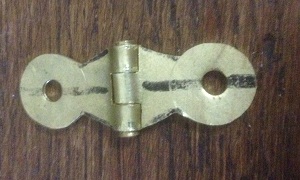
 |  |
| A few minutes with punches | A quick polish |
 |  |
| Rough ground hinge | side view detail |
Copyright Scott Martin, 2012
Last updated October 23, 2012 by Scott Martin