All posts by Scott Martin

Gauntlet Heat Treating

Working with carbon steel has a few more steps that working in mild or stainless steels, since you need to heat treat to harden the material. In general this has two stages, the “quench” stage and the tempering stage. Of course once armour is heat treated it needs to be cleaned up (unless you are getting the heat treatment done in a vacuum kiln) and all of the work that you need to do to shape the metal really needs to be done before heat treatment – because once it is heat treated it will be very hard and difficult to move.

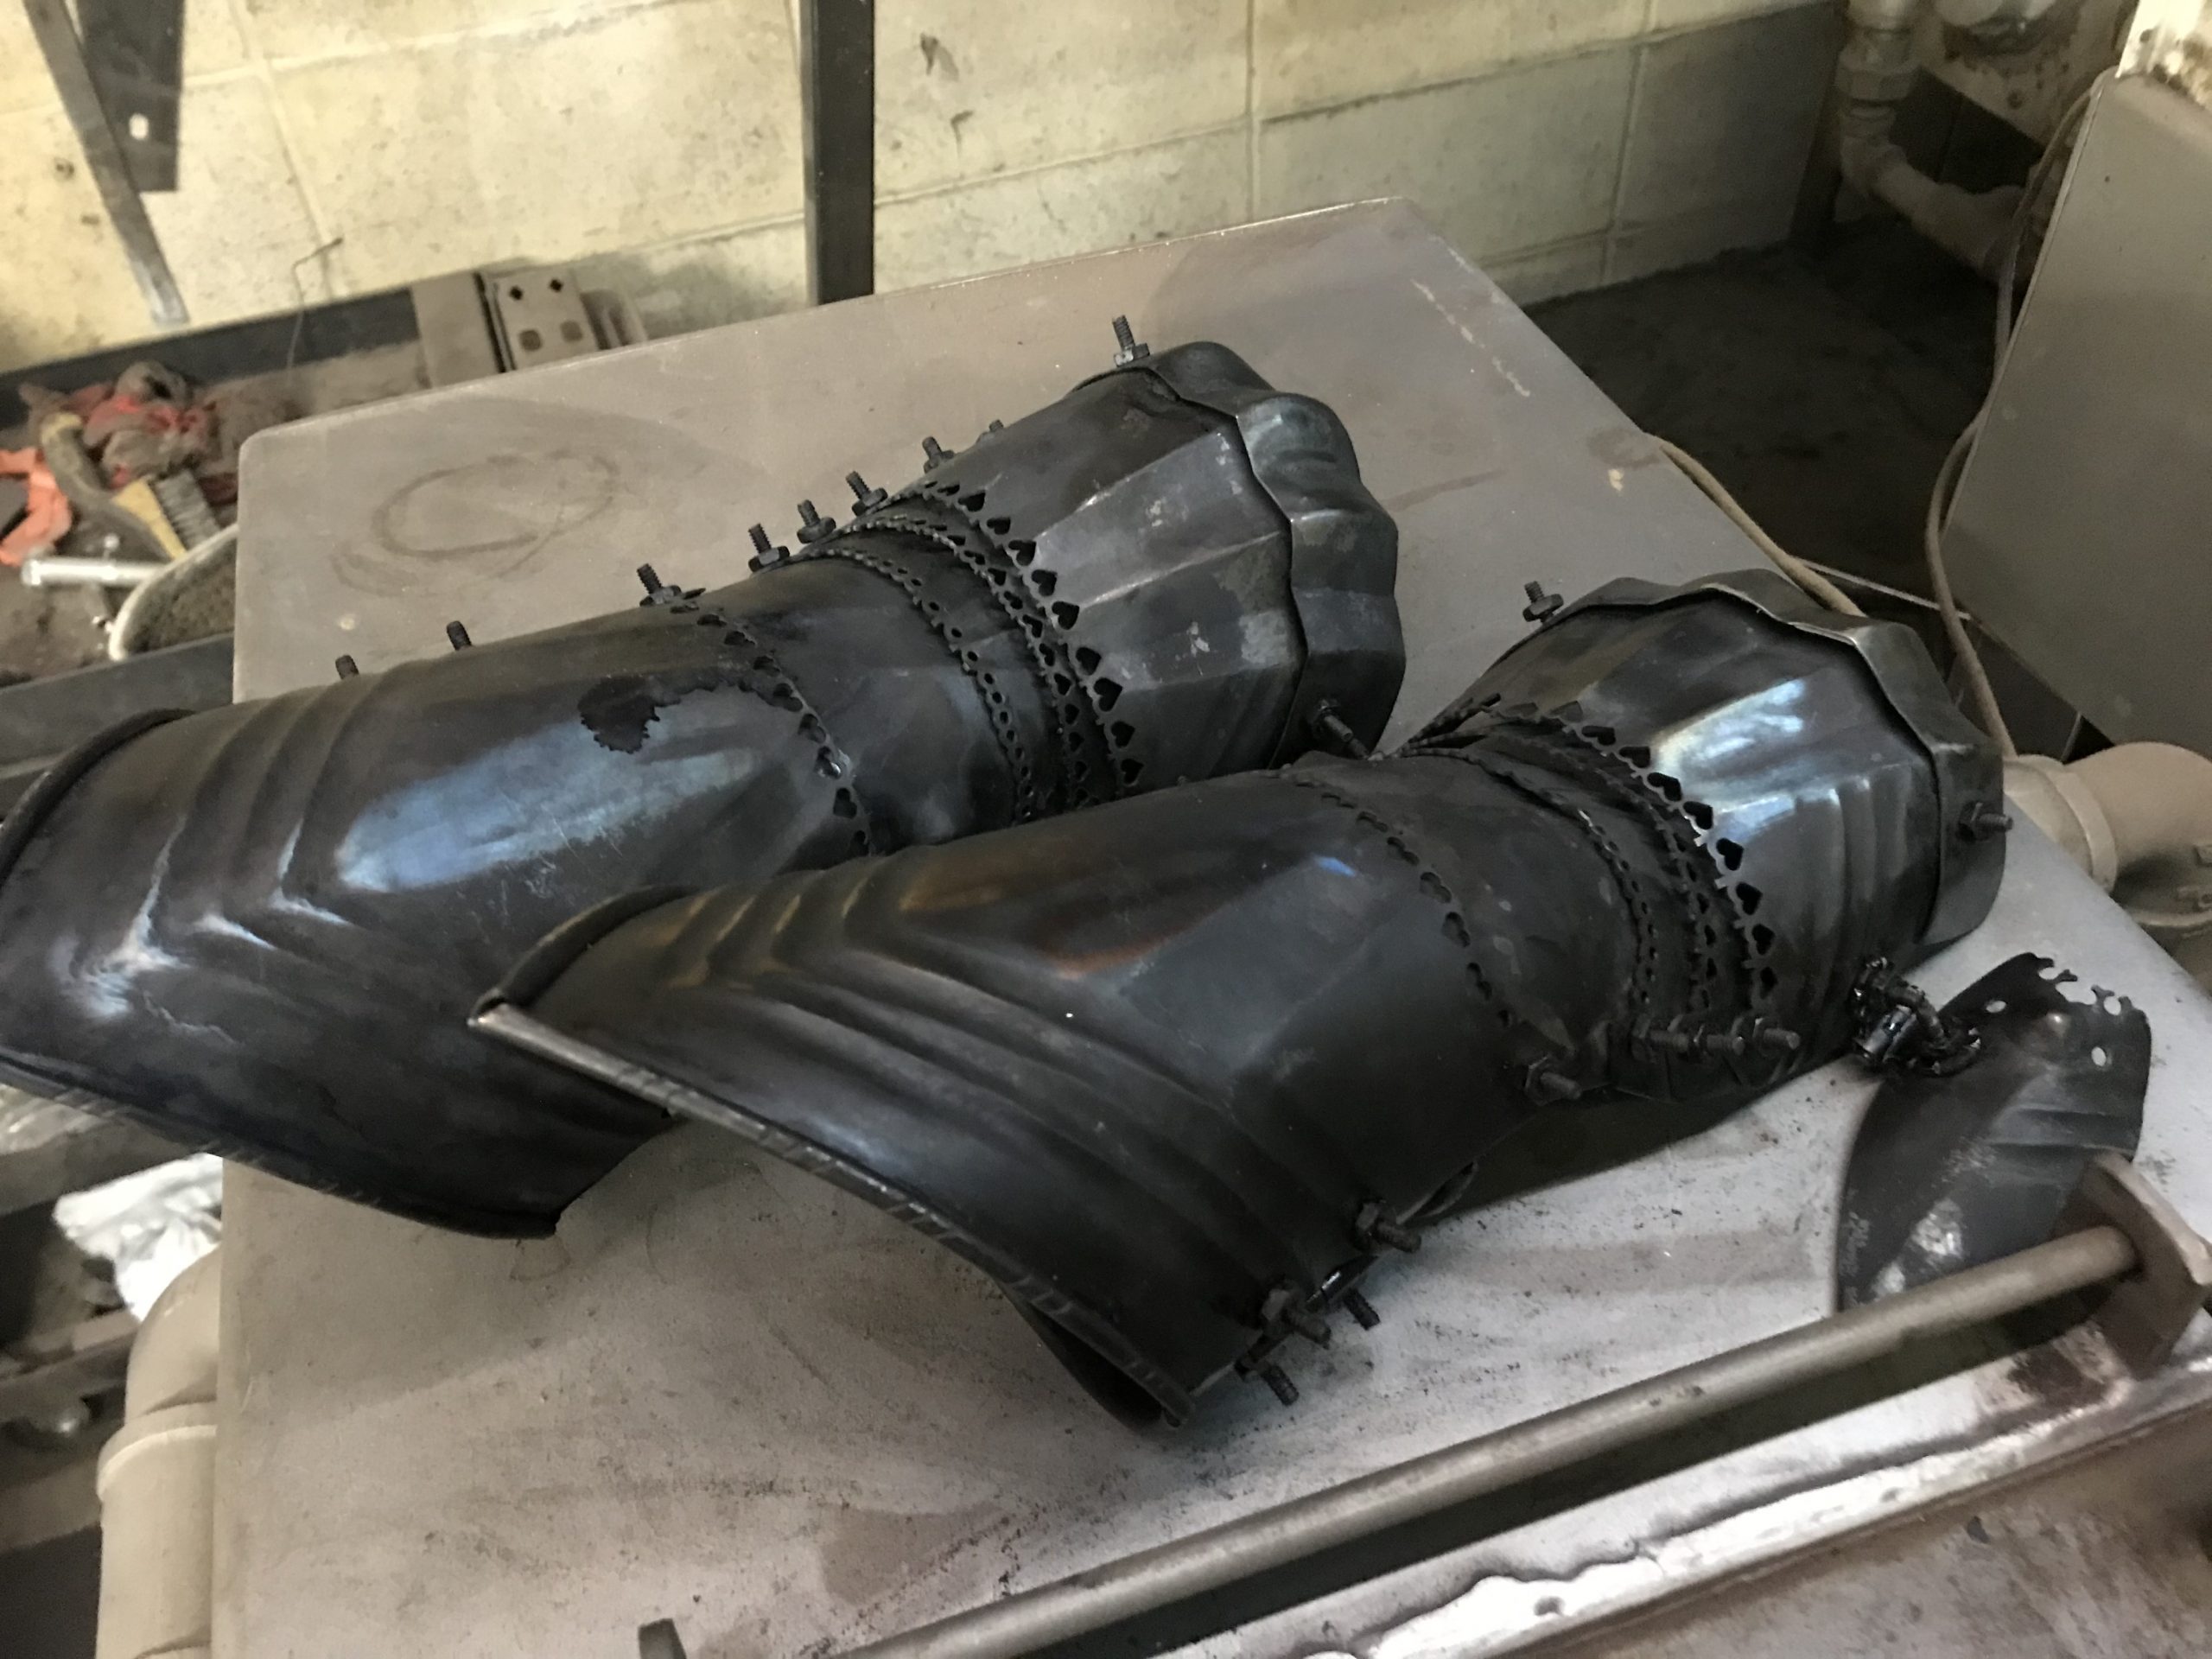
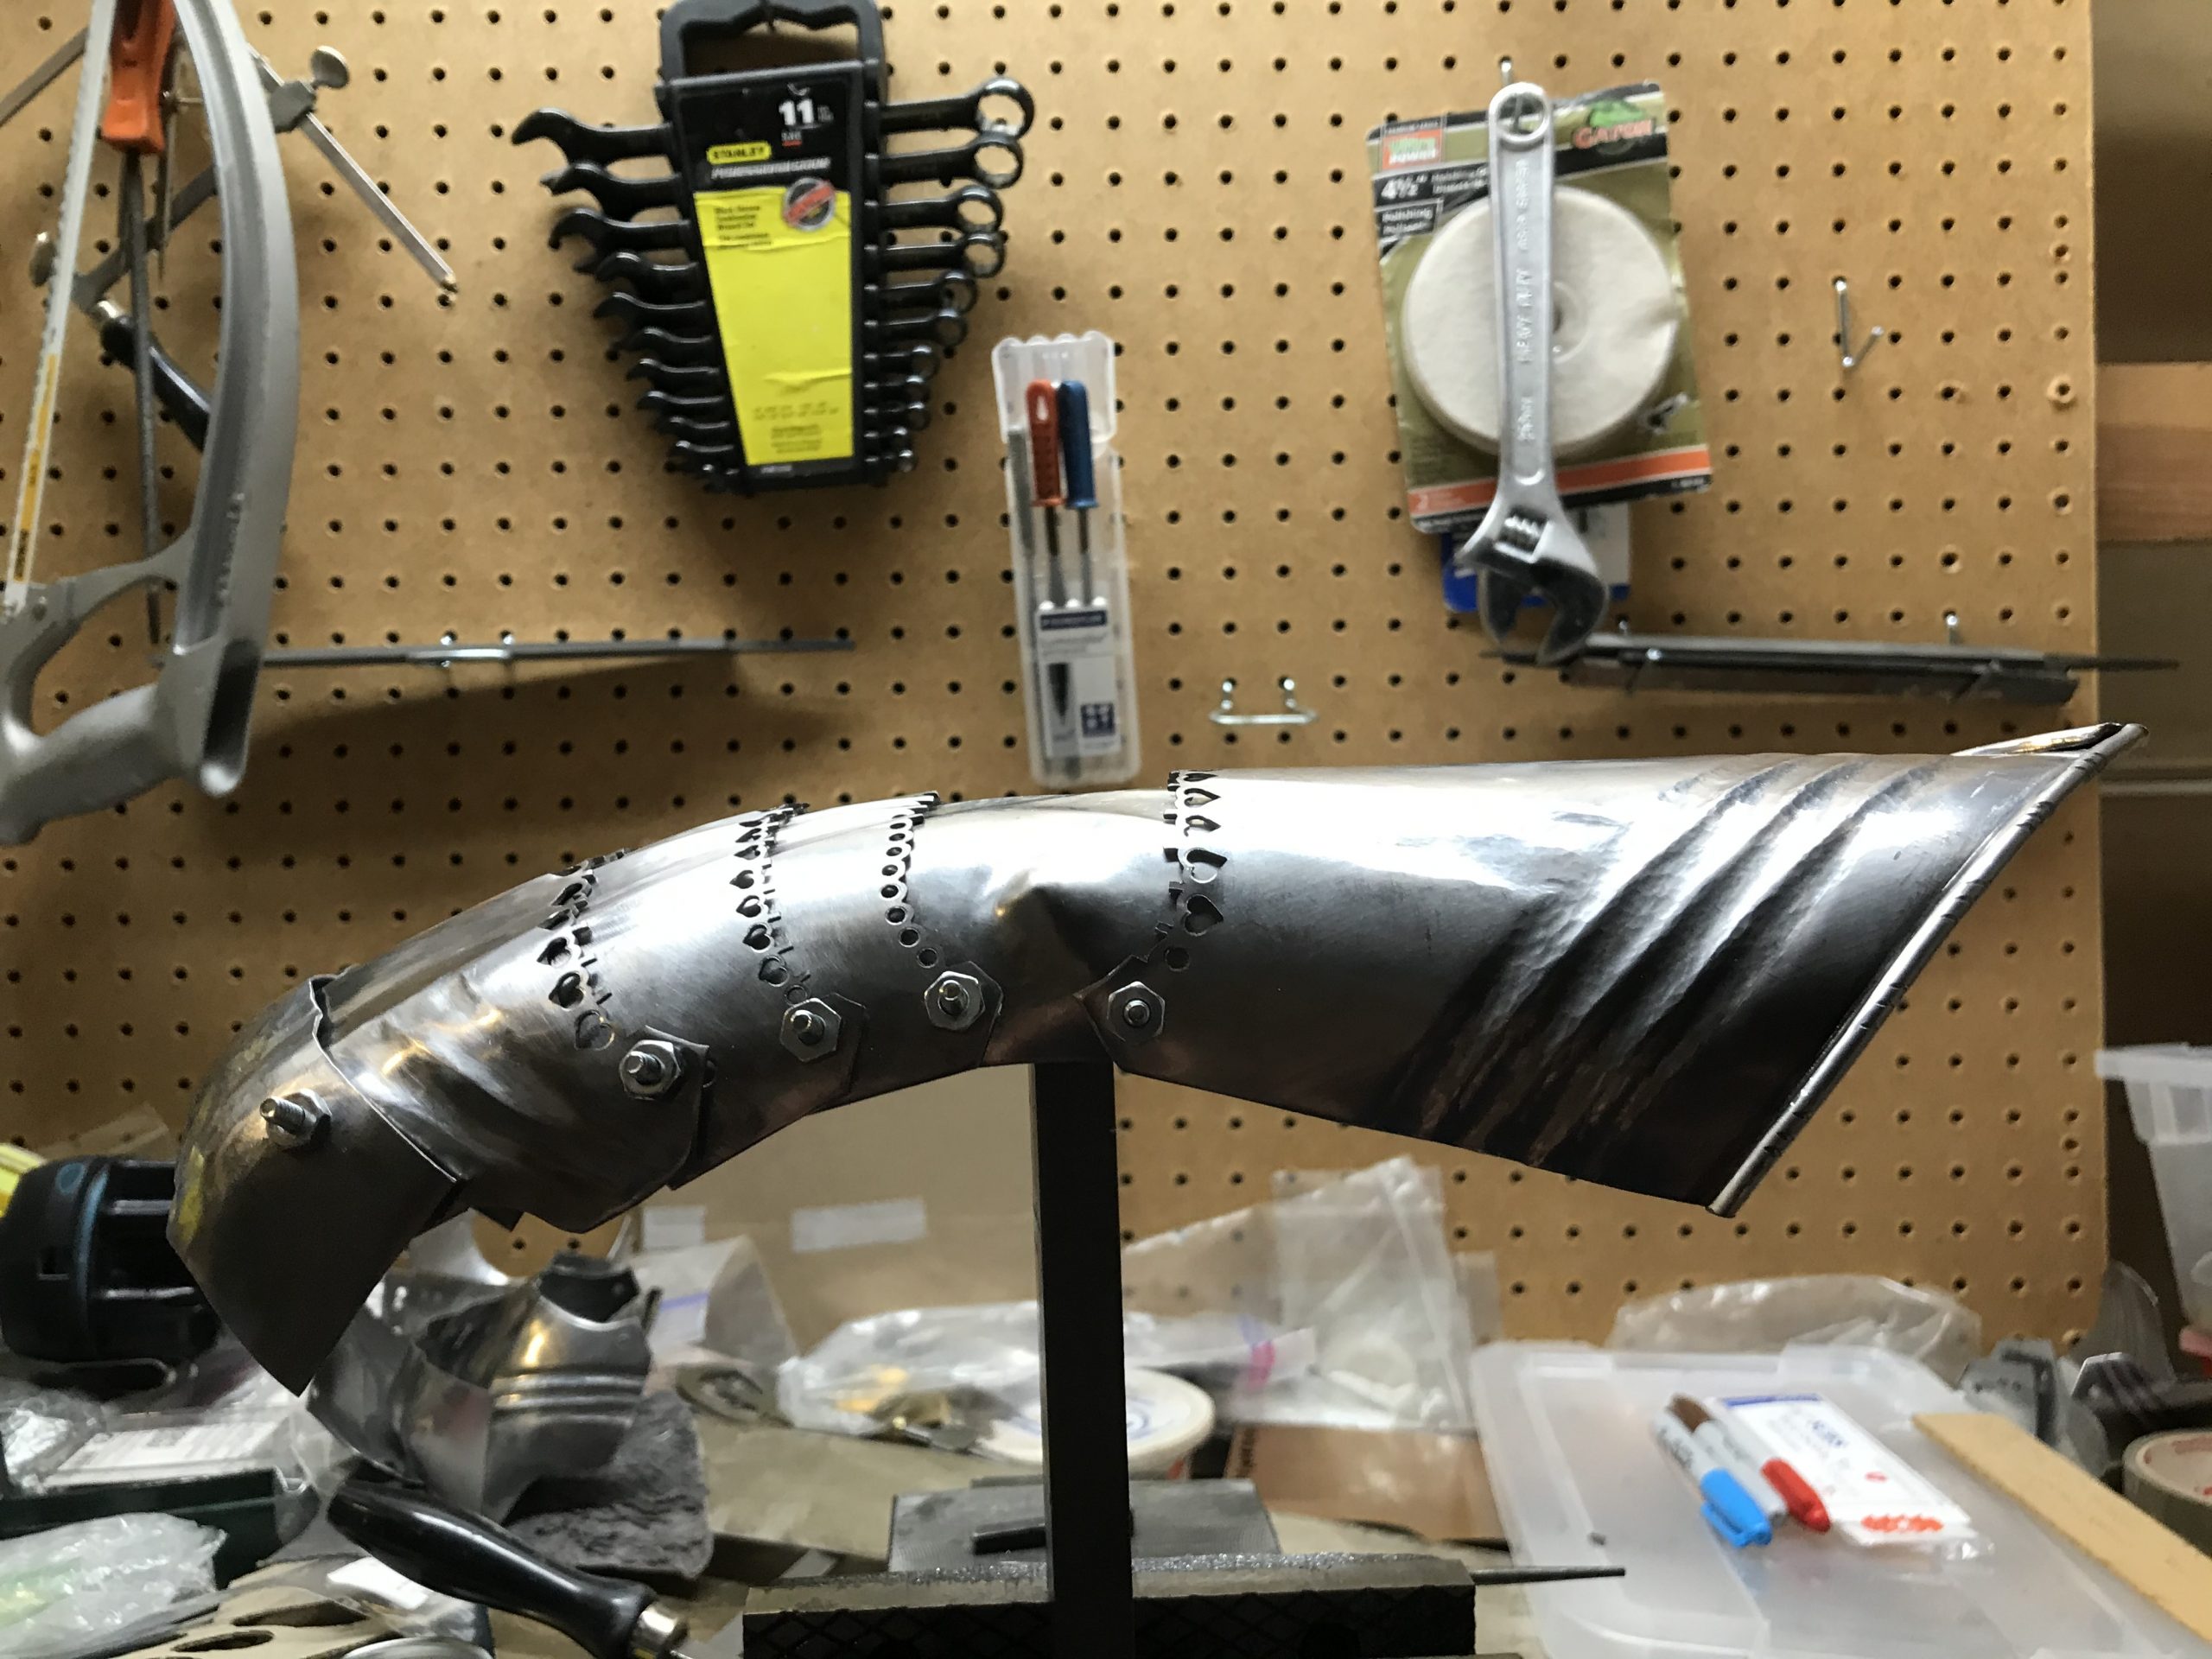
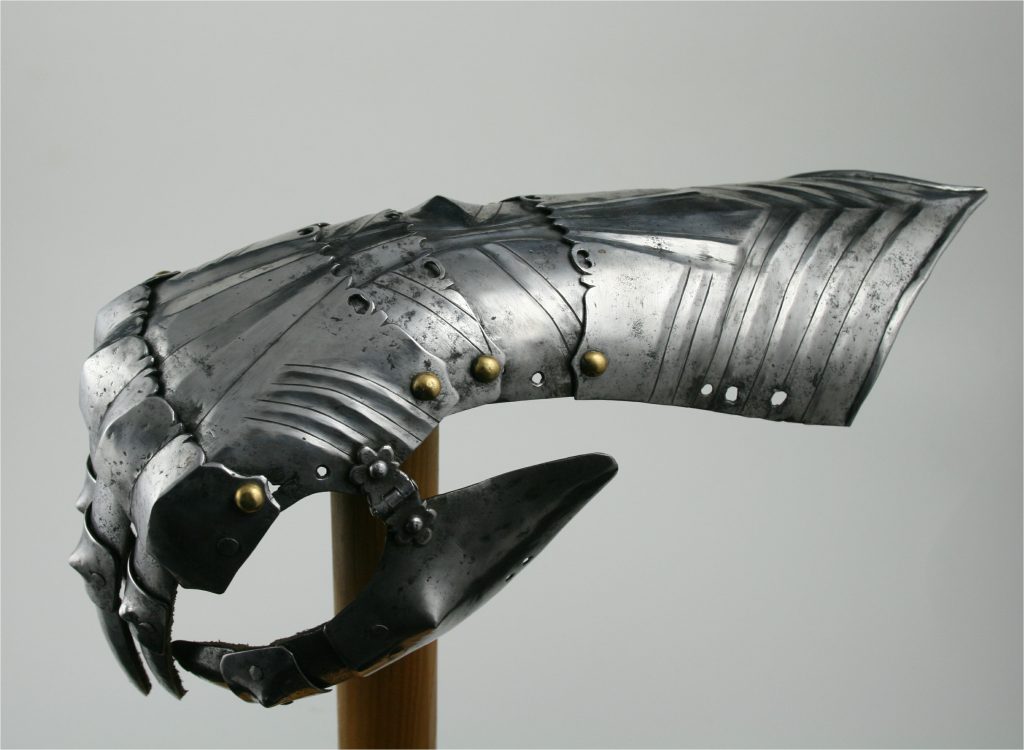
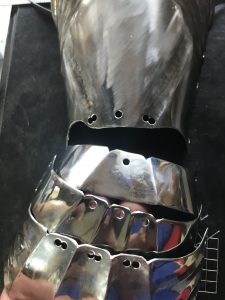
Here are a pair of gauntlets after heat treatment and tempering. Because we used a kiln with very good temperature control we have minimal scaling, and there was minimal plate deformation. To ensure that the gauntlets had minimal issues with deformation they were bolted together and heat treated as a unit, and their movement after heat treatment was “fair” – it should be back to full mobility once we clean up the scale, which is making the gauntlets more than a bit “stickier” than they were before treatment since the fire scale won’t allow plates to “slide”. This is also because we tightened the bolts before heat treatment, and will need to “loosen” the plates by a millimeter or so per joint so that they can freely slide on their slots, since the clamping of the bolts has pulled the plates tighter than we want them to be in actual use.

(To be continued as these gauntlets are cleaned up)

Constructing Gothic Gauntlets with Droop

One of the things that many gauntlet reproductions don’t do (or do badly) is “droop” – the level of extension needed to break the wrist “down” toward the fingers. Wade Allen has a nice 1480 / 1490 gauntlet, and also has a nice photo showing what these should do:

Wade Allen's A213 Gauntlet

It isn’t much, but it’s enough so that the gauntlet won’t bind, and the limit of movement may be enough to keep wrist locks (or for fans of Fiore “keys”) from working well. This post will go into how I build gauntlets to make sure that I have enough “droop” and also get into how I set the slotted rivets to allow lateral movement, since this style of gauntlet is extremely close fitting, and requires approximately 1″ (25mm) of compression so that movement is not hindered.

Layout and Patterning

While computer assisted laser and water-jet cutting optimizes the layout to minimize metal wastage, in general you will waste considerably less metal (and time) if you make sure to have at least 1/2″ of space around each piece. While closer spacing uses less material, it doesn’t take a lot of mistakes (cutting through and ruining other pieces) to offset the material savings, and tight tolerances here will require more cutting time – and time is probably the most valuable component of these gauntlets: my cost breakdown was roughly $2 for leather, $15 for gloves, $3 for rivets (7 dozen rivets, more than half of these brass) and $5 for steel (largely 0.040″ / 1 mm / 20 Ga stainless steel)

Continue reading Constructing Gothic Gauntlets with Droop

All the gauntlet pieces

I thought that I’d put together a build list of all the pieces that I needed to cut out and shape for a pair of finger gauntlets. This is also a convenient listing of what order to cut the pieces in (particularly if heat treating) since there is a distinct order of operations to follow. Note that I generally build the fingers first and then attach to the body of the gauntlet, you can also build the body of the gauntlet first, but the knuckle plate fitting will depend on the fit of the plate that rivets the finger leathers into the knuckle, so you can’t finish this fit until the fingers are done – and if you are heat treating that means that this plate is the absolute last plate to get heat treated! I have also included the rivets, and based on this build list a pair of finger gauntlets will use 132 rivets (not including those to hold the glove to the gauntlet = likely another 6 per gauntlet) although the vast majority of these will be “arming nails” for attaching metal plates to leather.

Continue reading All the gauntlet pieces

Quick Besagews

This was actually a project that I started (and finished) today after trying to figure out a good “practice” exercise for gothic gauntlets, since the metacarpal plate shaping is “tricky”. Then it occurred to me that Besagews have the same “ridge and scallop” shaping, and should be something that I could teach an intermediate armourer in an afternoon. Instead of going into the historic background of these, I thought that I’d just put up the build. Even doing this as a quick post, the preparation of the post probably took more time than the Besagew, which I timed at 40 minutes (including the pattern)

I’m going to cheat and just include the gallery of photos at the bottom instead of embedding them inline, but they follow the order that I am outlining here. here are pics of the (rough finished) besagew, as well as the edge view showing the “scallop”. The center hole will be used to mount the attachment (probably a leather loop)

[Edit] – added a pair of videos at the end, one of shaping the besagews once the flute lines are roughed in, and a second showing the sanding (at 240 grit). I have also added some “fancier” Besagews, which are the second set of photos below

Rough finished besagew edge view of Besagew

Here are a couple of alternate versions, which were made by spending a bit more time cleaning them up, and different grinding for the edges. This gives a more “floral” version and a “needs more umlauts!!” gothic version. For comparison, the floral version was made by Dean, who has been making armour very part time for about a year, and this was completed in about 2 hours in an afternoon with almost no input from me other than a demonstration of the technique

Fancier Besagew (about an hour) some alternate configurations Continue reading Quick Besagews

Making Gauntlet Gadlings

Let’s start with “what’s a gadling”. A gadling is the plate that covers a knuckle on a set of gauntlets that covers individual fingers. In practice, this is simply covering the “gap” between the plates along the finger bones, and with the exception of some early (14th century) gauntlets, these are invariably articulated by riveting them onto a leather (generally buff leather) backing. for a nice picture of a single gauntlet, check out the A213 which is in the collection of Wade Allen – it is one of the few resources on the web that includes interior photos as well as exterior ones. compare and contrast to the A98 pair which are mitten gauntlets.

Gadling and punch

There is a common misconception about gauntlets, that finger gauntlets are more difficult to build than mitten gauntlets. While either type of gauntlet is time consuming, the main challenge to finger gauntlets is simply having the right tools. Gadlings are a particular challenge for most folks, particularly the pyramidal or conical types, as many people seem to think that these need to be shaped in the same way you would make a poleyn or couter (knee or elbow protection). As with many pieces of armour,the first question you should ask yourself is “what is the easiest possible way to make this” – that is generally how these pieces were made, because a medieval armourer had bills to pay and mouths to feed, and didn’t get a bonus for doing things the hard way.

Continue reading Making Gauntlet Gadlings

Gauntlet Punchwork Decoration

Working through the “finishing” stages of my current gauntlets, I though that it would be worth demonstrating how easy it is to do some of the “fiddly bits” that differentiate “nice” reproduction gauntlets from “ho-hum” gauntlets. Almost all gothic armour has in incredible amount of decorative details, much done with punching or filing. Since I have little interest in becoming a master in the use of tiny chisels, I tend to cheat excessively, and the “heart” motifs that are scattered on the edges of many gauntlets plates are very easy to do with a metal punch (or drill) and a jewelers saw or coping saw.

Centerpunched locations. Holes Punched, ready for piercing Continue reading Gauntlet Punchwork Decoration

Prototyping Obsessions

While it may not be a requirement to be obsessive when prototyping armour, I’d argue that it helps. “Prototyping” may be the wrong word since much of the armour I’m working on building was “perfected” hundreds of years ago, but it is definitely an iterative process.

  • Try a pattern and a set of techniques
  • learn a new technique, or modify one you have been using
  • realize that this changes the pattern
  • Update the pattern and or set of techniques
  • …repeat…

Part of doing this well (or at least not doing it badly) is recognizing when you know that you need to do multiple iterations, and determining what this specific iteration is trying to refine. I’m just about ready to finalize the gauntlet pattern that I’ve been working on for almost 20 years, so I thought that I’d share a picture of the latest few iterations

So what’s going on here? On the far left are gauntlets where I was refining the ulnar bump, along with some spare cuff plates since I realized partway in that this pattern (which I hadn’t changed for over a decade) needed to be fixed. The four gauntlets on the left are a “simplified” gothic pattern in stainless steel. These will probably be finished up and used as “loaner” gauntlets, provided as gifts or prizes, or sold.

The gauntlets in the middle (largely complete) are my experiments at the proper gothic fluting and shaping, as well as the knuckle plate design and technique refinement. These are 20 Gauge (0.040″ / 1mm) stainless steel and are reasonably serviceable, although the fluting is rougher than I would like both because I was learning a new technique and needed to figure out how much I needed to round the edges of my fluting hammer and still be able to make crisp “centers” for the chevron fluting. These are likely to be my “practice” combat gauntlets .

The remaining gauntlet pieces are carbon steel: the cuffs in the back of the picture in the middle are 20 Ga 1050, and when heat treated and tempered are likely to be fairly bulletproof. The gauntlets to the right (which are in the early stage of construction) are 22 Ga 1050 (0.032″ / 0.8mm) and are very close to medieval thickness. Assuming that I can do decent heat treatment on these this is likely to be my “production” gauntlet design, and the first two will probably be my “tournament” gauntlets both because they will be pretty, but also because they will be very close the medieval weight, and I’m hoping they will come in at under a pound, a fraction of the weight of most medieval gauntlets.

1050 Steel Arrives from Chicago

My moderately large pile of steel just arrived from Chicago (Admiral Steel). It’s amazing how little space 600 pounds of steel takes, this is a stack of 2′ x 4′ sheets of various thicknesses ranging from 14 Ga (0.80″ / 2mm) down to 22 ga (0.032″ / 0.8mm). Interestingly the (nominally) 20 Ga sheets which are supposed to be 0.040″ (1mm) thick came in at a hair over that thickness, so I have a lot of material (20 2′ x 4′ sheets) that is very close to this thickness. Fortunately, this is the range of thickness that most medieval armour sits in (breastplates, helmets and gorgets are thicker, some gauntlet components are thinner) so I anticipate that I will go through this in a year or three.

A pile of steel in the garage

The whole stack is about 2″ thick, with the thicker material in the back since it gets used less. I’m currently working on some gauntlets, so I’ll try these in the 1 mm thickness first (so that I have material that I can lose to abrasives when I “clean up” my hammer scuffs) and I will then test the medieval thickness which is generally on the order of 0.030″ (0.75mm) and see if it makes a significant difference in how it moves – gauntlets made of 16 Ga (1.5mm) material are very “clunky” because the plates are thick enough that the “stepping” for articulations is noticable: this is mostly alleviated in 20 Ga material (1mm) but may be even better with the “correct” thickness used.

Gauntlet Progress

I’ve been refining my gothic gauntlet pattern, and I’m coming down the home stretch on the current pair, with most of the fluting done. It’s time to start cleaning up the pieces, polishing and assembling. Here is how the pieces are coming together (bolted together) before any sanding or polishing.

Gauntlet under construction -

The cuff is fairly rough. I have since modified the hammer, since the “corners” are what was causing the scarring that can be seen, so the “wrapper” is a lot cleaner. The alignment of the cuff and wrapper worked fairly well: note that this is the other cuff and wrapper – before hemming the edges:

gauntlet cuff showing fluting alignment

I probably need to tighten the fluting, since the wrapper has minimal space for an edge roll on the leading edge – tightening the spacing up by 1/16″ (from 3/8″ to 5/16″) will clear me an additional 1/4″ on the cuff edge, which is coincidentally the amount of material I need for a tight roll.

It’s interesting how rapidly you learn to flute: the gauntlet pictured here was my second attempt at close laid flutes. My 6th piece (in carbon steel) will have no scarring that won’t sand out, and I could probably go directly to polish and not have it look too bad – and probably better than any armour I made in my first 5 years!

Updates and instructions (including final pattern layouts) to follow soon(ish)