All posts by Scott Martin

A Few Hammers

My wife thinks that I have too many hammers, since the last time we moved she counted over 50 – and I didn’t mention the dozen that were at a friends’ house…

Here are a few of the hammers in my shop – one of the boxes (not sacks) of hammers that I filled while cleaning up my shop. My currently most used hammers are a modified 8 oz ball pien, a couple of autobody planishing hammers, and a peddinghaus that I am using a lot for fluting right now. The pedinghause hammers and one of the autobody hammers can be seen in the middle of the photo above (click on it to get a full sized pic) – they were all on my “finishing” bench while I was doing the shop clean up so the went in last.

I’ll have to post a follow up showing a few of the specialty hammers that I use on a regular basis, and why I use these in preference to other options. It will also help explain why I have so many hammers, and which ones I have multiples of so that I can keep one at each of several stations like the aformentioned 8 oz ballpien, which is an excellent “tight areas” hammer as well as being my most useful riveting hammer.

Refining Armour Patterns

There is a common misconception that once you hit a certain level of ability, it’s suddenly easy to make patterns for armour. Another common misconception is that once you have the pattern for a piece of armour it’s easy to make that piece. Neither of these is true, and in one way I am fortunate that when I was learning to build armour there weren’t any armourers in the area that I could get patterns from.

I’ll take these in reverse order. To build armour from a pattern, you need the pattern and the methodology used to build armour. In the early days or armour reproduction when the techniques were simple, it was reasonable to be able to take anyone’s pattern and be able to build their armour. As more advanced techniques developed, it started to be important to know how the armour was built. The pattern for a raised sallet is generally some variation on a circle – a milanese sallet will be close to a circle, while a gothic sallet with a tail will be a teardrop. The reason that I don’t generally provide armour patterns is because without having a set of instructions, they are really a bit of an exercise in frustration. That said, I’m workng on providing patterns and instruction sets so that it is possible for people to learn from my numerous mistakes and save a considerable amount of time (years) from their development as a plattner.

Here are some pictures of the last 3 sallets I have built, as I have been working on a 2-piece sallet pattern for a number of years:

3 sallets - oldest to newest
Continue reading Refining Armour Patterns

Gothic Gauntlet Knuckle Plates

The knuckle plate is a fairly complex piece, and it took me a number of tries to figure out a simple way of making these using the tools that I built for making the finger gadlings. The base pattern for this is a rectangular strip of steel 1 1/4″ in width roughly 6″ wide (38mm x 150mm) Mark the center line, and 2 lines on each side 1 1/8″ to either side, these delineate the outer edges of the knuckles. Mark the center of these since this is where they will be domed. I use a lead block for most of the shaping, but pewter or firm clay will also work, although the clay will not provide as clean an impression.

Setup

The “pattern” for the knuckle plate is a rectangle 1 1/4″ wide by 6″ (or a bit more) long. This will be trimmed later, so the length isn’t terribly important. the 1 1/4″ width is slightly wider than it needs to be, but it’s easier to grind down a bit of extra material than to have to make a new plate if your punch locations aren’t perfect. Mark the middle of the sheet and mark at 1 1/8″ intervals from this centerline. If your hands are large, you will need to increase this spacing, if they are small you can decrease it. this will give you 4 “squares”, and if you put a mark in the middle of each one you can use this to line it up on your dapping block. Below are a couple of pictures, one of the “marked” knuckle plate aligned on the striking block, the second showing the lines I used to align the punch depression. The hammer I use is a 24 oz ball pien, and it has an almost spherical “ball” which is why I chose it for this forming.

Knuckle Plate dome set Marked Plate

Once I have set the hammer I strike the ball pien hammer with an 8 lb (4kg) sledge hammer with a cut down handle to allow it to be swung with a single hand. Because the “alignment” punches are fairly “light” and relatively shallow (about 1/8″ deep) and supported by the rest of the lead block they leave the rest of the plate flat, and ready for the major forming operations to follow. The following pictures show the first punch, and the series of 4 demonstrating that the plate is still flat following the alignment punches.

first knuckle set ready to dome Continue reading Gothic Gauntlet Knuckle Plates

Stress Relief

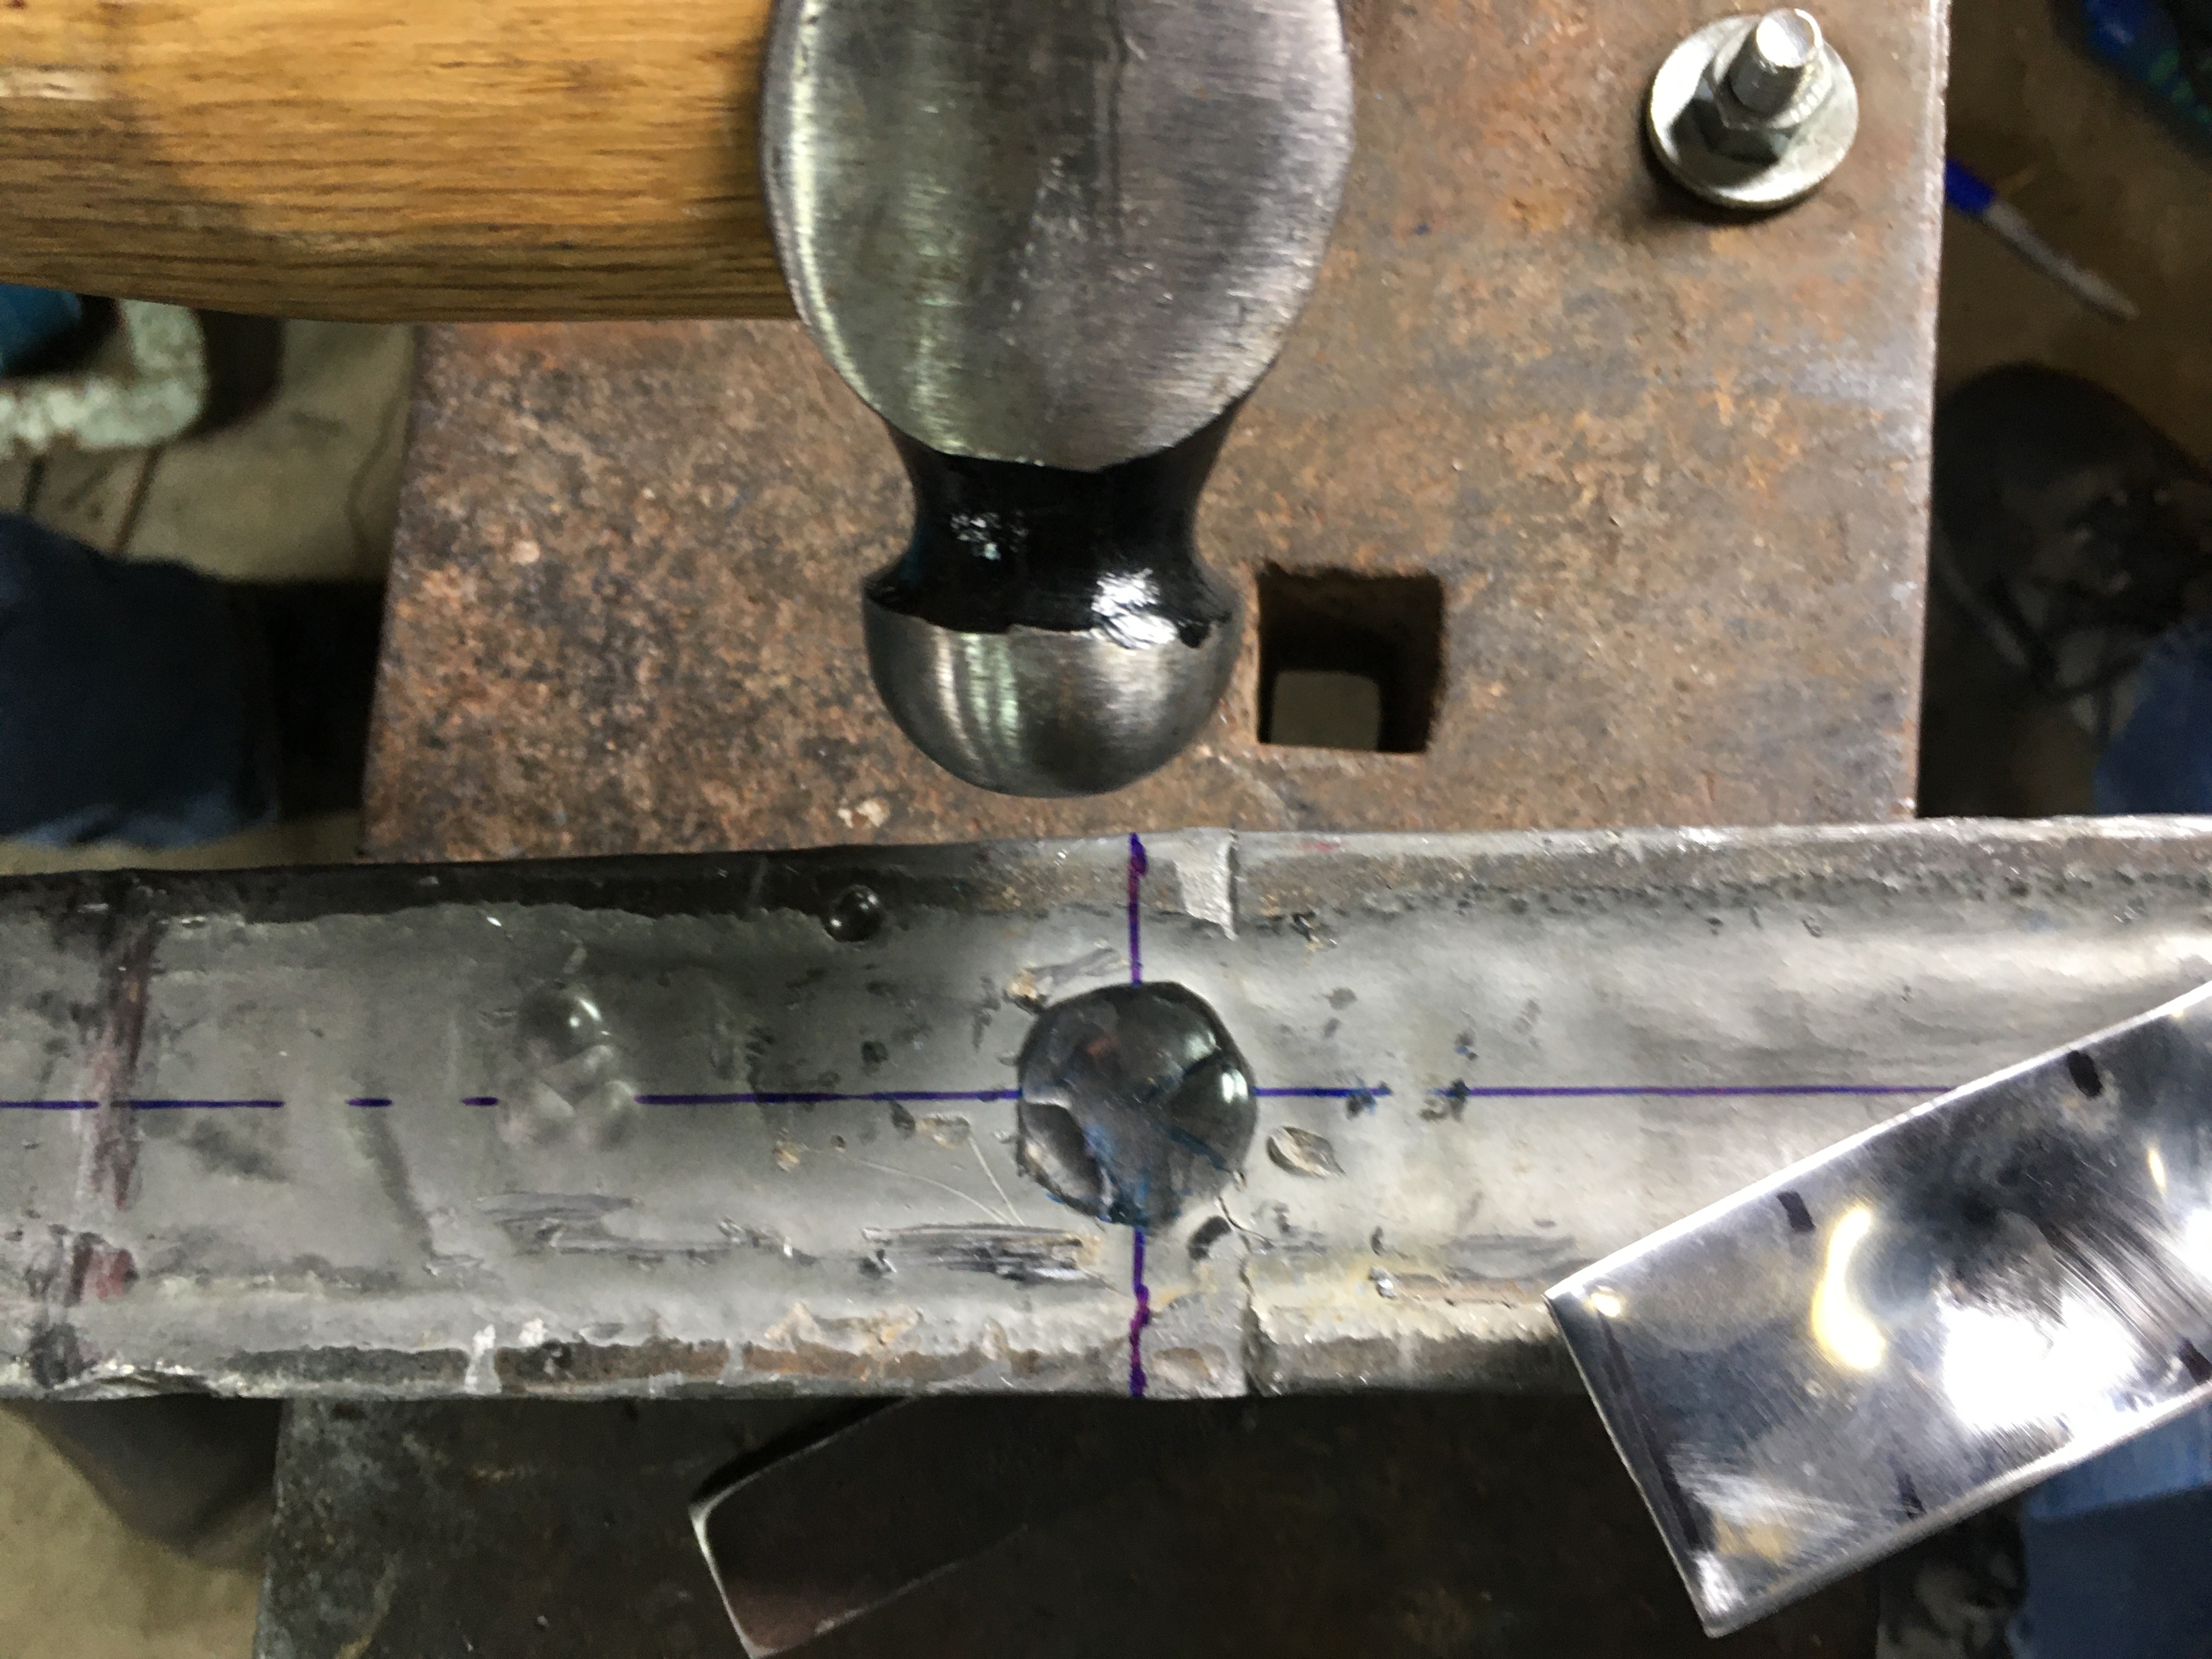
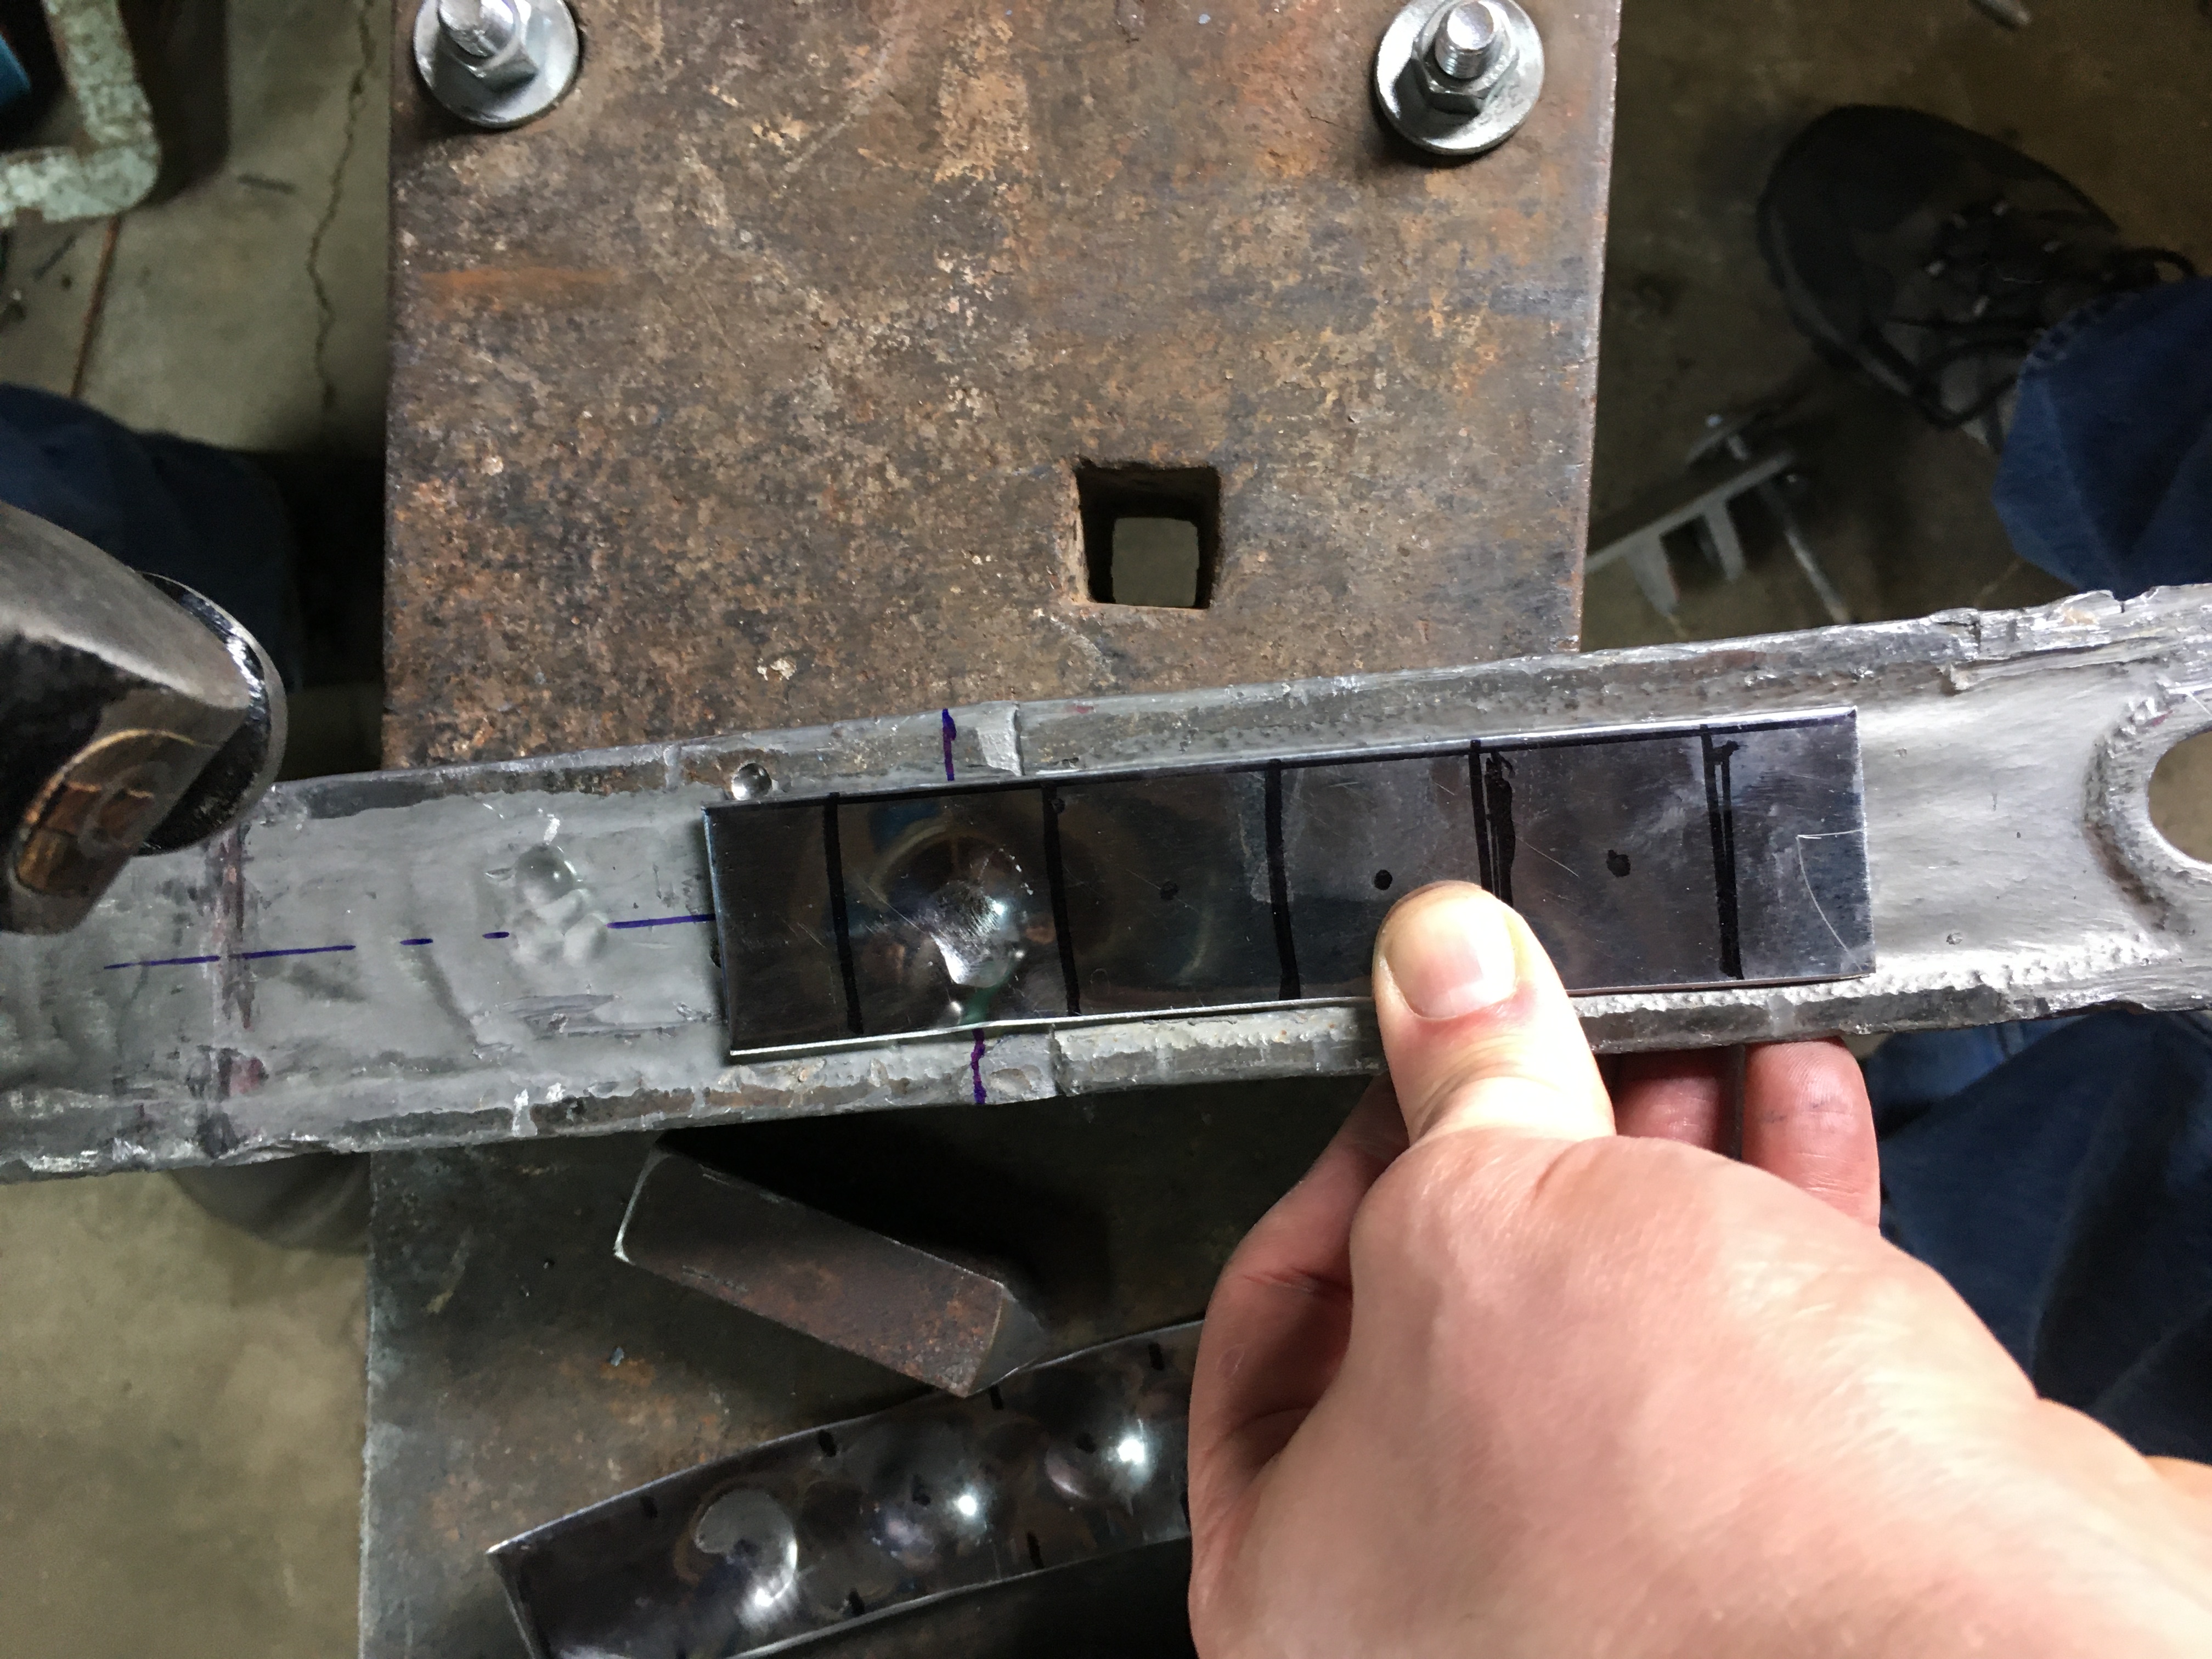
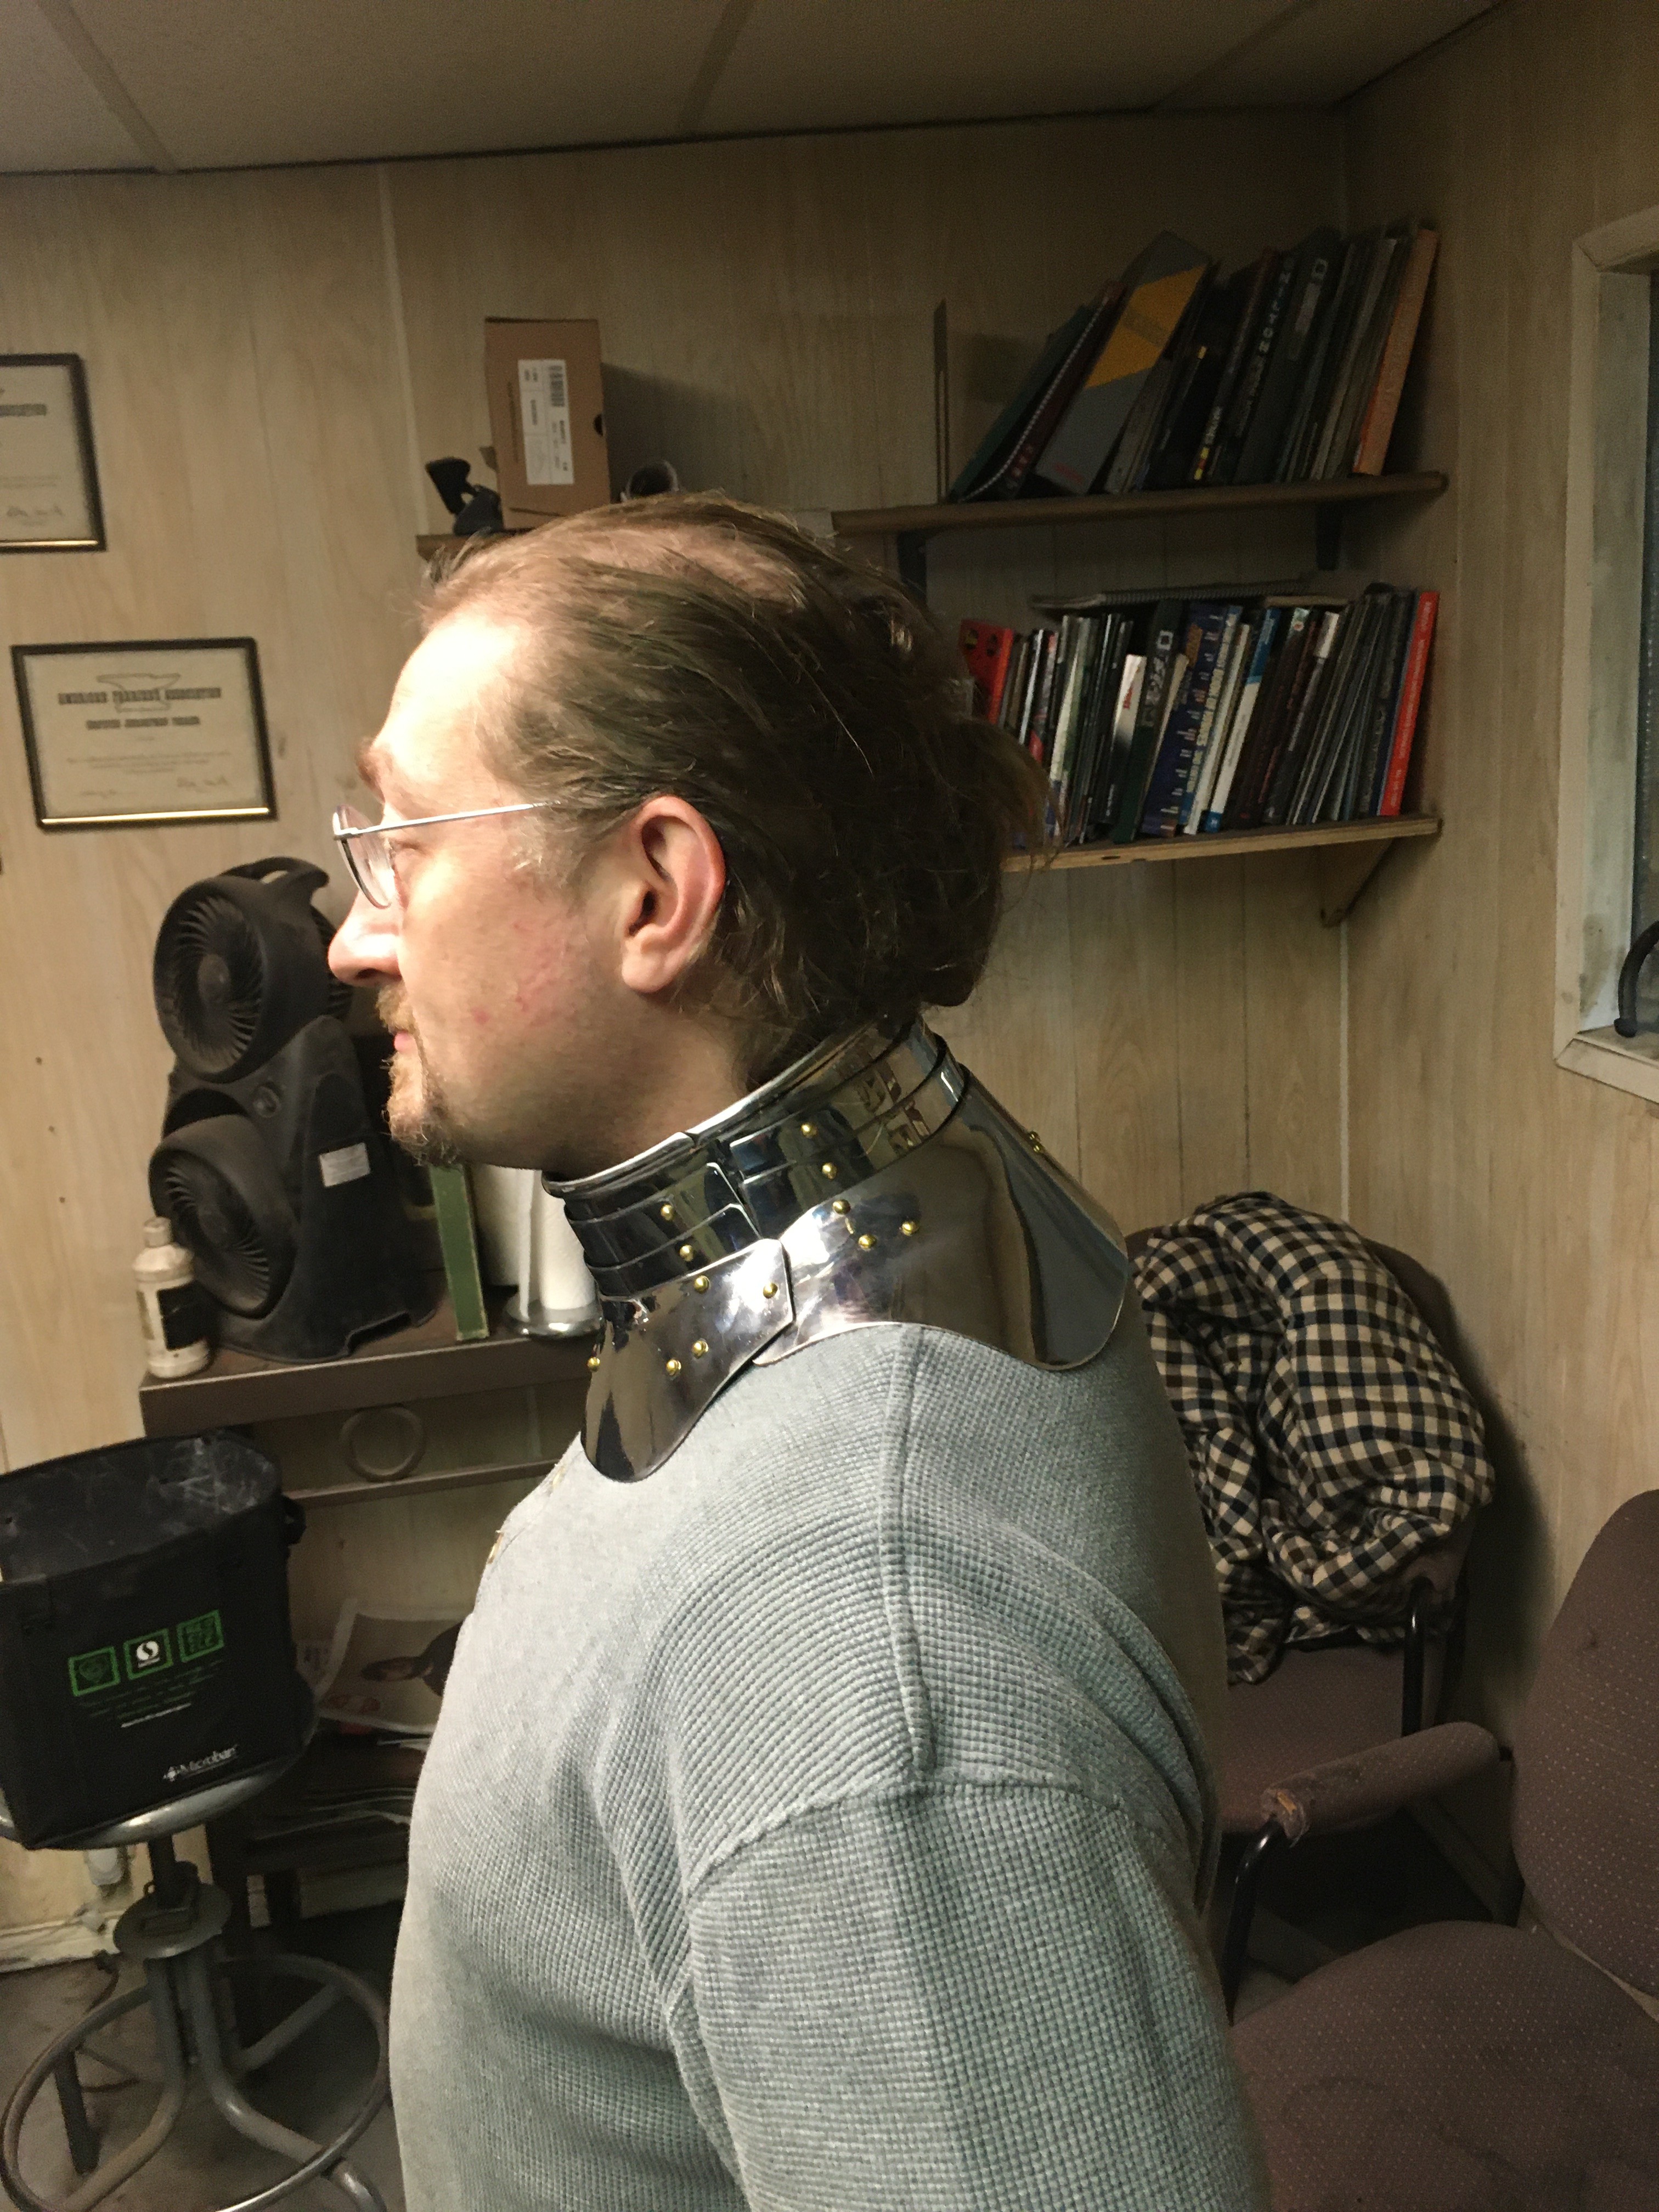
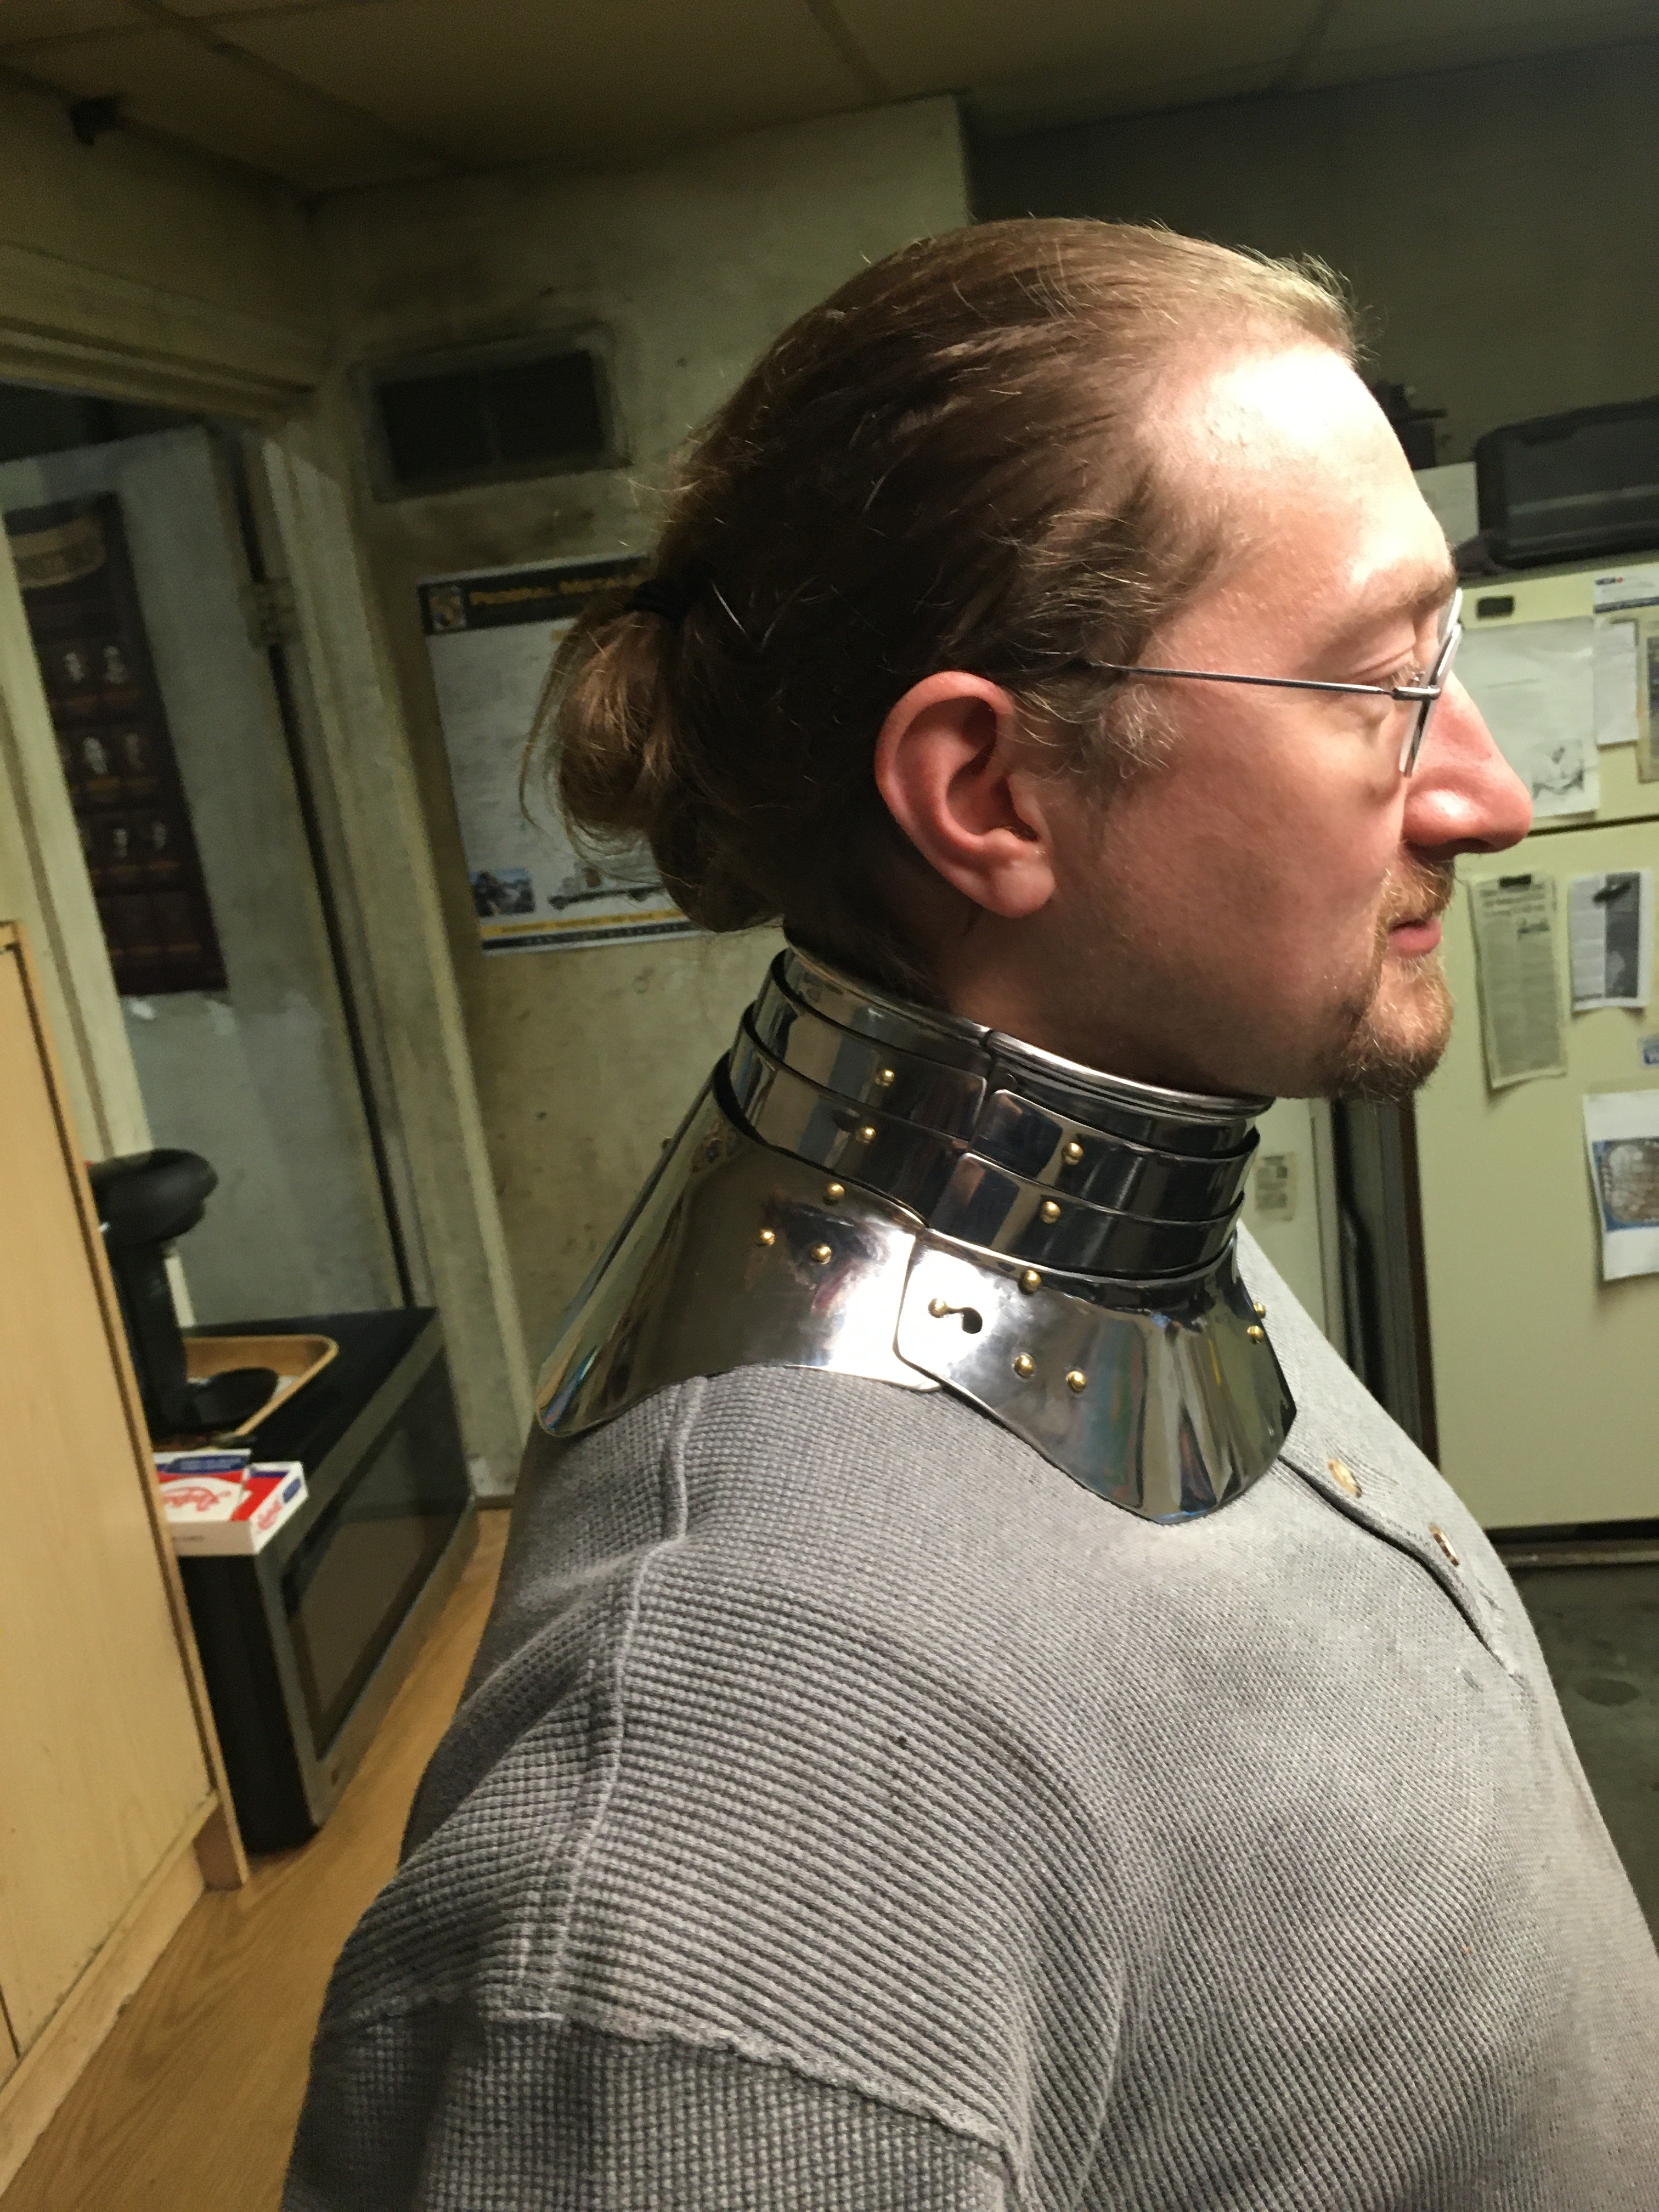
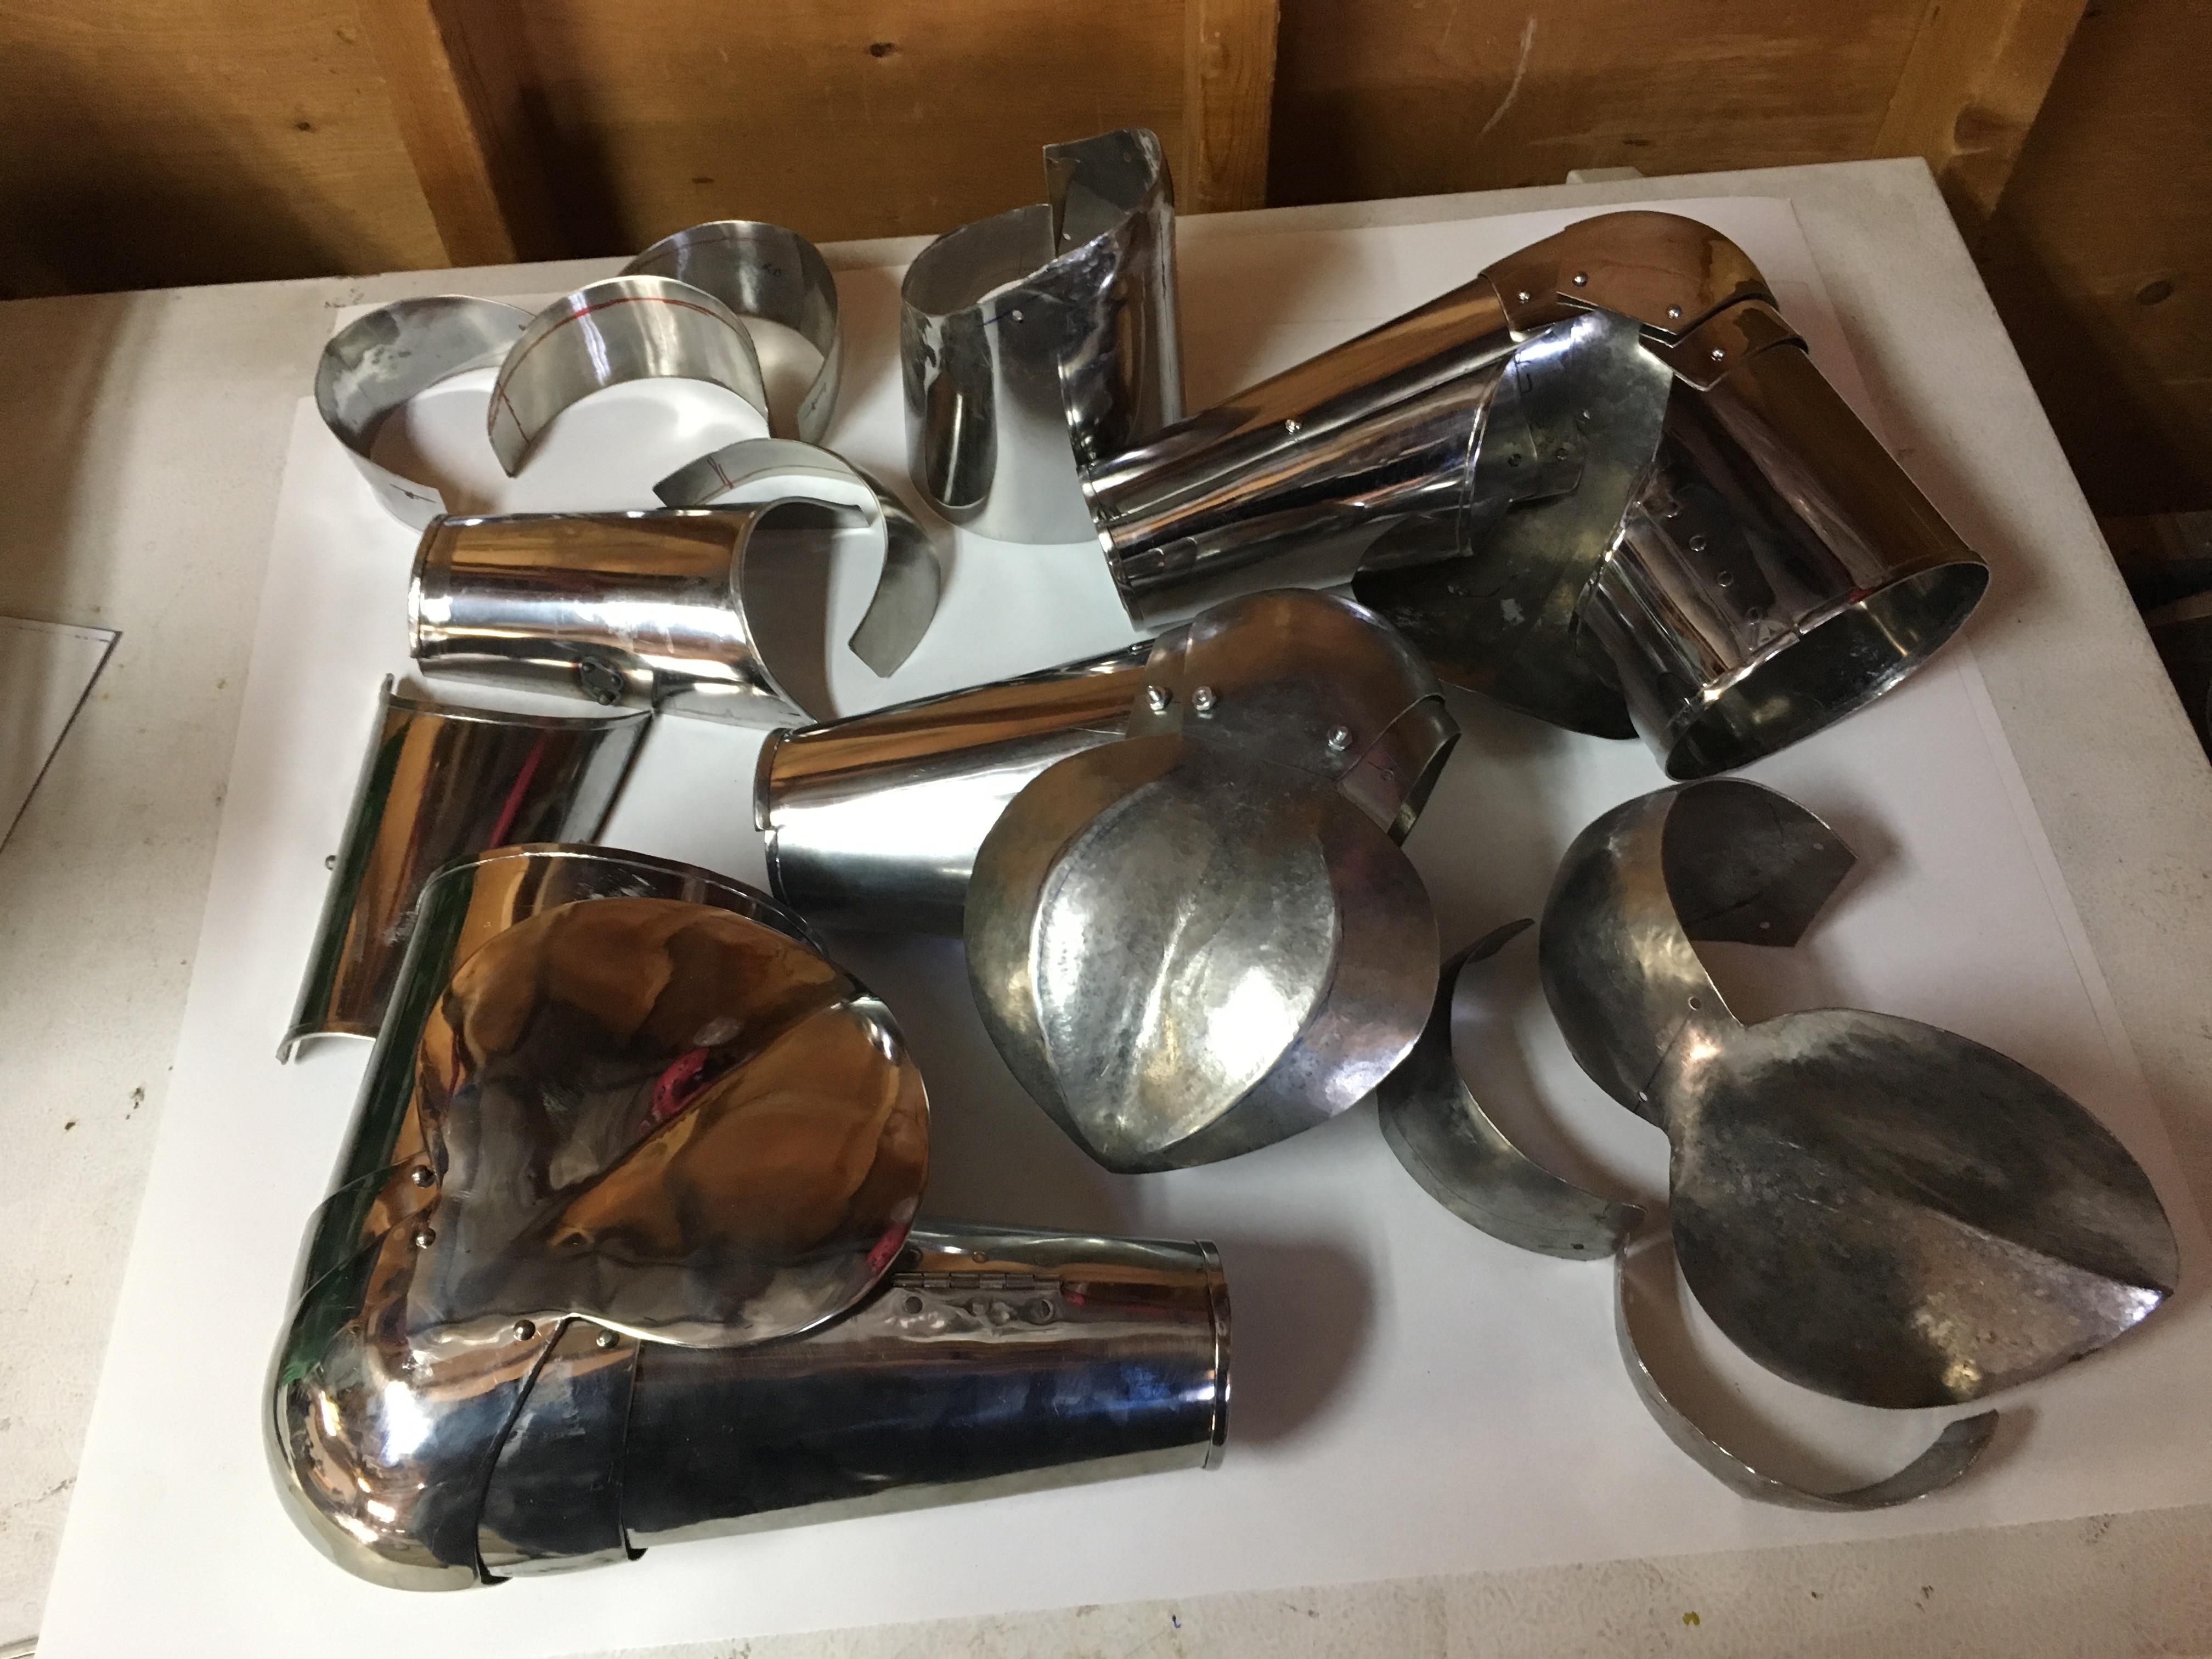
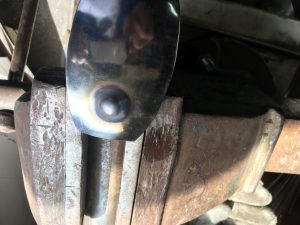
Metal is generally pretty forgiving, and there is a lot of shape that you can give using hammers and other such tools. Unfortunately you can push it too far, as I periodically discover. Here is an example of an ulnar bump on a gauntlet. This is a pivot plate that fits on the wrist – the pyramid covers the “bump” on your wrist so that it isn’t in contact if the gauntlet is hit.

Metal Failure - tear view from the back Metal Failure - tear view from the Front

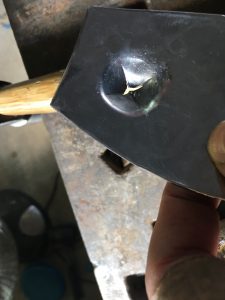
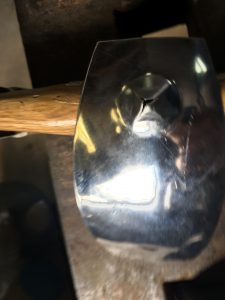
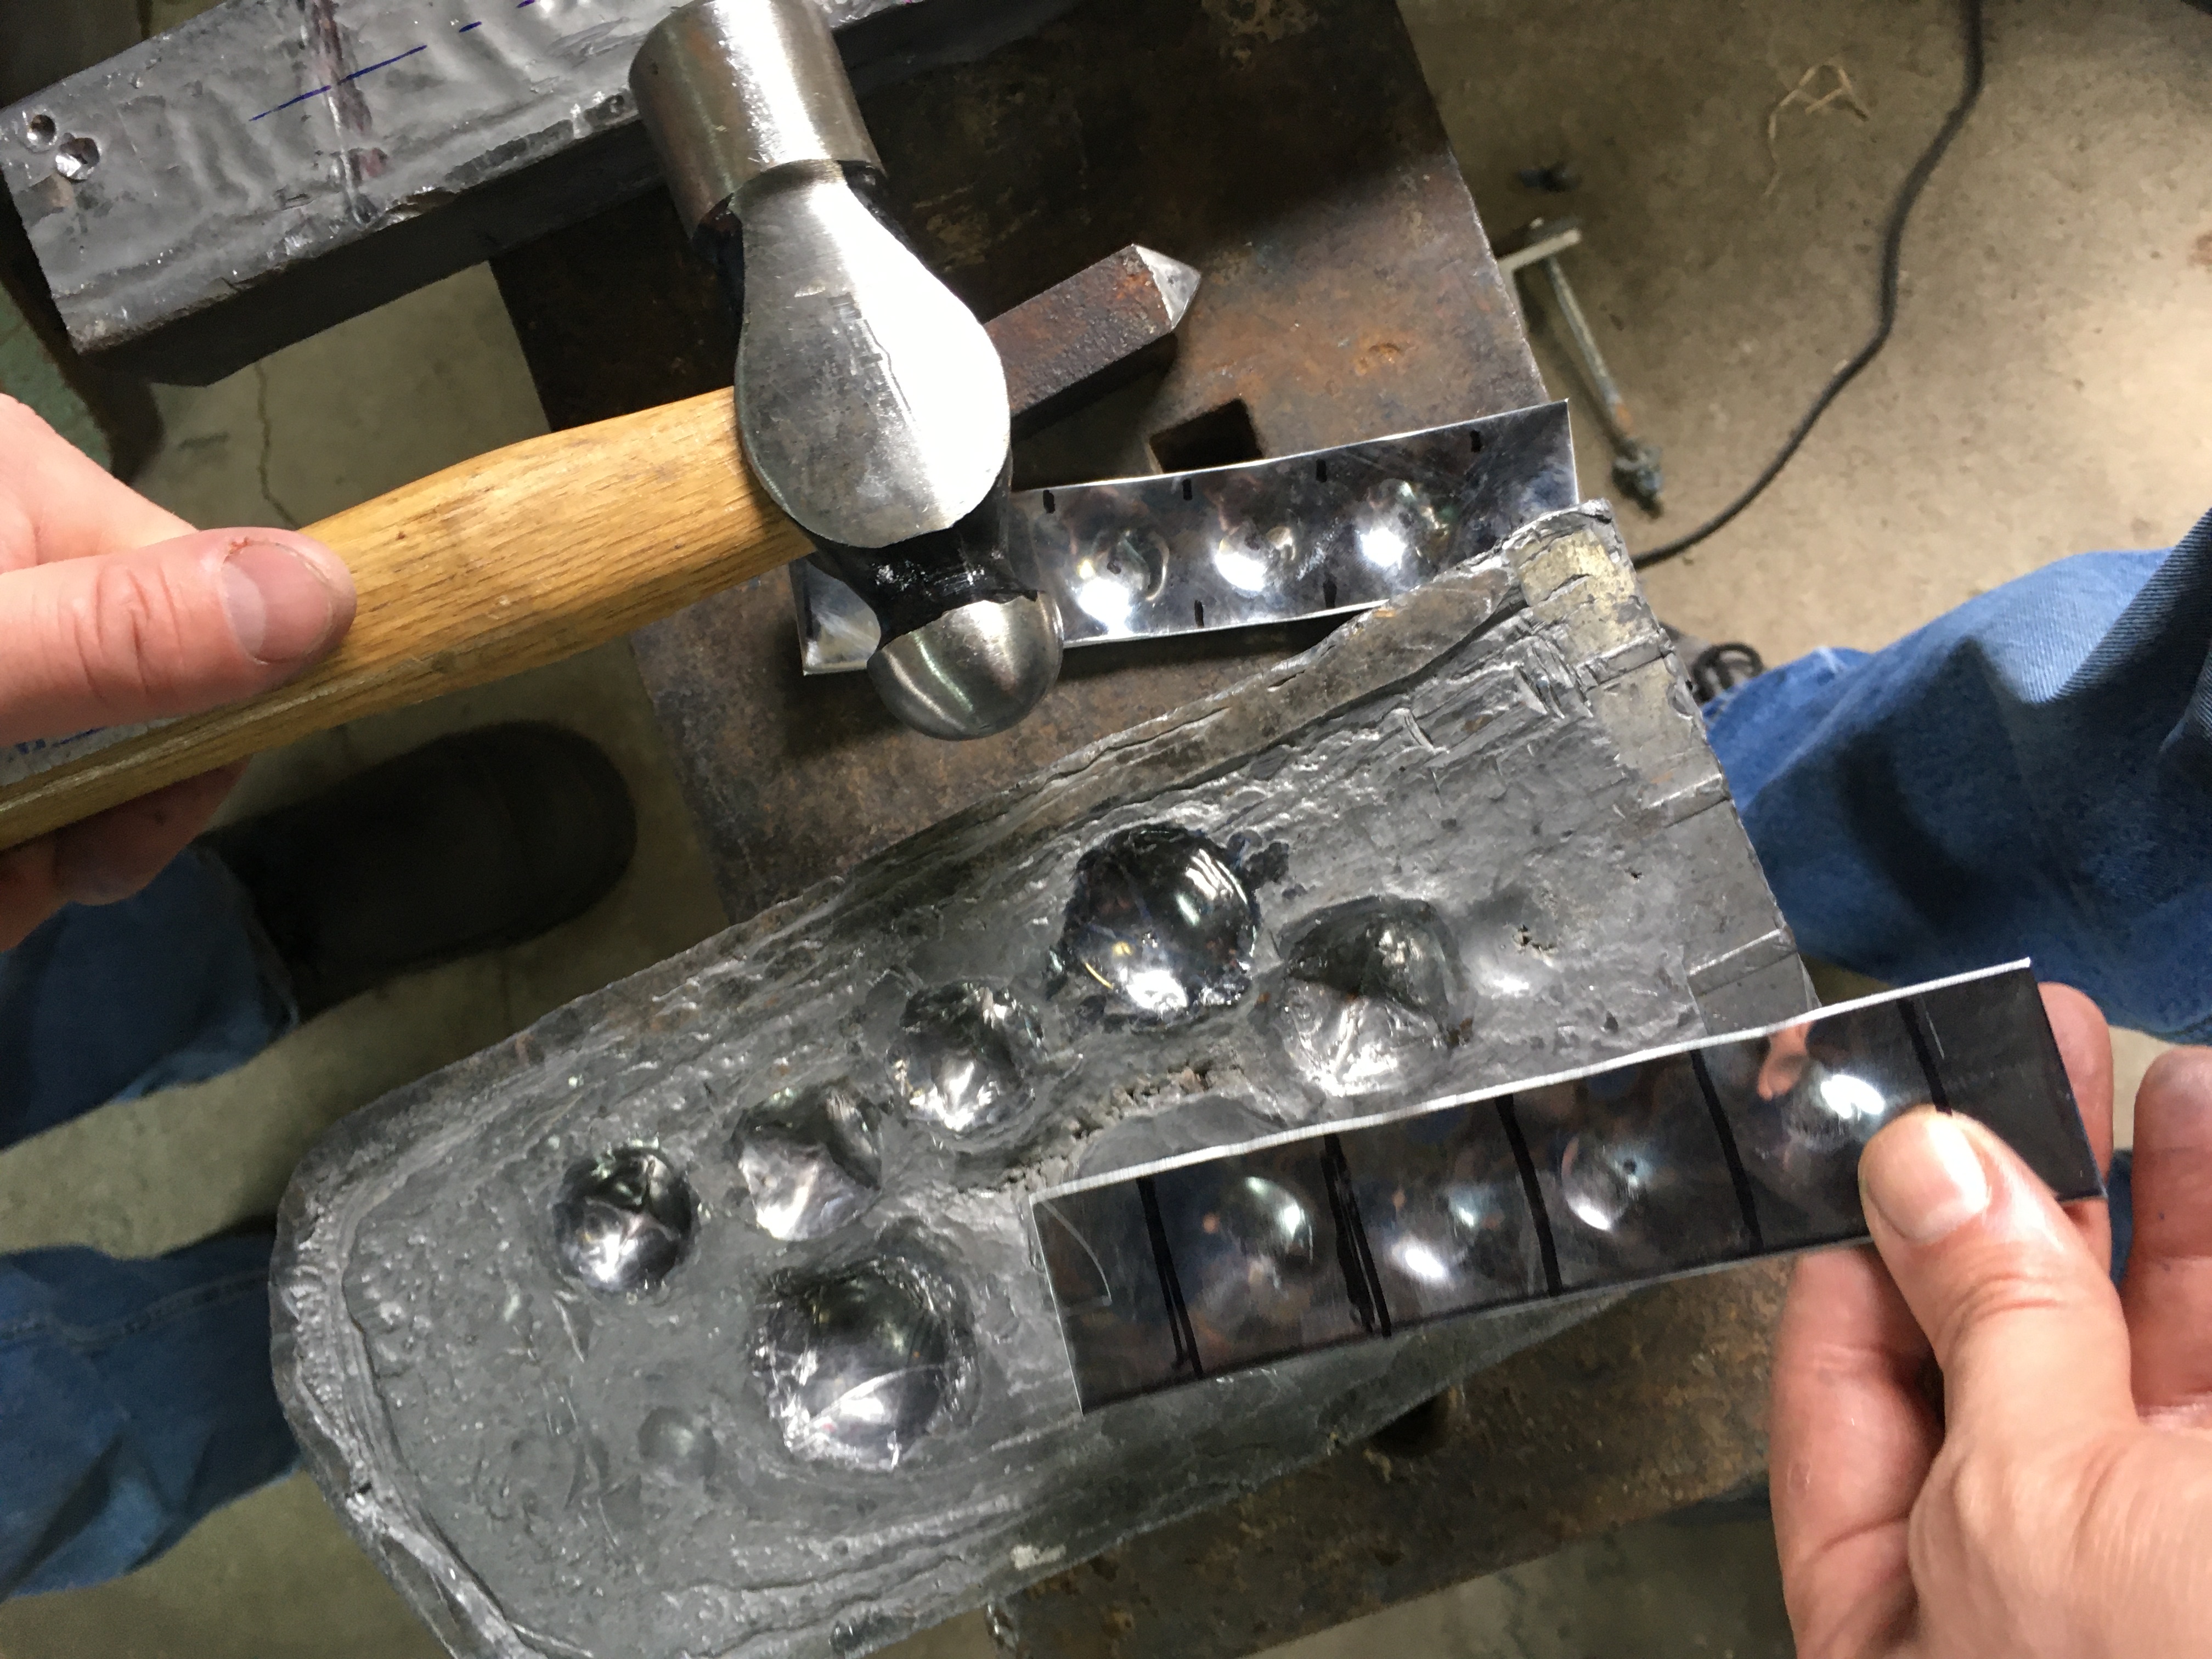
This is what happens when you exceed the ability of the metal to conform – these photos show a fracture (some would call this a tear) and this is what happens when your material work hardens and then you put a lot of force on it. In this case, hammering a pyramidal stake into a lead block with an 8 lb (4kg) sledge hammer. This is simple enough to avoid by annealing – but a full anneal would require a lot of time in a forge or kiln. An easier alternative is to stress relieve the material, heating it to a bright orange and then letting it air cool. This can be done with a propane torch and will work for most materials, but carbon steels can be a bit finicky so for carbon steels I tend to actually anneal them. For mild and stainless steel, heating to orange works fine, and lets you get on with your forming. In this case, I simply heated the intermediate stage, where I formed the “bump” with 3 progressively smaller dapping punches, one on top of the other and then heated this to orange.

Stress Relief point Forming complete after stress relief

As you can see, forming the pyramid after stress relieving worked perfectly well. So why wouldn’t you stress relieve as a matter of course? This takes time, and a fair amount of the time I can actually get away without needing to do any stress relief of pieces. When you stress relieve, you are eliminating any work hardening of the piece, and in the case of some pieces (such as knuckle gadlings) you actually want these as hard as possible since in any condition where they can fail (such as being struck when braced against something) you would generally prefer them to have as much strength before failing than having them yield (deform).

Stress relieving also takes time, and while it isn’t a lot of time, when making a lot of pieces (like the aforementioned gadlings) an extra few minutes per piece adds up: I need 16 finger gadlings for a pair of gauntlets which I generally don’t stress relieve. I also need 2 thumb gadlings, which I always stress relieve because these have a lot of depth to them.

Making a hinge setting tool

This is one of the “simple” tools that I have made and kicked myself afterwards. It took less than 30 minutes to make, and saves me about 5-10 minutes per hinge!

For background I’ve been making a fair number of hinges lately, and I realized that it would be useful if I could put together a tool to “set” the curve of a hinge, rather than working to hammer the metal repeatedly onto the pin to make it conform nicely. When thinking about this I realized that the solution would be similar to a rivet set, but instead of a dome, as used in a rivet set, I needed a “gutter”. The easiest gutter I could think of was to drill through a chunk of steel and then cut through it. Instead of spending lots of time analyzing (my normal modus operandi) I decided to try it, and then adjust if it didn’t work. My first pass Worked remarkably well, taking a significant bite out of my hinge build times, and making it easy tobuild a nice clean hinge knuckle. Before I get into the details (and pictures) I figured I’d provide a nice table outlining the size of drill you will need to get appropriate clearance for a 1/8″ pin:

Sizing to accommodate a 1/8″ Hinge pin
Drill Size Max Hinge thickness
Fraction Decimal Gauge Decimal
1/8 0.125 0   –   
5/32 0.156 28 0.016
3/16 0.188 24 0.031
13/64 0.203125 22 0.039
7/32 0.21875 20 0.047
15/64 0.234375 18 0.055
1/4 0.25 16 0.063

The table is a fancy way of taking the difference between your hinge pin size and the drill bit size and divide by 2. You will note that I included some “silly” sizes, since for armour there is no point making a “hinge set” on metal significantly thinner than 1/32″ / 22 ga (3/16″ for a 1/8″ hinge pin). In general I make my hinges with material ranging from 0.5 to 1mm (24 Ga to 20 Ga) so I decided to make this tool with a 7/32″ hole.

Continue reading Making a hinge setting tool

Introduction to Riveting

In reviewing the stuff on the site, I realized that I’m a bit short on a number of the “foundational” techniques. I’m unlikely to add content on welding, since there are a million people who are better at it than I am, but there aren’t a lot of articles out there on riveting – perhaps in large part because everyone welds stuff these days…

I though that it would be useful to provide a quick guide to riveting so that I could just reference this in construction articles and say “use a countersunk leather rivet – here’s a link if you don’t know how to do this” instead of spending a lot of time duplicating material with minor variations across multiple articles. This also gives me a single place to update if I realize that there is another type of rivet that I should add.

Types of Rivets

In general there are 5 basic classes of rivets: these are used to solidly fix plates, allow plates to pivot, or allow plates to move on multiple dimensions. I’ve broken these out from least to most movement:

  • Decorative rivets
  • Hard rivets
  • Countersunk Rivets
  • Articulation Rivets
  • Sliding Rivets
  • Leather Rivets

Note that the last class (Leather Rivets) is really a hard rivet connecting a metal plate to leather: I have made it a separate class here since the type of rivet used is generally different than that used on metal to metal connections since leather is much easier to tear, and there some considerations that need to be kept in mind which are not relevant to metal to metal connections.

Continue reading Introduction to Riveting

1560 Ausberg Gorget Construction Notes

STILL IN DRAFT – latest update March 31, 2020 (Pattern links added)

Pattern links: Word Format (11″ x 17″ tabloid size) or PDF format (11″ x 17″ tabloid size)

As part of the harness I am working on, I needed to construct a gorget. Most 15th century Milanese armour has a fairly large neck opening which is meant to accommodate a mail standard (mail neck defences) I would like to have the ability to use this as a combat harness, which means that I would like to have plate defences for my neck both from a “rules” point of view (because most armoured combat groups require rigid neck armour) and because I really like being able to use all of my limbs, and have taken a number of hits to my neck area which would have been concerning if I wasn’t generally armoured like a tank.

Wade Allen owns the nicest gorget I have handled (linked) so if I am going to use a non-period solution, I wanted to make the nicest one possible. Ironically, this type of armour could be seen as the ultimate development of milanese armour, since 17th century armour is very functional, with minimal fluting and integrates all of the components. To quote Wade and Mac (Robert Macpherson) “if you want to build a 17th century suit of armour, first build the gorget…”

Here’s a few pictures of the completed piece  – thanks to Dean for modelling:
Dean Modelling a 1560 gorget reproduction - BackDean Modelling a 1560 gorget reproduction - Front

Dean Modelling a 1560 gorget reproduction - Left sideDean Modelling a 1560 gorget reproduction - Right side Continue reading 1560 Ausberg Gorget Construction Notes

Making Arming Nails

I just had a bunch of folks drop by my shop, and I realized that there are a lot of small fabrications that I take for granted – particularly my “consumables”. I thought that I should spend a bit of time to post how to make some of these, since it’s quite easy, and without the right components, your armour will end up looking more than a little funny. A lot of folks have realized that standard rivets are bad at making leather to metal connections for strapping and “soft” articulations (such as used in gorgets and pauldrons) and many people have used roofing nails as a much better solution than rivets and washers.

Unfortunately, for most leather attachments and particularly gorgets, the head of a roofing nail is too wide. It is also worth noting that roofing nails are often quite asymmetric, so making “precise” connections (again, critical for gorgets with integral hinges) is problematic. To solve this, I have a process for making “arming nails” that gives consistent results (and nice connectors) and takes about ~30 seconds per rivet. It should be noted that I tend to do a hundred or so at a time, and have a little container of these which I periodically refill when it gets empty. This prompted the question that triggered this article when I was working on a gorget “Where did you get those?”

A can of annealed nails Container of arming nails
I start with a lot of nails – the nails in the container are a few more than those in the small container on the right. The head size for these is about 5/16″ – roughly halfway between a standard 1/8″ rivet head (a flathead or truss 1/8″ rivet head will be 1/4″ diameter, round heads are slightly smaller) and the diameter of a standard roofing nail (generally about 3/8″). The container is from Lee valley – they sell a lot of useful containers:here is a direct link to all sizes of these containers Continue reading Making Arming Nails

The Hidden Cost of Armour

Back in the dawn of time when I used to build armour to sell in the Society for Creative Anachronisms (SCA) I never understood why people were unwilling to pay for nice armour. I had a running joke with a fellow armourer – “If you have a $75 head, then you should buy a $75 helmet”. Yup that was a long time ago.
I’ve spent a lot of years working away at getting better at the craft, and like to think that I’m starting to get reasonably good. Mac, Wade, Patrick, Peter and Ugo all serve to remind me that I have a long way to go, and I have (fortunately) outgrown the “arrogant asshole” stage that mst armourers seem to go through when they think that they can make anything because they know enough to mostly make the shapes they want, but they aren’t yet good enough to see the shapes that they need to make.

I just finished up a prototype pair of arm harnesses (in stainless steel) which I will now build in an appropriate thickness of carbon steel. After taking the “beauty shot” of the completed project, I looked around at all of the things that I had moved off my project area (the deep freeze in my garage) and thought that I should include a picture of all the pieces that weren’t in that shot, but were needed to complete it (I realized later that I also left out the pair of hinges that I didn’t use). Here is the comparison:
The completed arm harnesses The completed arm harnesses - and all the other pieces that didn't work
Continue reading The Hidden Cost of Armour