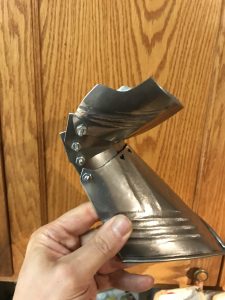
This is an article outlining the process to add the gothic flutes and embossing to the main body of a gothic gauntlet. Another post will follow outlining how to build the gauntlet cuff (including fluting and embossing) since this is a significant amount of work as well. Once these are done they should move easily through their entire range of movement with minimal effort – just a flip of the wrist.
http://borealissteel.ca/wp-content/uploads/video/Gauntlet_Movement.MOV
Video of the movement – sorry WordPress won’t allow a local video Embed anymore, so I may be looking for another alternative…

Before I get into the details, be aware that this is a non-trivial amount of effort – this work is on the order of a full day for a pair of gauntlets if you are fairly experienced in the techniques, and considerably more (and more frustration) if you are new to this kind of shaping. If you haven’t done fluting or embossing before I would STRONGLY recommend that you practice by making a pair of Besegews (link).
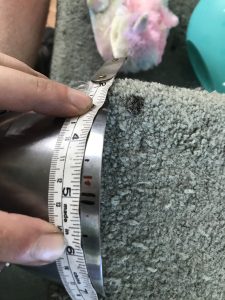
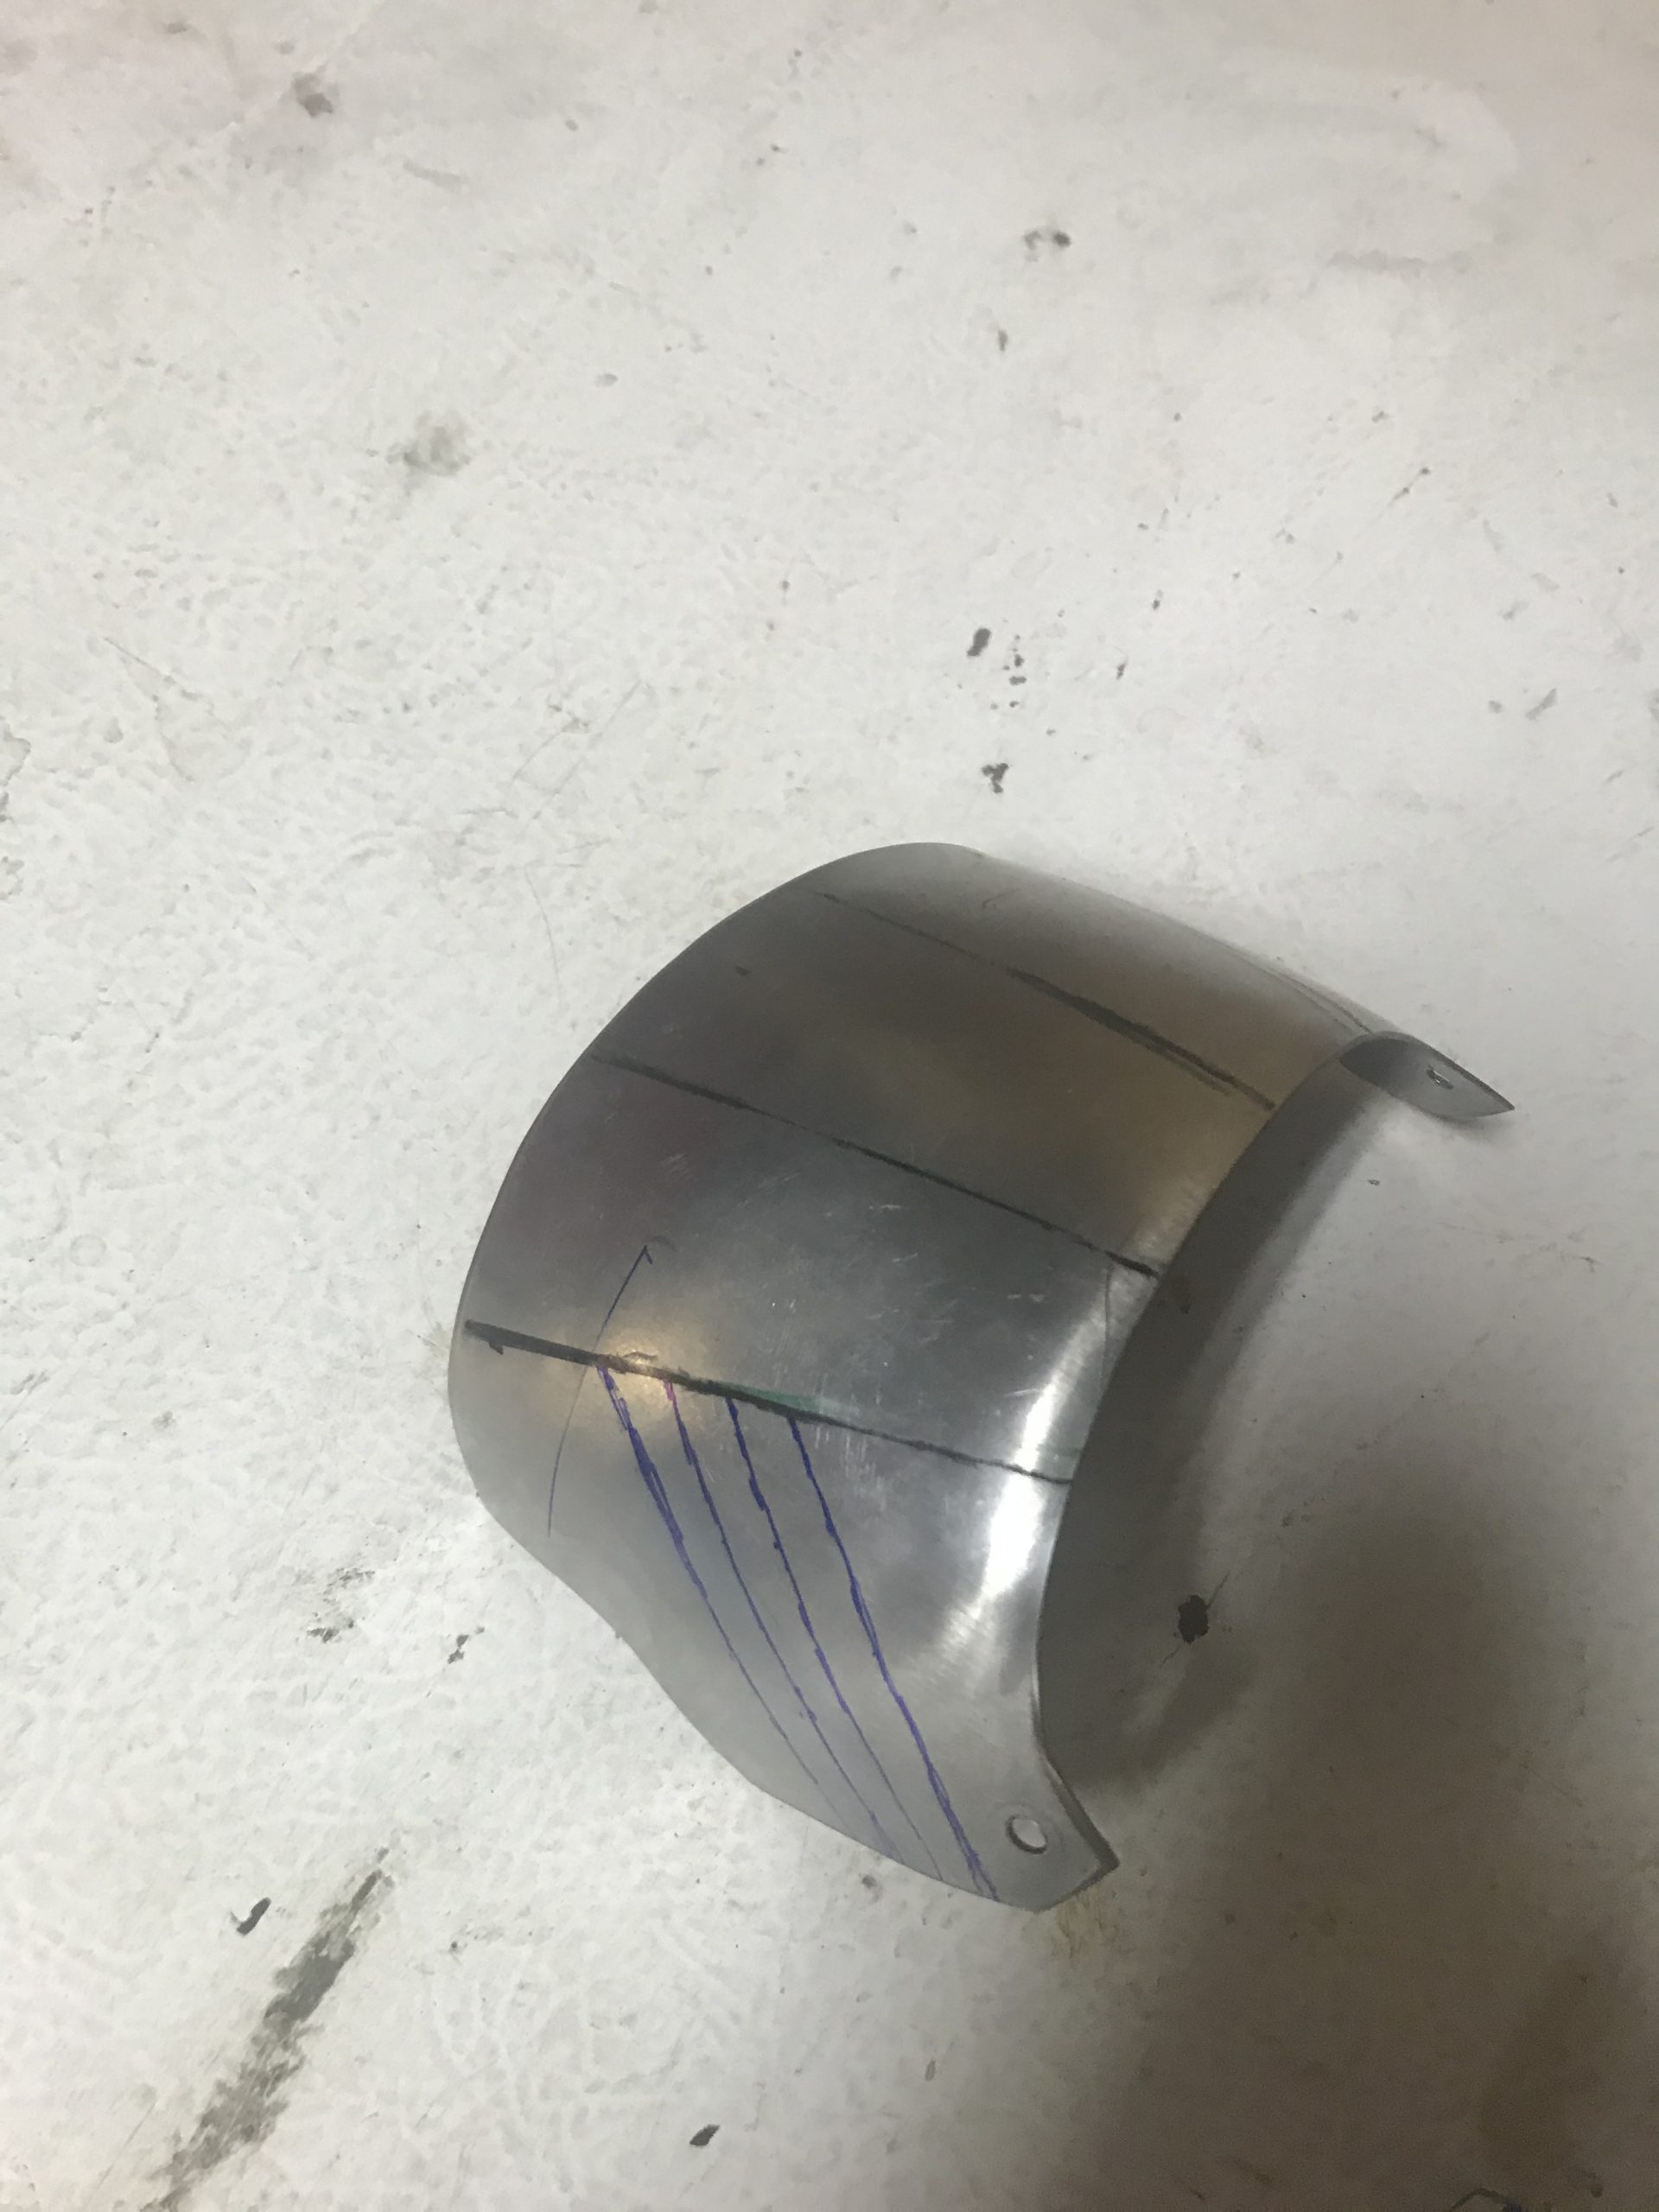
Once the main gauntlet body has been assembled and works appropriately in its “smooth” form you will need to mark where the primary ridge lines go. For most gauntlets using a gothic pattern, this is a “spray” or “fan” of ridges that starts just behind the centerline of the wrist pivot plate, and ends at the knuckles of the final hand (metacarpal) plate. I have size 10 hands, and after much trial and error, my knuckle spacing is 1 1/8″ (about 28mm) to 1 1/4″ (about 32mm) depending on the thickness of the gloves I plan to use as a foundation. For the pattern I have been using, which you can find in the earlier portions of this article, the spacing across the knuckles is 6″ (about 150 mm). I start by finding the centerline of the knuckles, and marking the two central knuckles at 9/16″ (14mm) from the centerline, and then marking the outer knuckles, each a further 1 1/8″ out (28mm). Since this line is “straight line” distance from the outer points, and the leading edge of the knuckles describes an arc, there is roughly 1″ (25mm) from the outer knuckle to the edge of the plate. Since the knuckle plate has an offset to allow for the thumb, this will result in a slight off-center “twist” to the ridges lines, which will be apparent in the spacing of these lines such that the thumb side will appear to have wider spacing than the “pinkie” side. While this may seem odd, this spacing can be seen in most 15th century gauntlets of this type.
Once these lines are drawn in I will then reassemble the gauntlet and repeat with the articulations in the fully compressed position. Note that these lines do NOT fully overlap, with the “compressed” lines tightening toward the center toward the wrist.
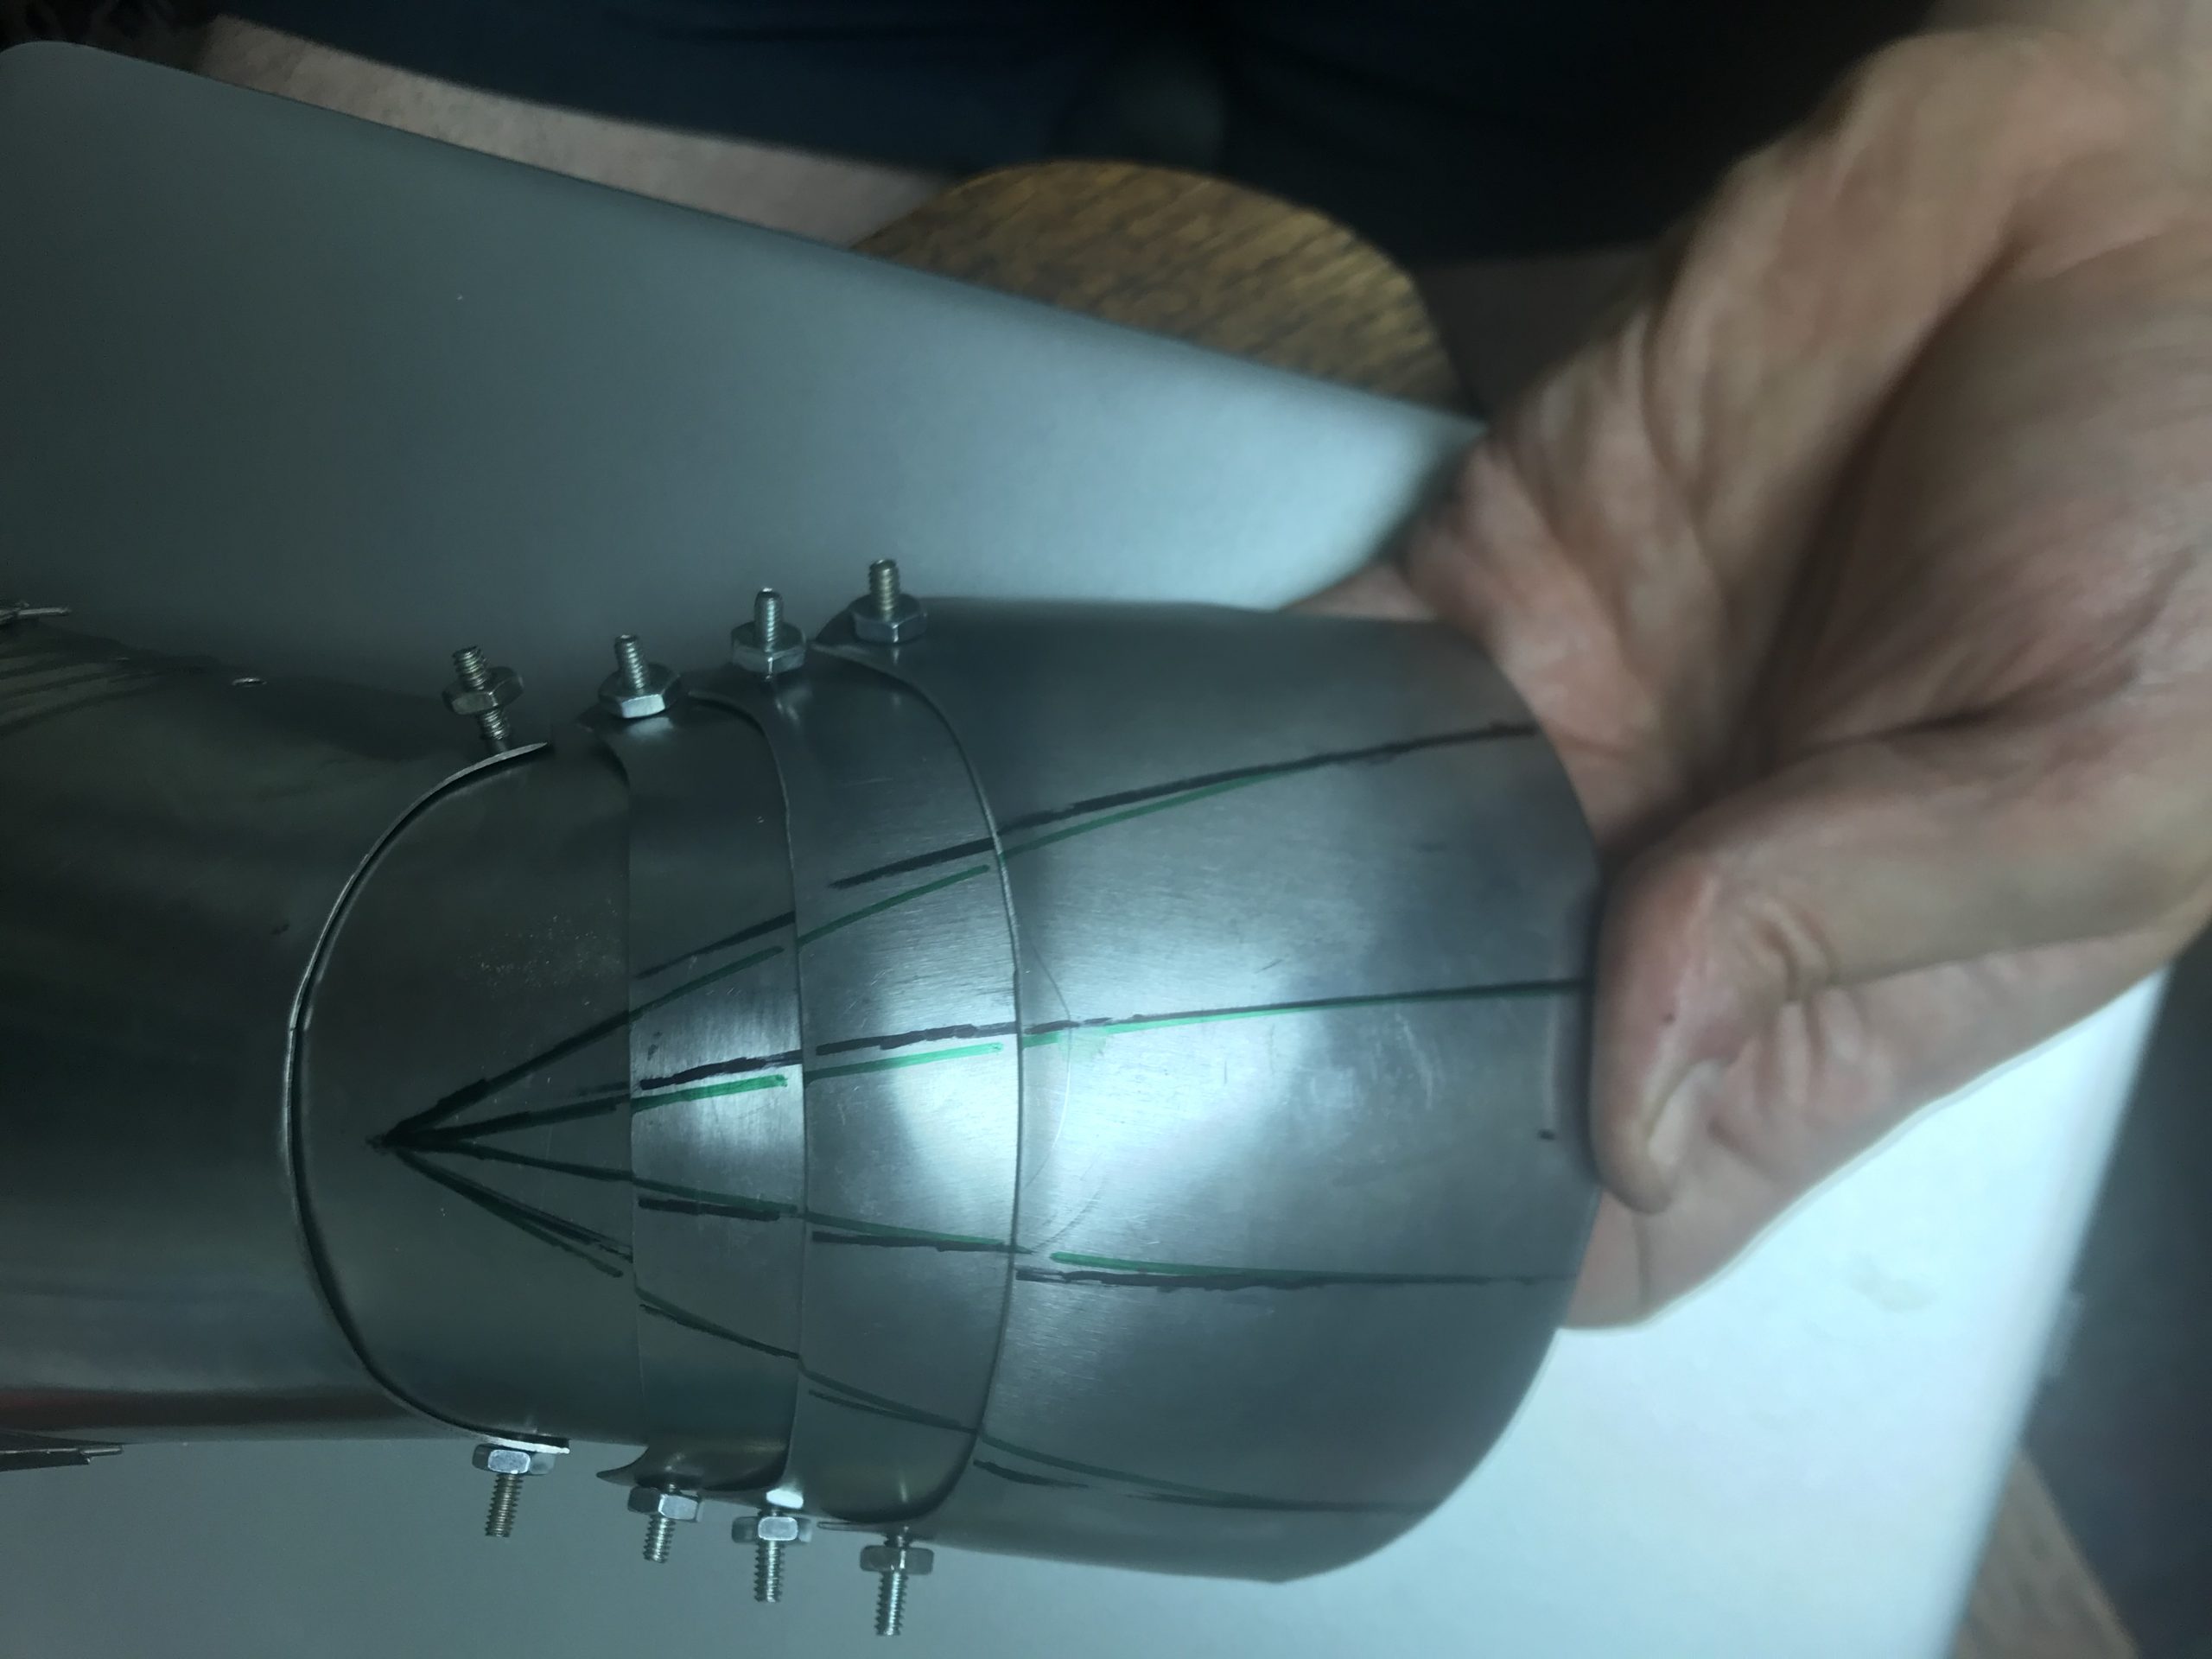
Once these are marked I will rule the lines for the “extended” plates out to the ends (since the overlap will cut off the lines) and then use the “compressed” position on the wristward side of the plate to rule my final lines. Note that it will work perfectly well to simply use the “extended” lines (which is what I did first, and what most gauntlets appear to do) but blending the two approaches gives me slightly better overall fit and more fluid movement, and thought that i. Once the main embossing lines are ruled in, the reinforcing lines need to be added to the last metacarpal plate. There are a number of ways of doing this but the two most common are sprays of flutes extending toward the knuckles (seen on the A254 and both of the gauntlet sets in Wade Allen’s collection) or to parallel the trailing edge (leaving room for pierce work) which can be seen in many of Lorenz Helmschmidt’s gauntlets, such as those made for Maximillian I (A62 in Austria). My personal preference is the “fan” with 3 lines on the “pinkie” side and 4 on the “thumb” side where there is slightly more room.

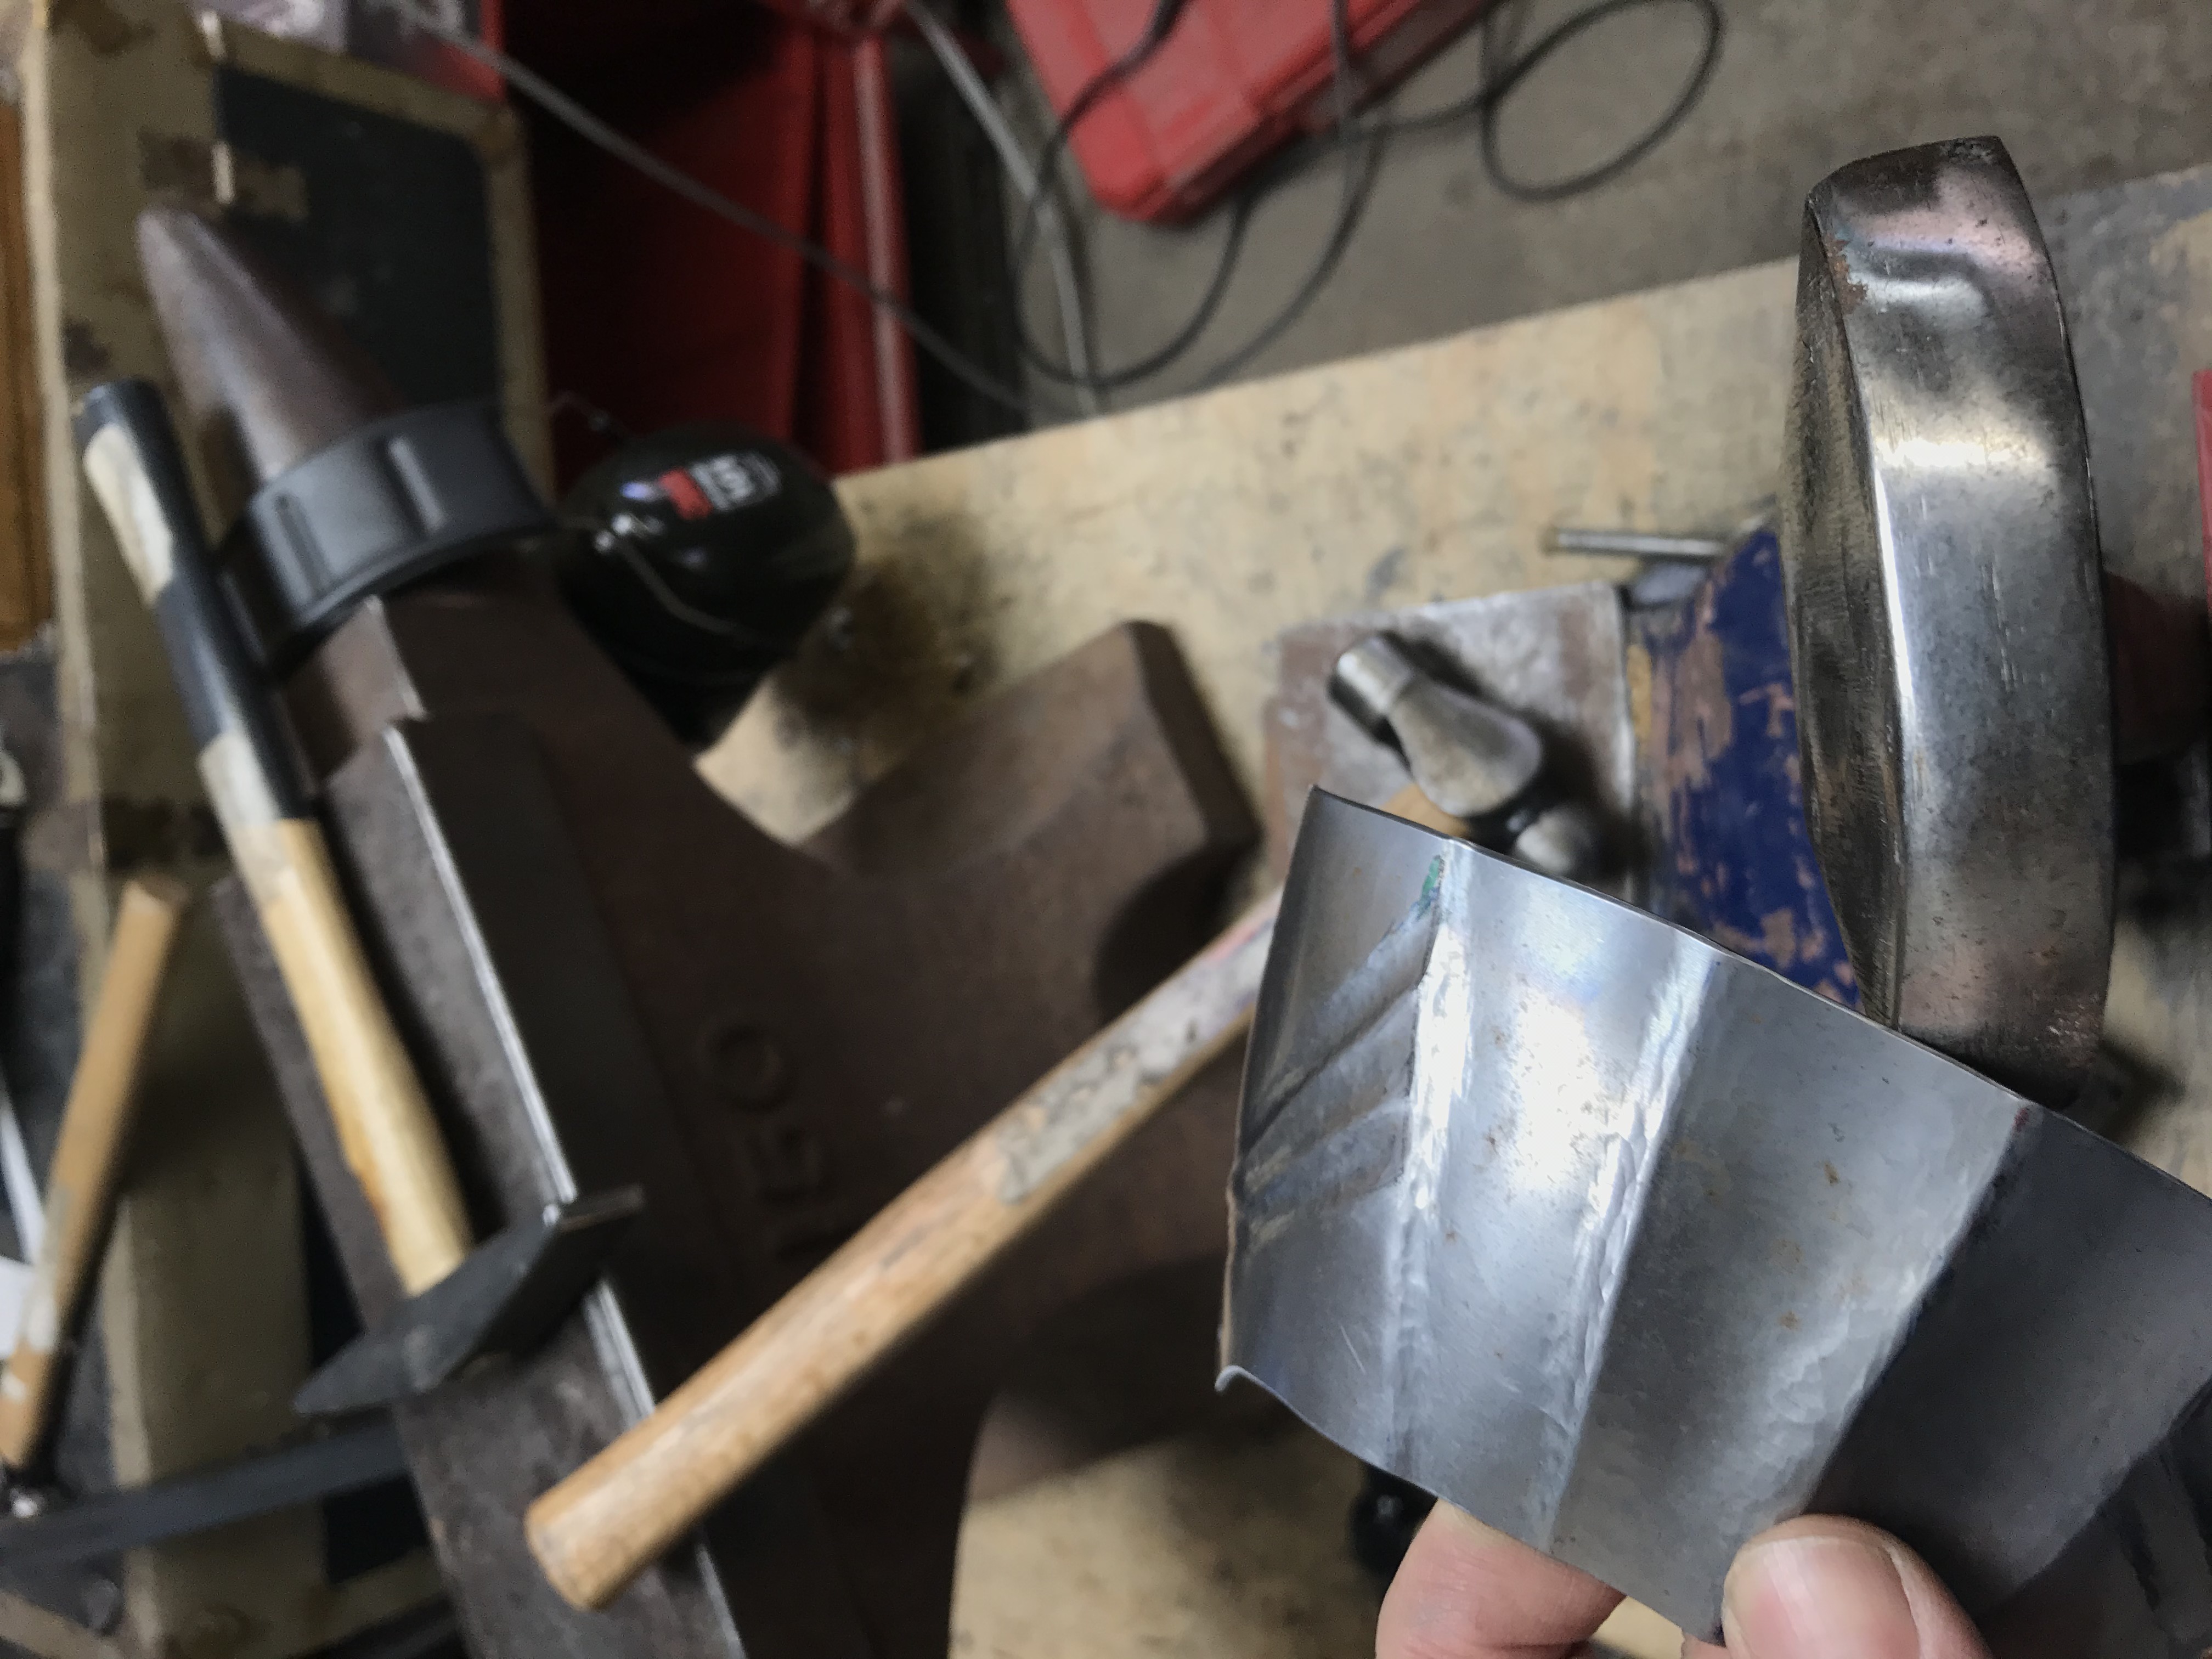
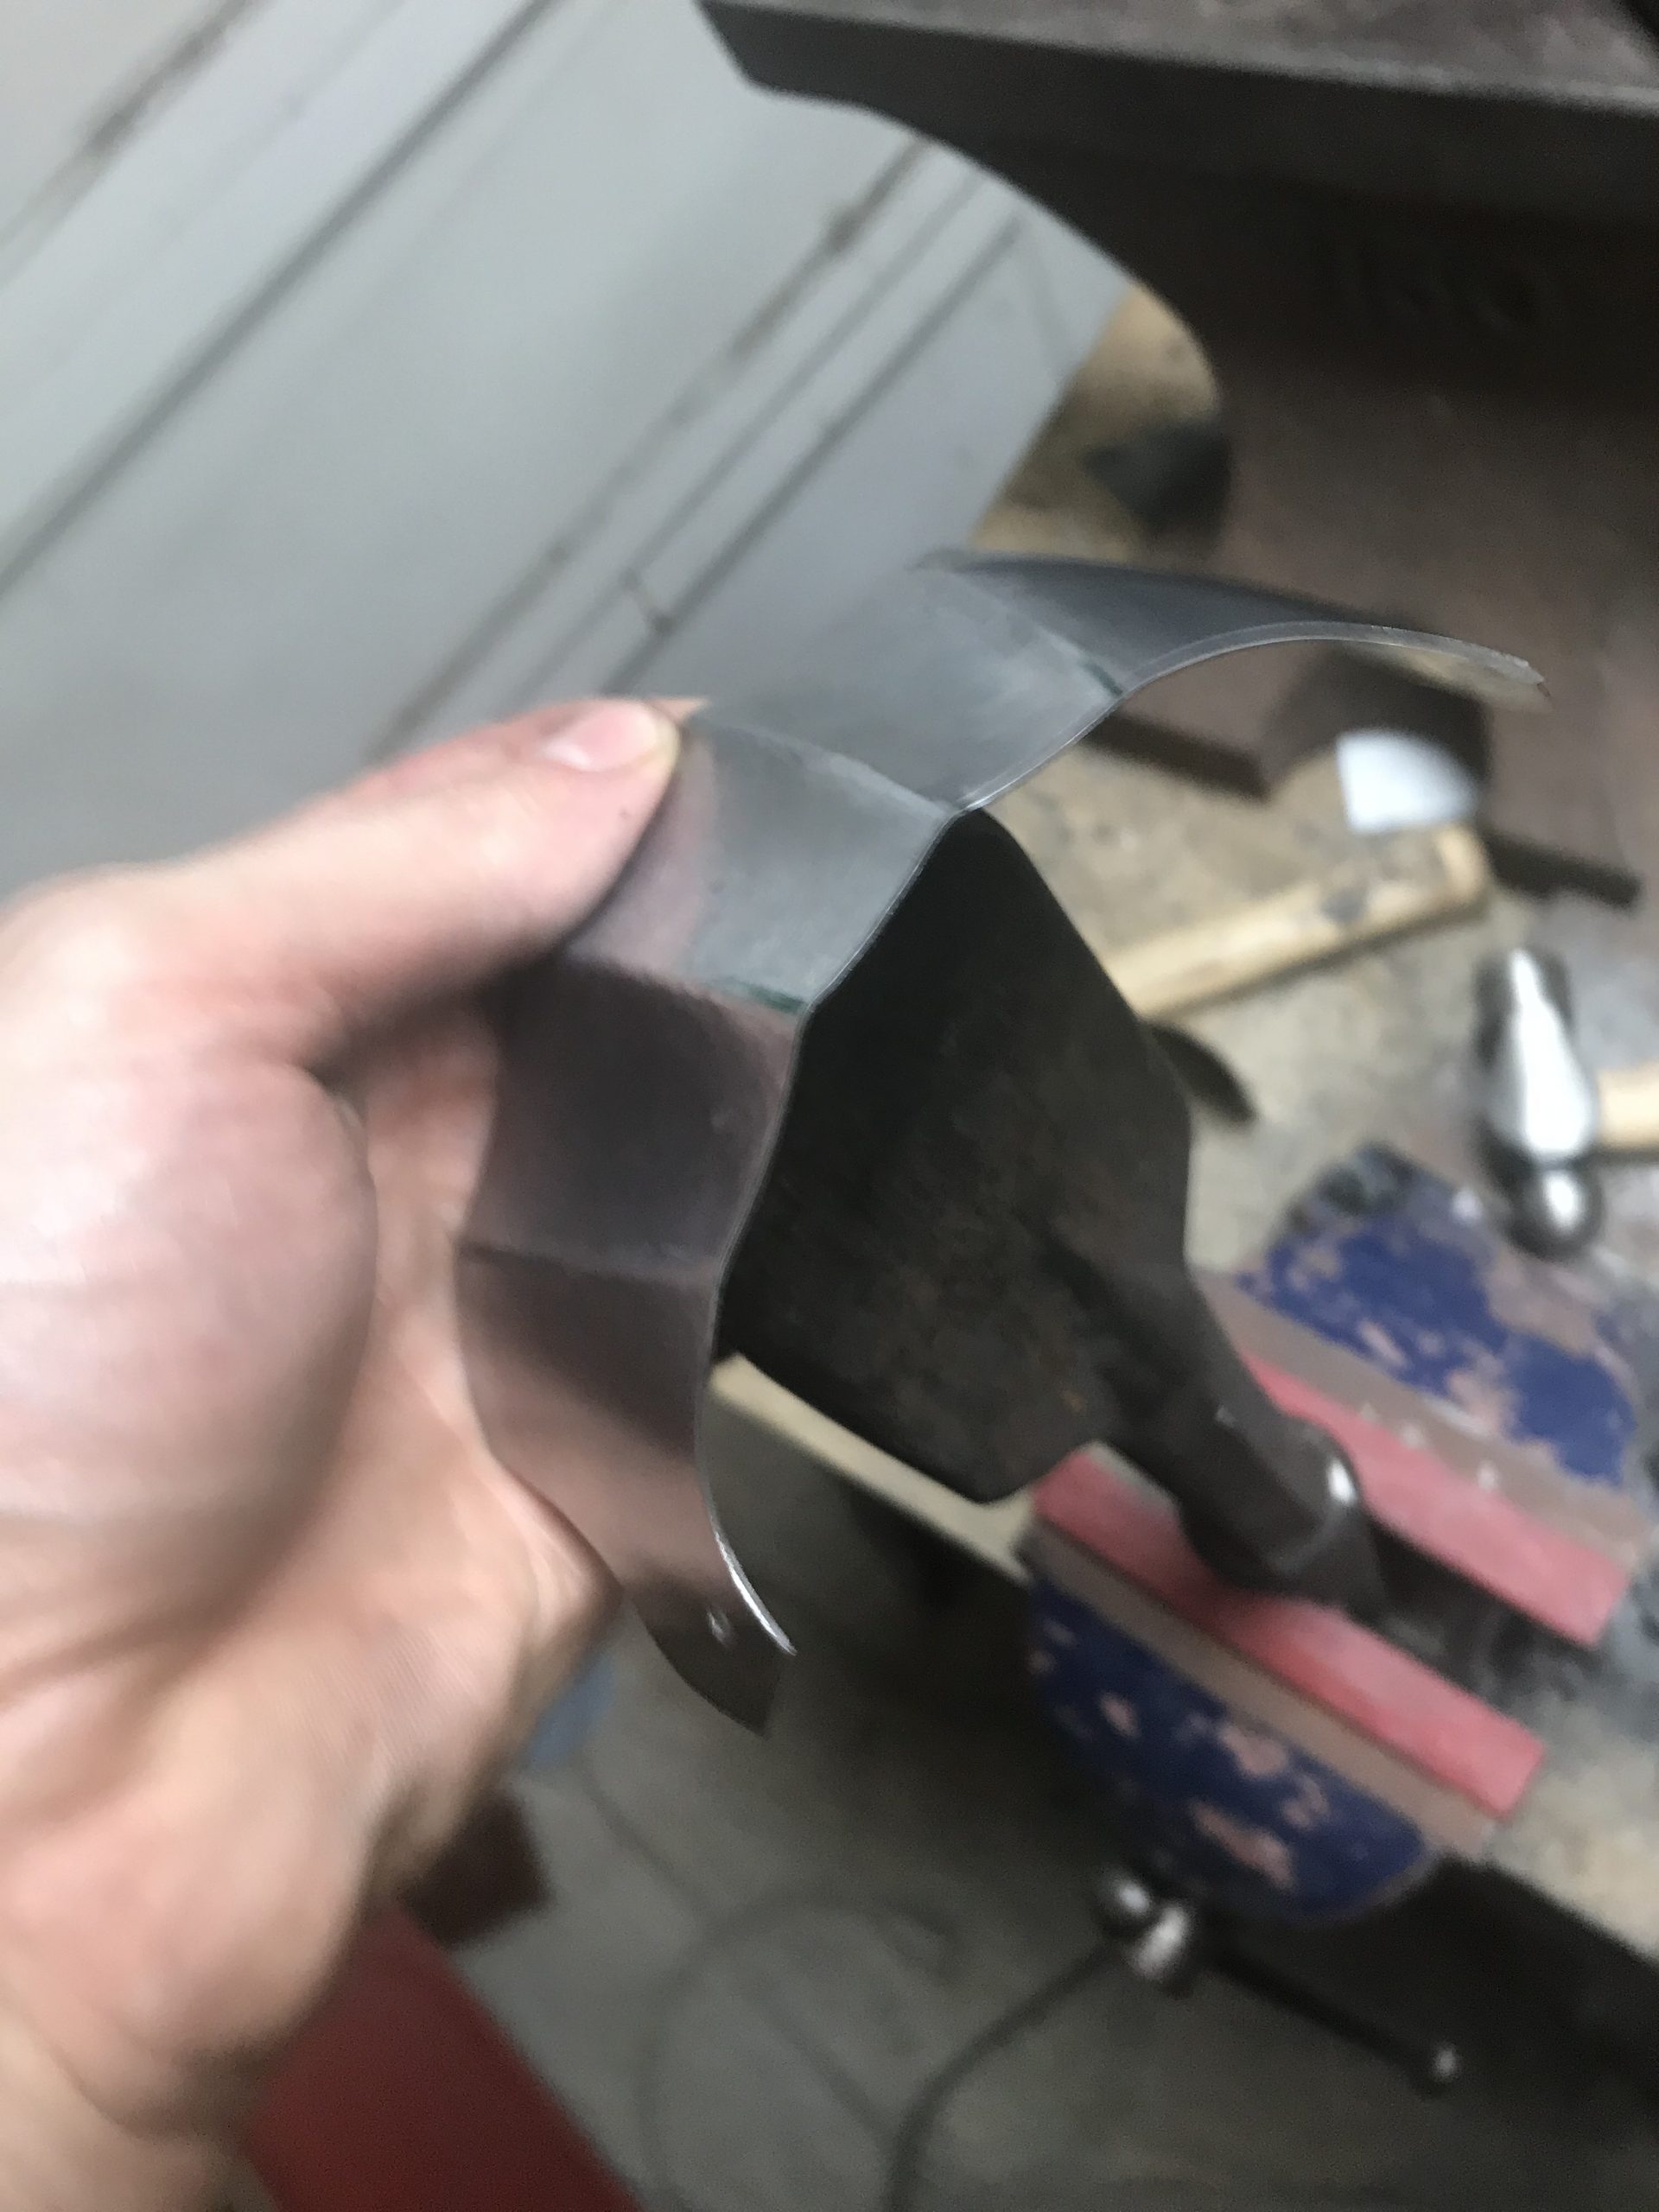
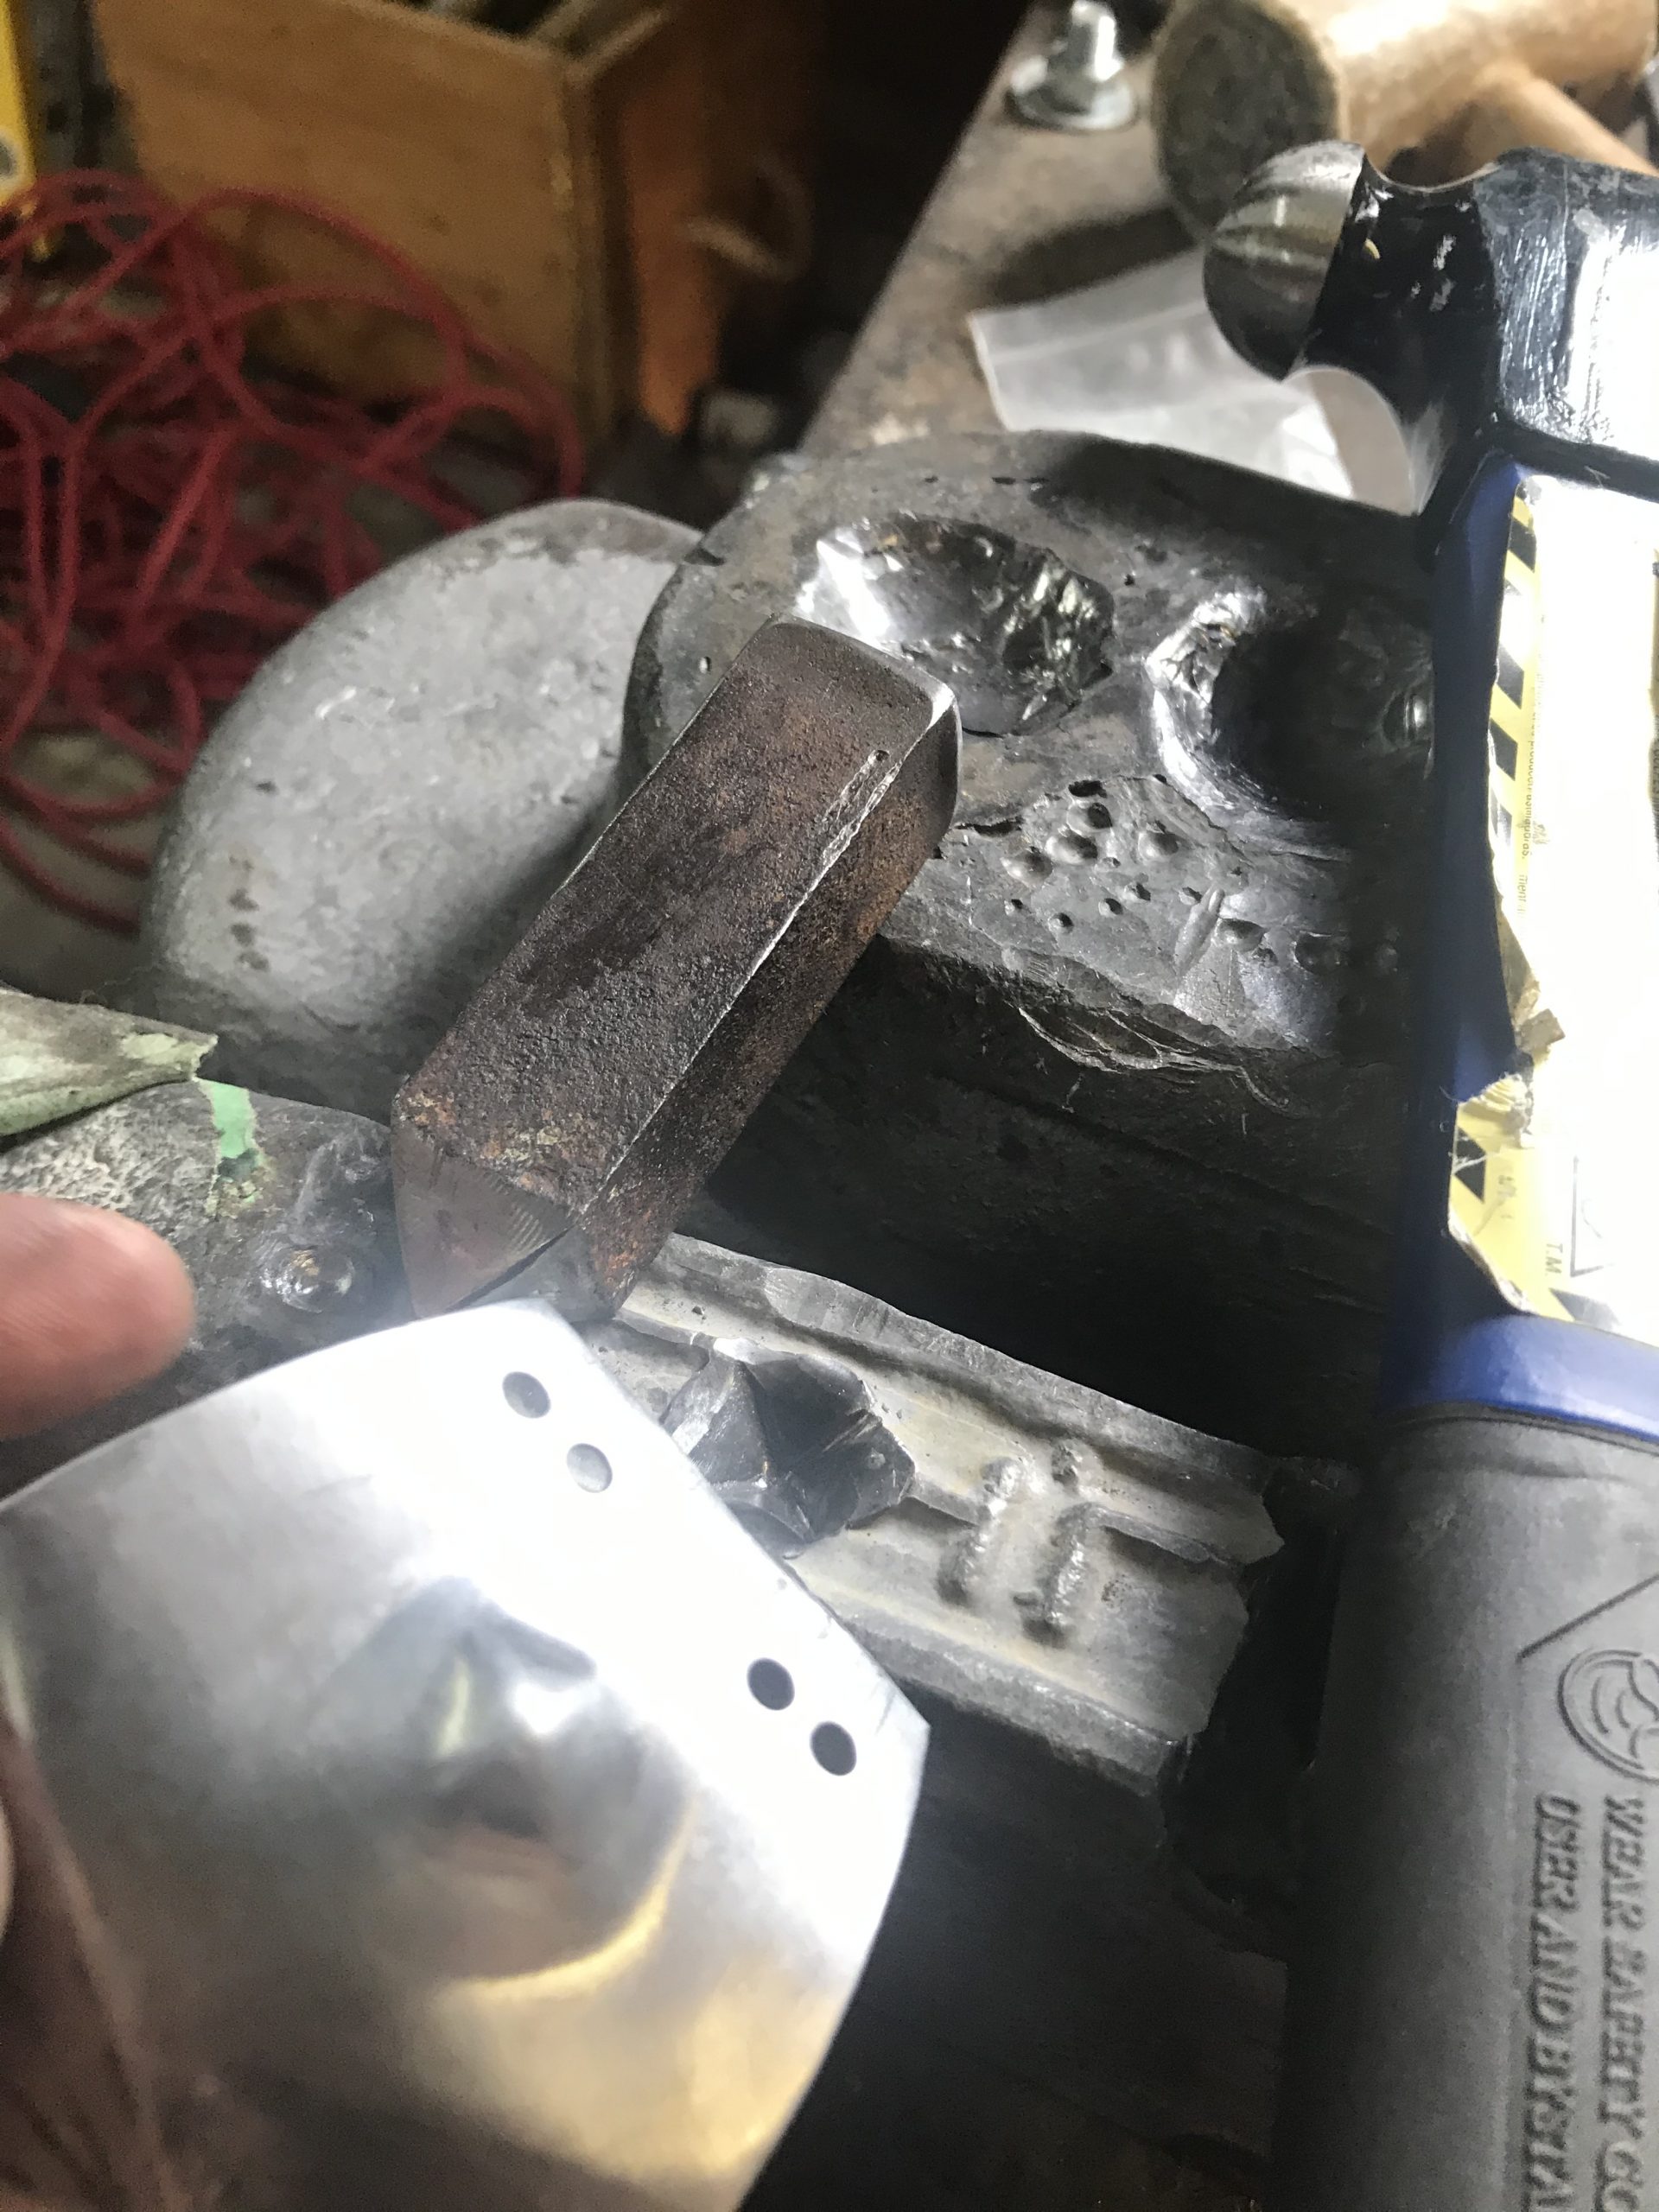
Once the lines are defined it’s time to start embossing the lines in. Having experimented a fair amount, the easiest way for the final plate is to put the “fan” lines in first and THEN emboss the main lines in. For this set, I did it the other way around, which needed more clean-up: the picture below illustrates my current methodology where I needed to replace a damaged hand plate. I then emboss the knuckle ridges, which will hammer through the irregularities. In the example below I used a fluting hammer (a cross pien with a triangular side profile – visibe in the second photo on the anvil) but I have also used a small round faced hammer (visible leaning against the anvil) which requires less clean up, so you may want to experiment and see what works best for you.
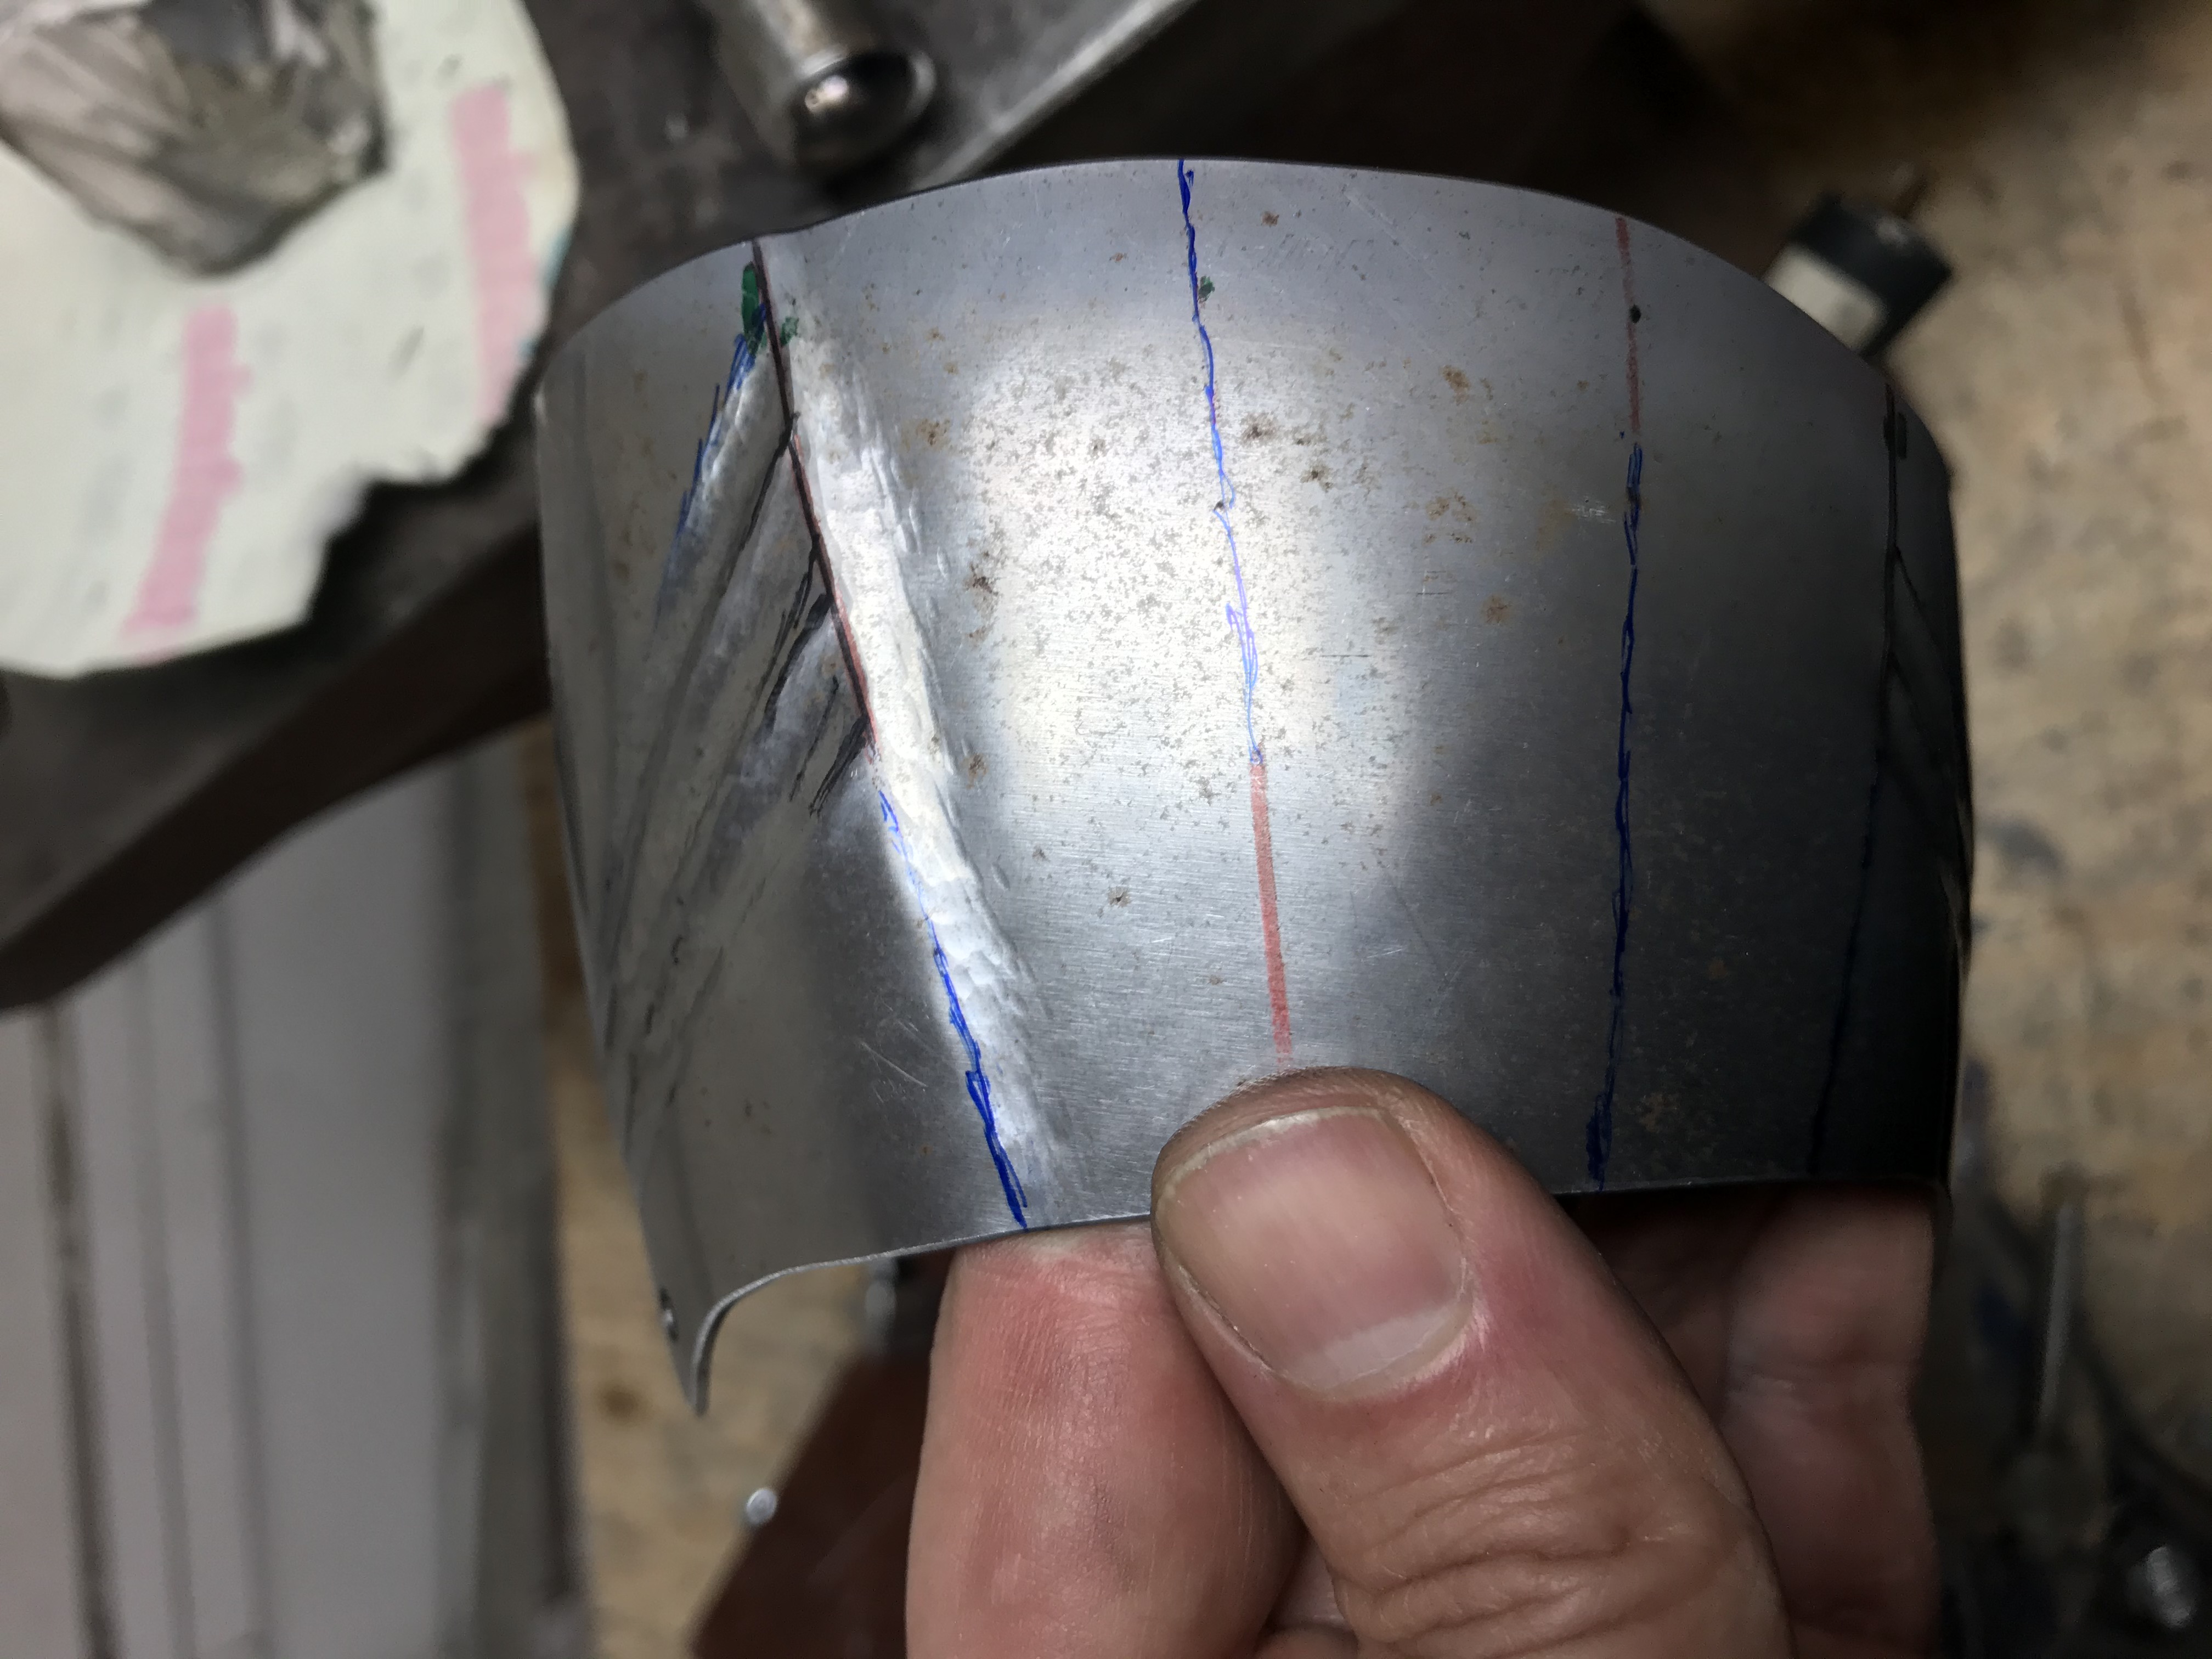
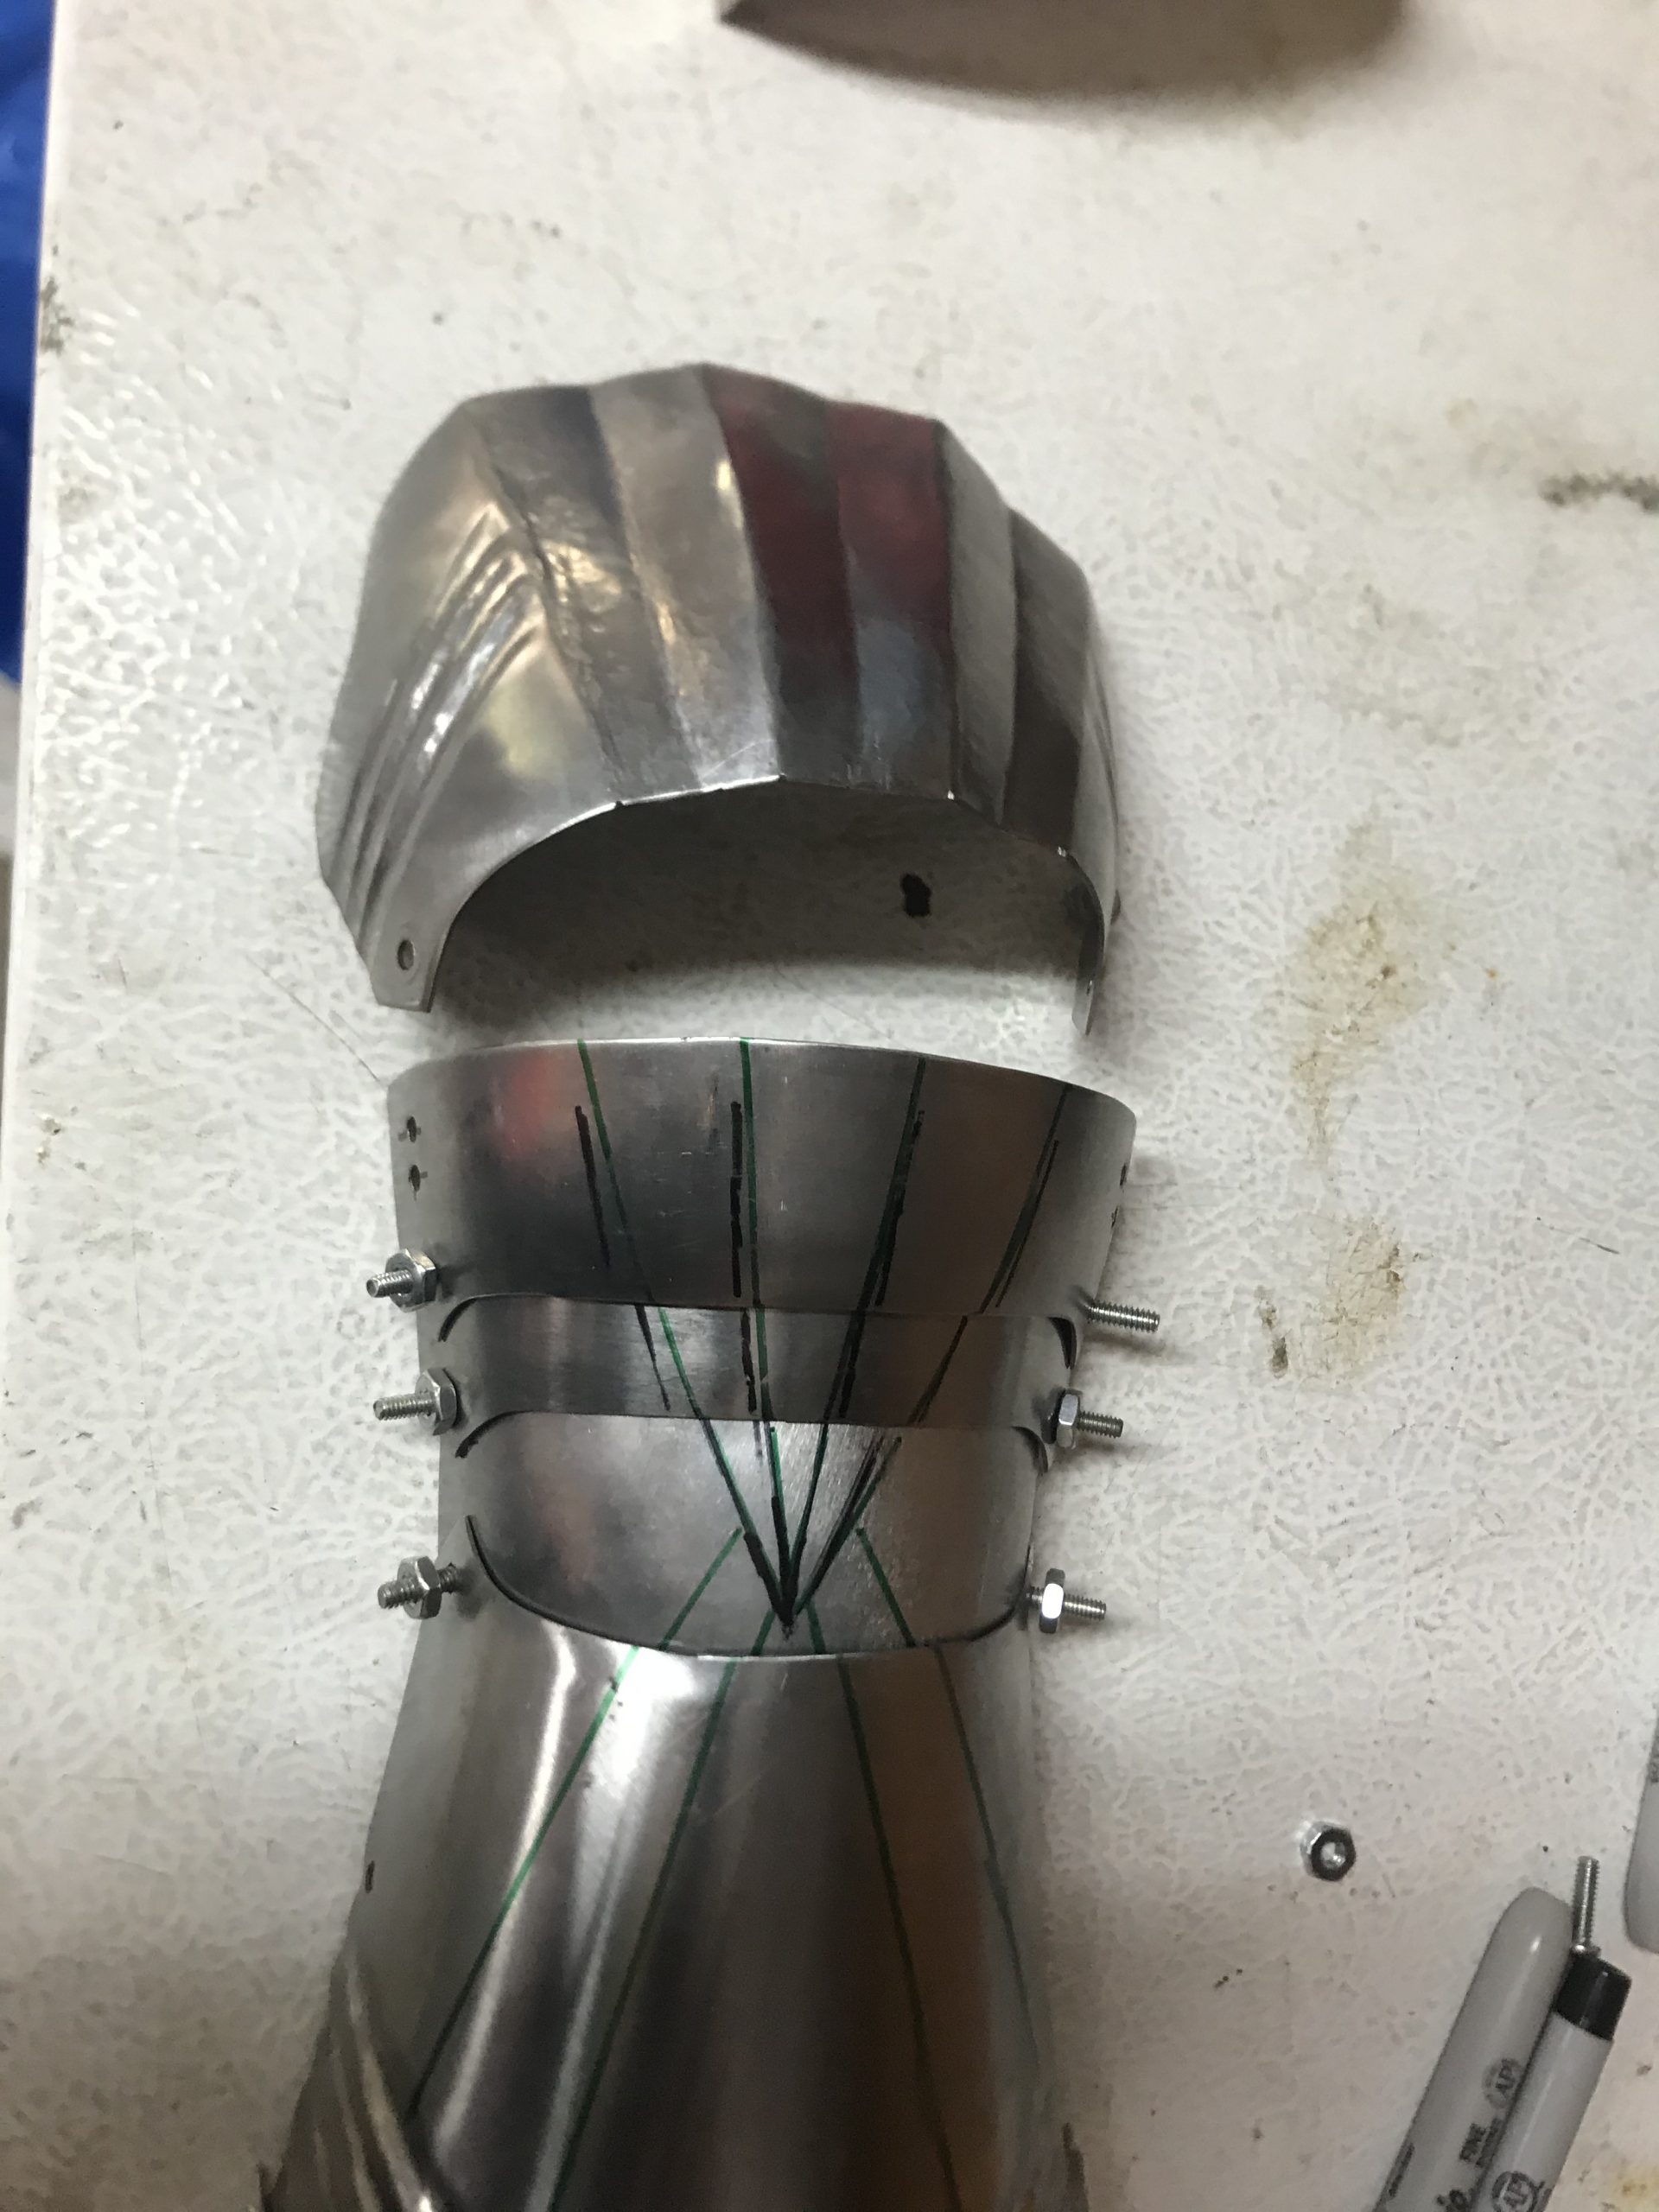
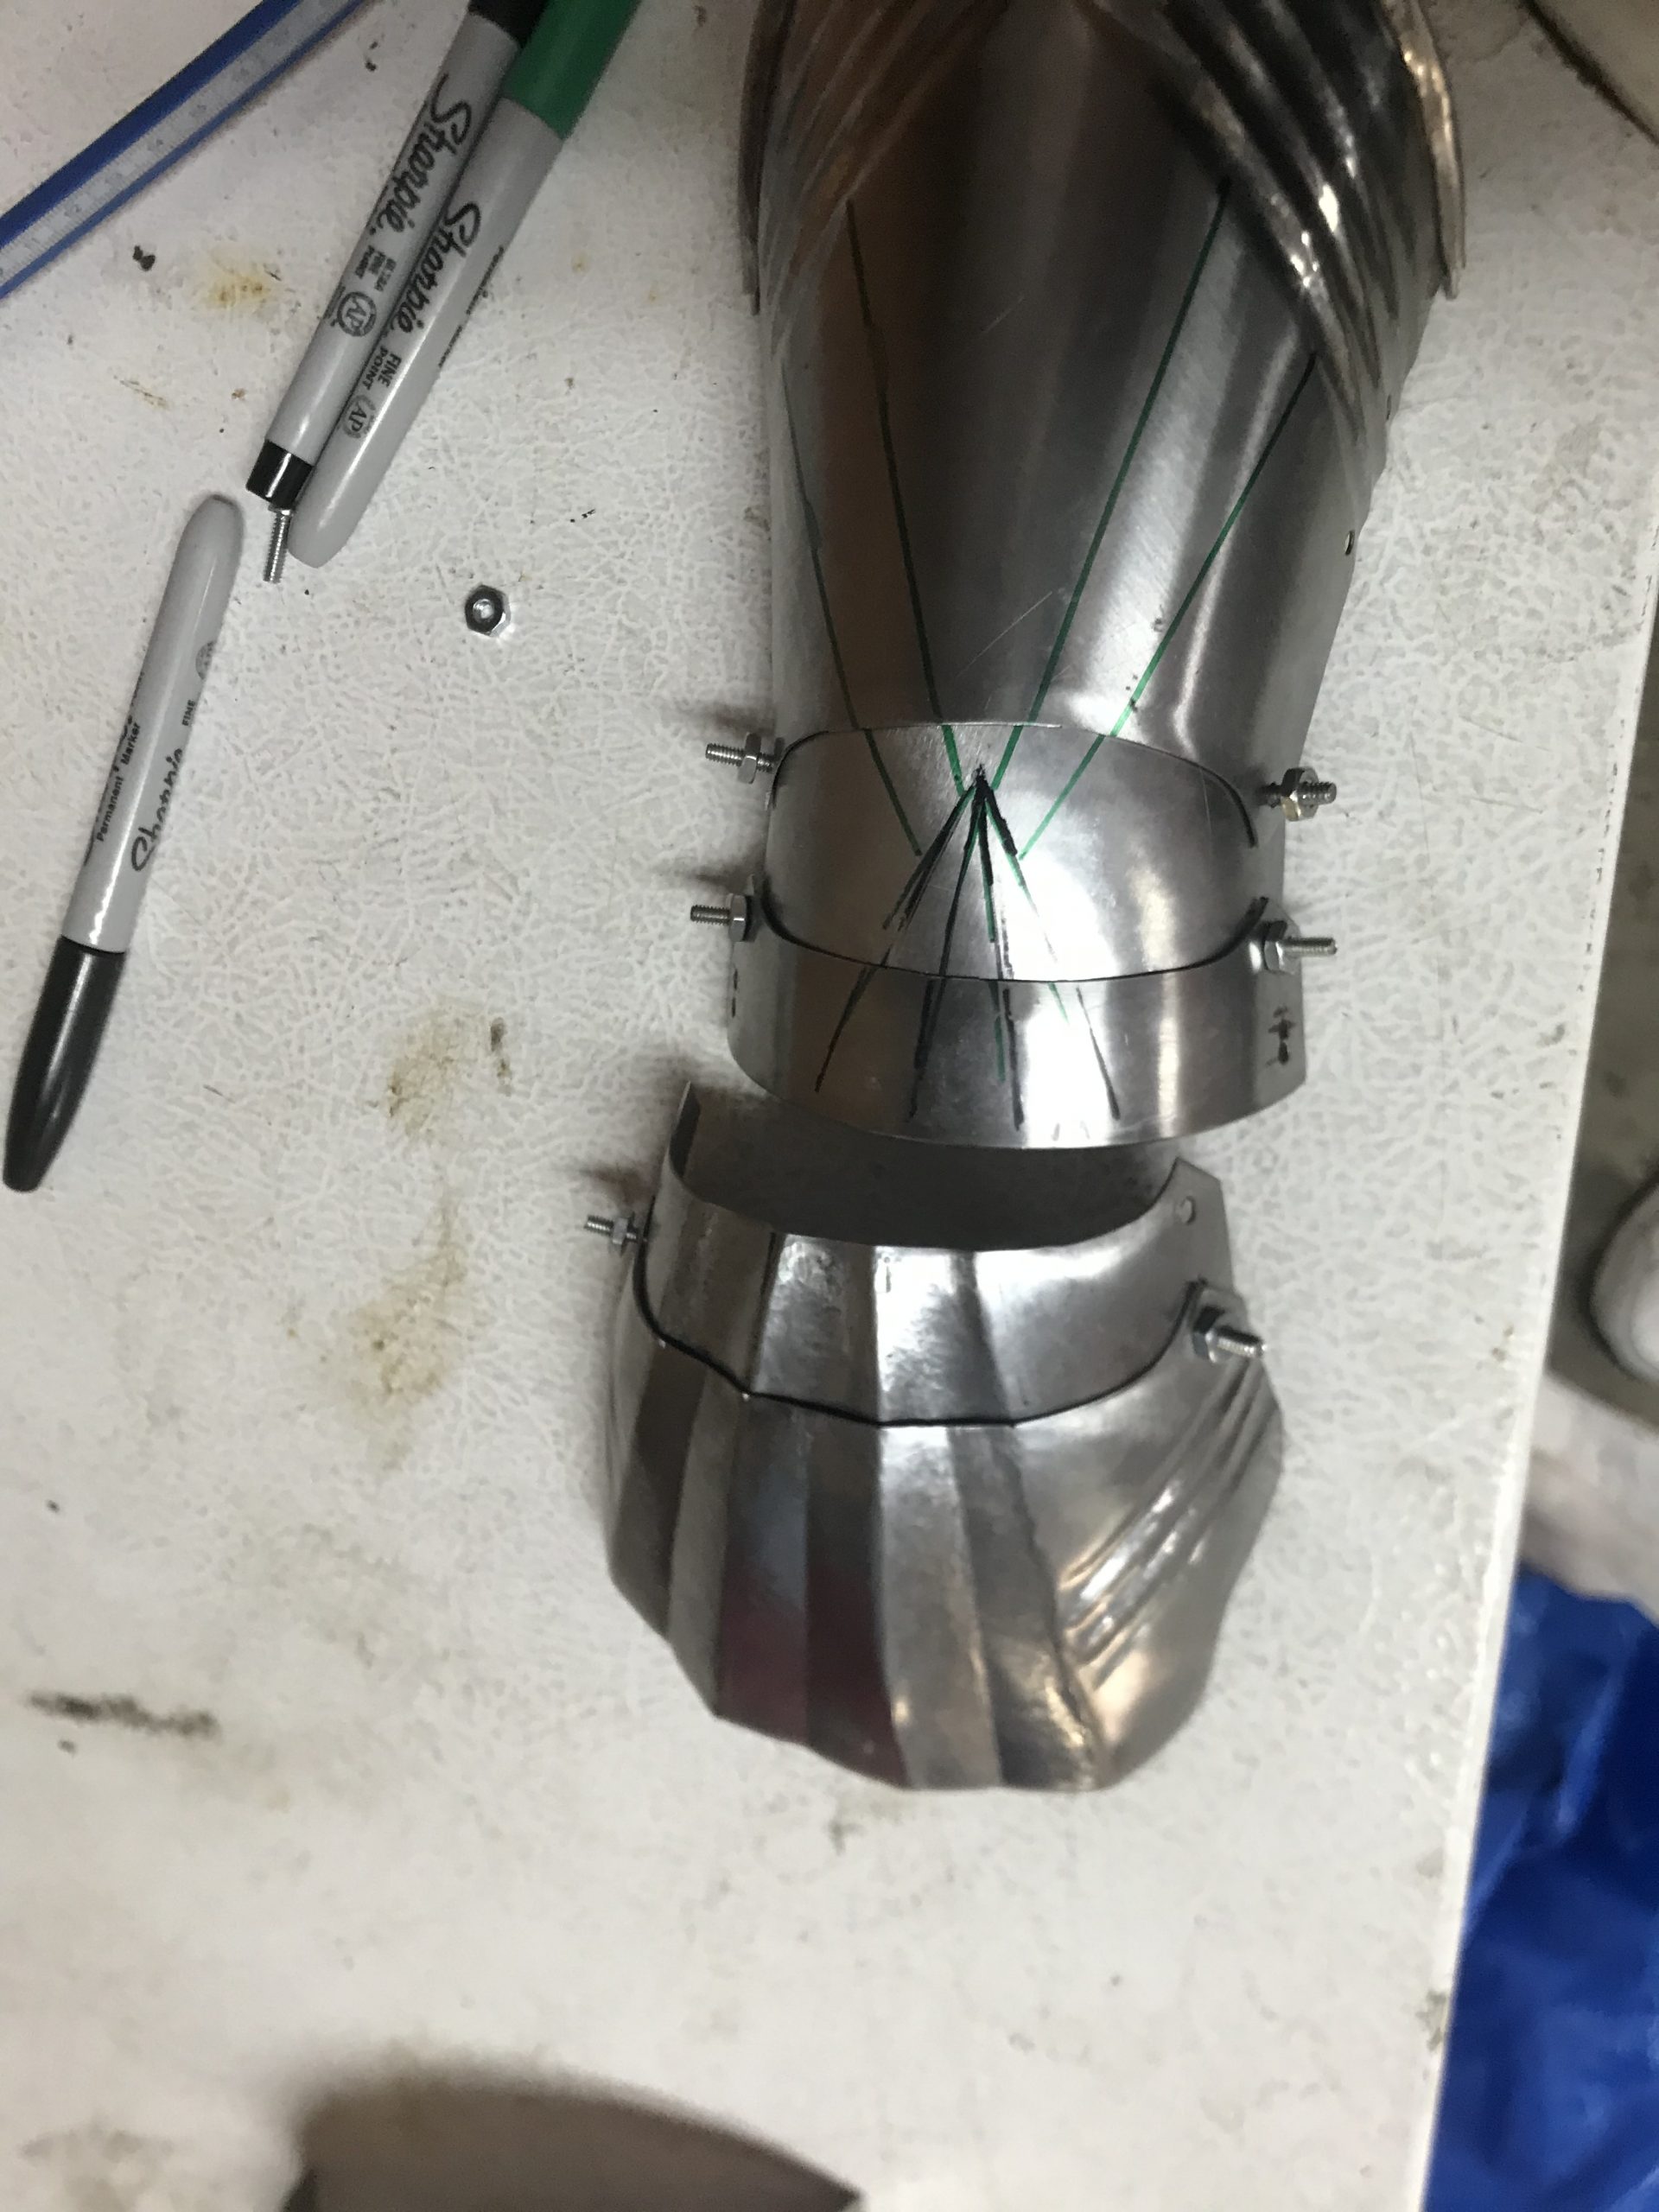
Note that the outer knuckle lines are “half flutes” where ONLY the inside edges are hammered down, while the center two knuckles are raised in on both sides, as with a normal flute. I will illustrate with a single plate rather than show all of the pieces. If you are using the “blended” lines that I currently prefer you will need to disassemble the gauntlet first. If you want to use only the “extended” lines then you can leave the gauntlet assembled and simply run your lines across all of the plates. Be aware that in general the wrist plate and the plate immediately adjacent often ONLY flute the outer lines (the half flutes) with the last two plates getting treatment on all four ridge lines. I have never put all 4 lines onto the wrist plate, but have done so on the rest of the plates, although this is challenging for the first plate due to the tightness of the lines. Note that this must be done preserving the three dimensional curvature of the plates – putting in “straight” flutes will destroy the ability of your gauntlets to “droop” – particularly when compressed, needed for the side to side movement, and the reason for the slotted rivets!

Once these lines are roughed in I will then hammer out toward the middle of the plates and draw the curve out.
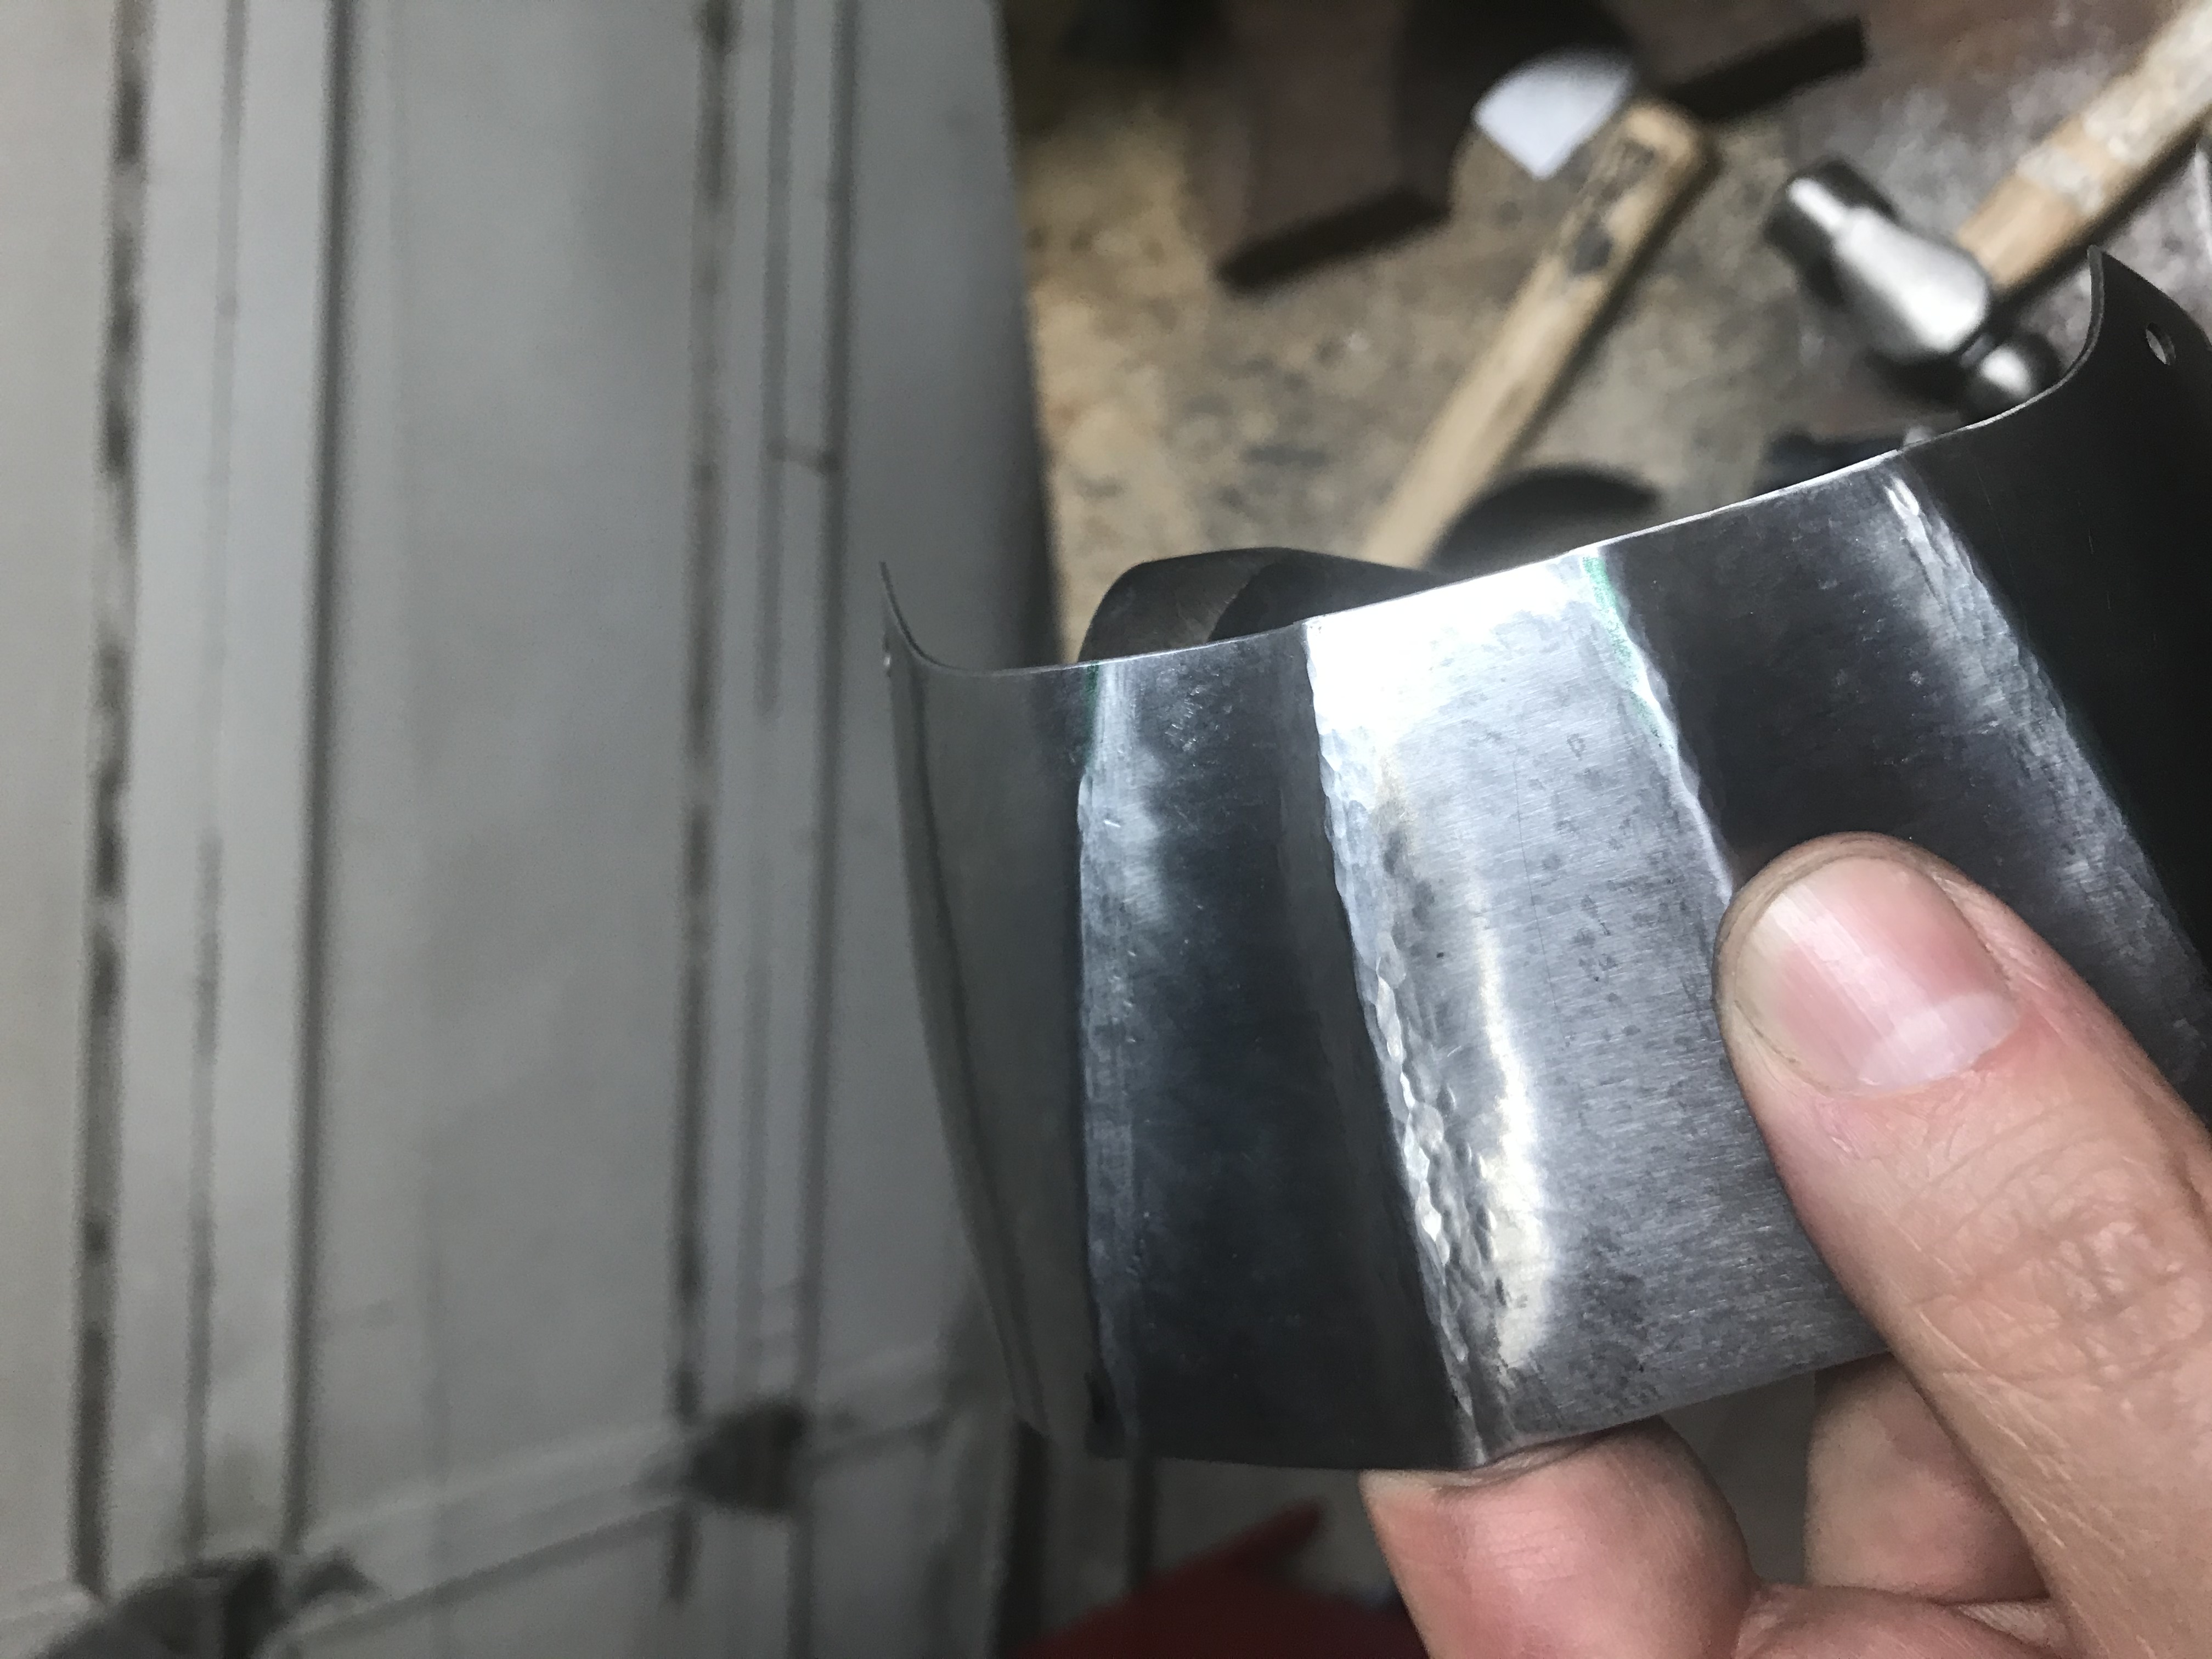
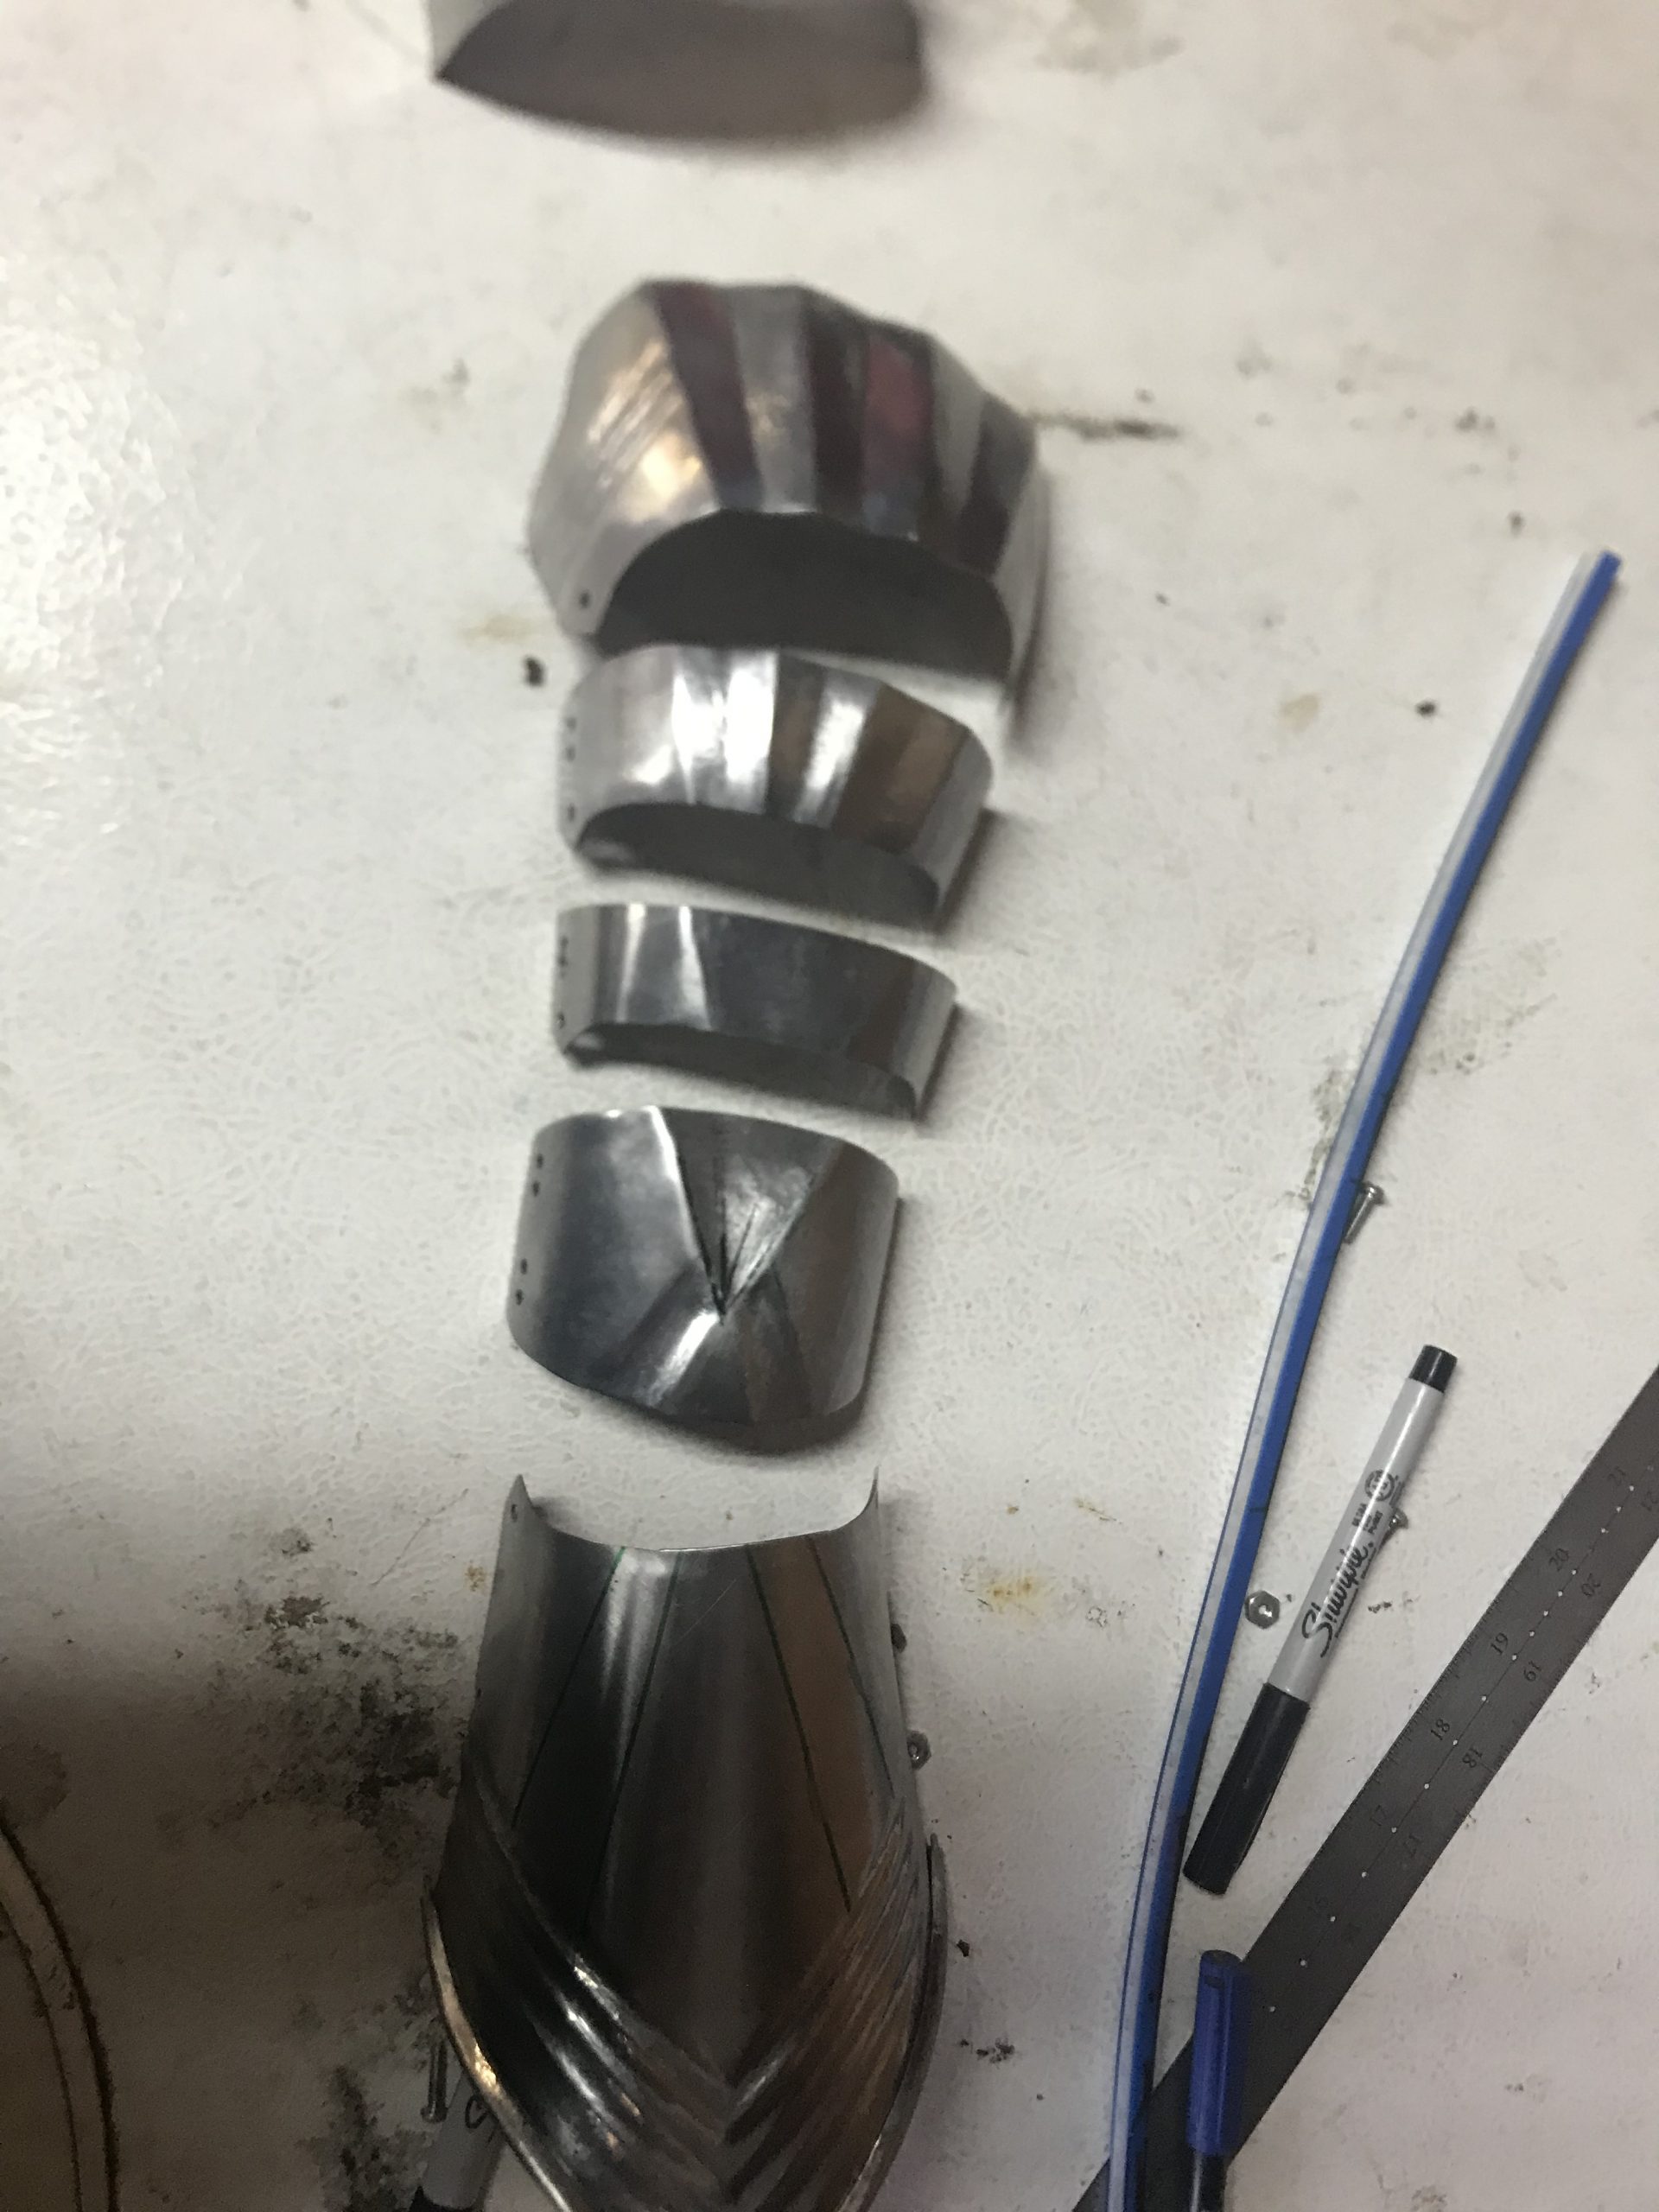
Once the plate is shaped, I will planish the crest lines to remove the hammer marks. Notice the transition over the last three pictures and how this plate has progressed to graceful curves coming to peaks, rather than the “ridges” of the fluting from the previous piece.
While this will put in the “sweep” needed, actual gauntlets have an angular trough, although it is important to realize that the overall shape of the plate is still curved from front to back, even with ese stepped ridges. I have found that the easiest way to put the “bottom” steps in is to use a small (slighty curved) hammer and emboss from the back over an anvil. As you can see, there is not a lot of work required, just enough to “sharpen” the bottoms of the trough.
Rather than showing the same process through the rest of the plates, here is a brief montage of shaping the plates from front to back. You will note that I keep the unit bolted together as I emboss the plates from front to back. The pivot plate over the wrist warrants a bit more discussion, so I will address this after the overall shaping of the plates. For this plate make sure that you first put in the outer “half flutes” forming a “V” facing forward, and THEN put in the flute lines from the gauntlet cuff, which intercept these.
When you are embossing these plates it is important to make sure that you still have plate curvature from front to back, so I have included a photo of an embossed plate sitting on my V-Board – this curvature is less than 1/8″ per plate, but is needed for correct “droop” on the finished gauntlets (assembled gauntlet shown for reference)
Once all of the lines from the wrist to the hand are in place I will assemble these pieces and sight from the wrist to the knuckle plates. I will almost always have some slight gaps, generally less than 1/8″ (3mm) which are easy to fix at this point, and get harder once you have put in the pierced decoration. Simply place the assembled unit on a ball stake and tap the gap closed. In this illustration I use my fluting hammer, but the edge of a rawhide or nylon mallet will also work well. I don’t bother cleaning up any minor “scuffing” on the plates, since I will planish the plates after completing the edgework – one of the tricks to building armour is determining the correct level of “good enough” at each stage!
The wrist pivot plate warrants a bit of extra discussion, since it is where the “hand” and “cuff” plates merge, and it trickier than it seems. In general I will put in the “forward” facing V and then put in the lines radiating to the gauntlet cuff. I also tend to put these lines in to align with the cuff BEFORE I do these embossed lines on the cuff. I have done it both ways, but this fits my workflow where I put in the cuff fluting (which is independent of the rest of the gauntlet) and then work from front to back. It also means that if I “bobble” the lines on the cuff plate (which is more complex than it looks) I can adjust without needing to rebuild this wrist plate. The cuff plate is a “risk” whenever you do it, so this seems to be the least bad option in terms of rework risk, so I put the embossed lines into the gauntlet cuff LAST.
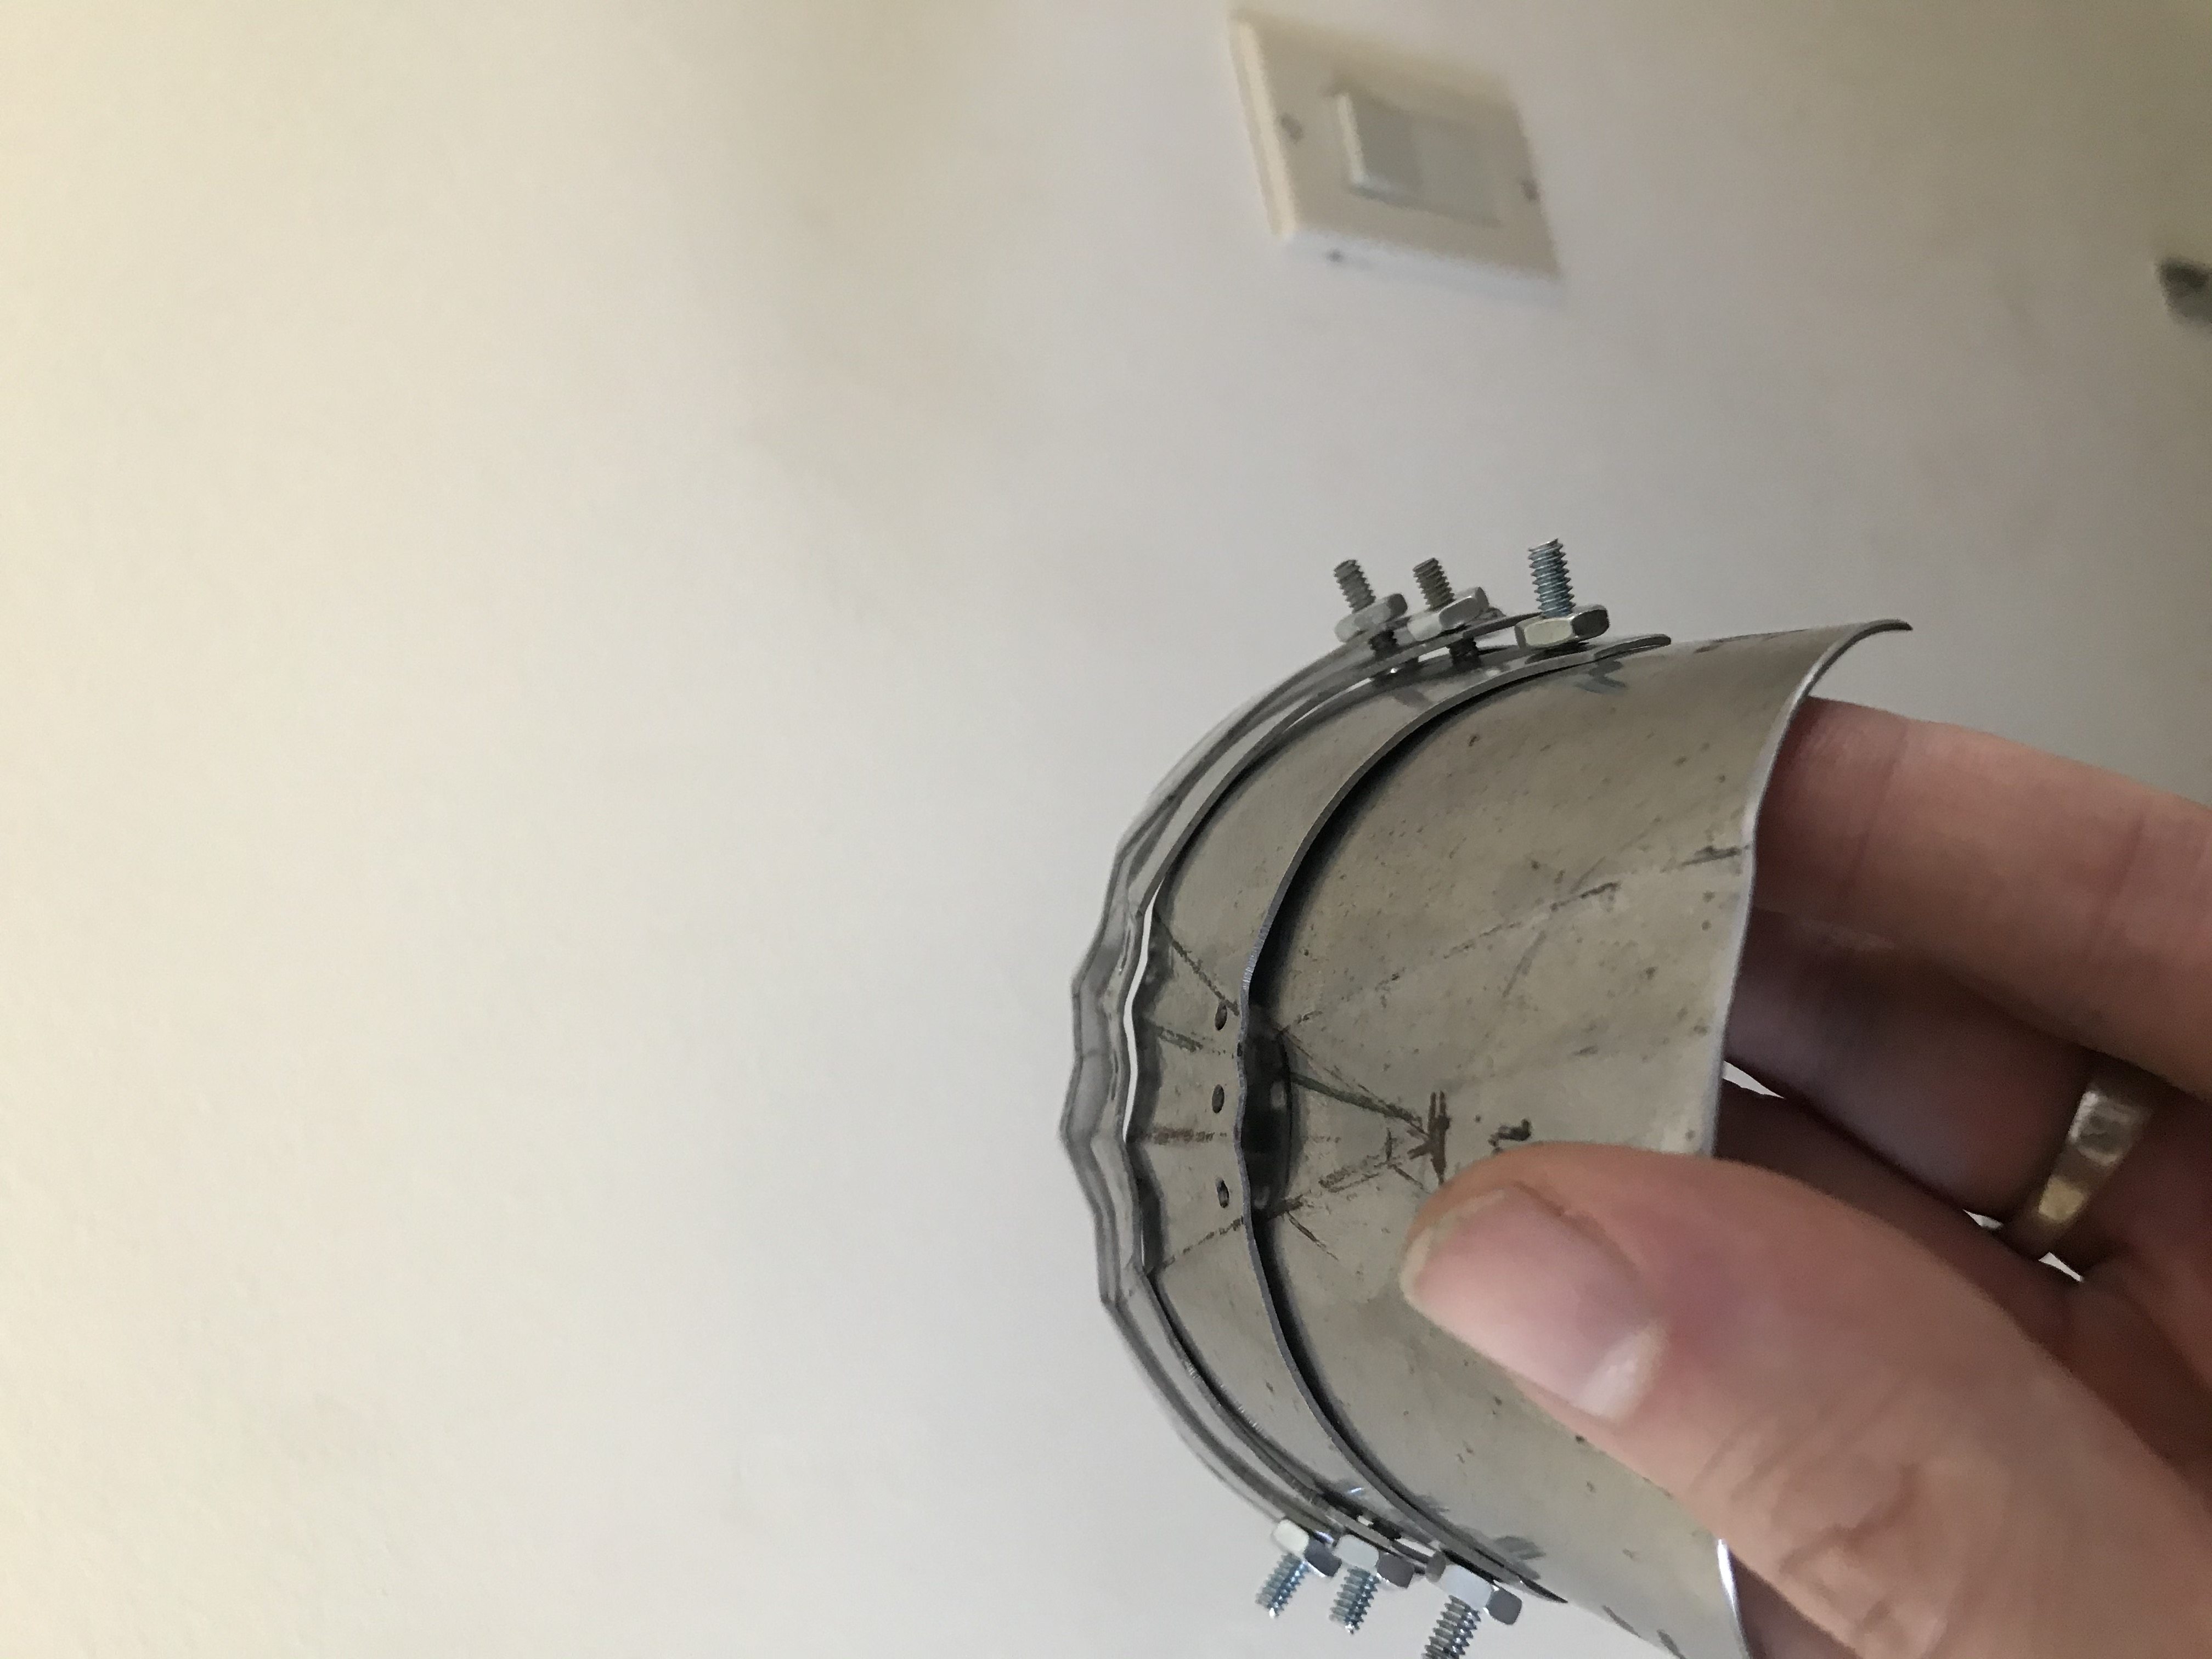
For the wrist plate, you will also need to emboss the “ulnar bump” on the outside of the wrist plate to accommodate the end of the ulna. I do this last because the additional rigidity added by the embossing reduces the amount of distortion that this process imposes on the plate. With Carbon steel there is less need to stress relieve, but it’s a consideration since this plate is a pain to rebuild if it is damaged – here is a post on stress relief (on this specific piece) so that I don’t need to review it here.
For the ulnar bump, you will need to push out a bulge so that there is sufficient volume for the ulnar projection, and then you can make a “fancy” shape to meet your particular Aesthetic. spacing this volume between the articulation rivets and the flute lines will generally get the bump within 1/4″ of where it needs to be (shown above) or you can assemble the gauntlet and mark where your wrist contacts the plate – this bump is a “pocket” for this projection so that if the gauntlet is struck it does not direct the force onto this bone – in my opinion a major improvement over the “hourglass” gauntlets of the previous century.
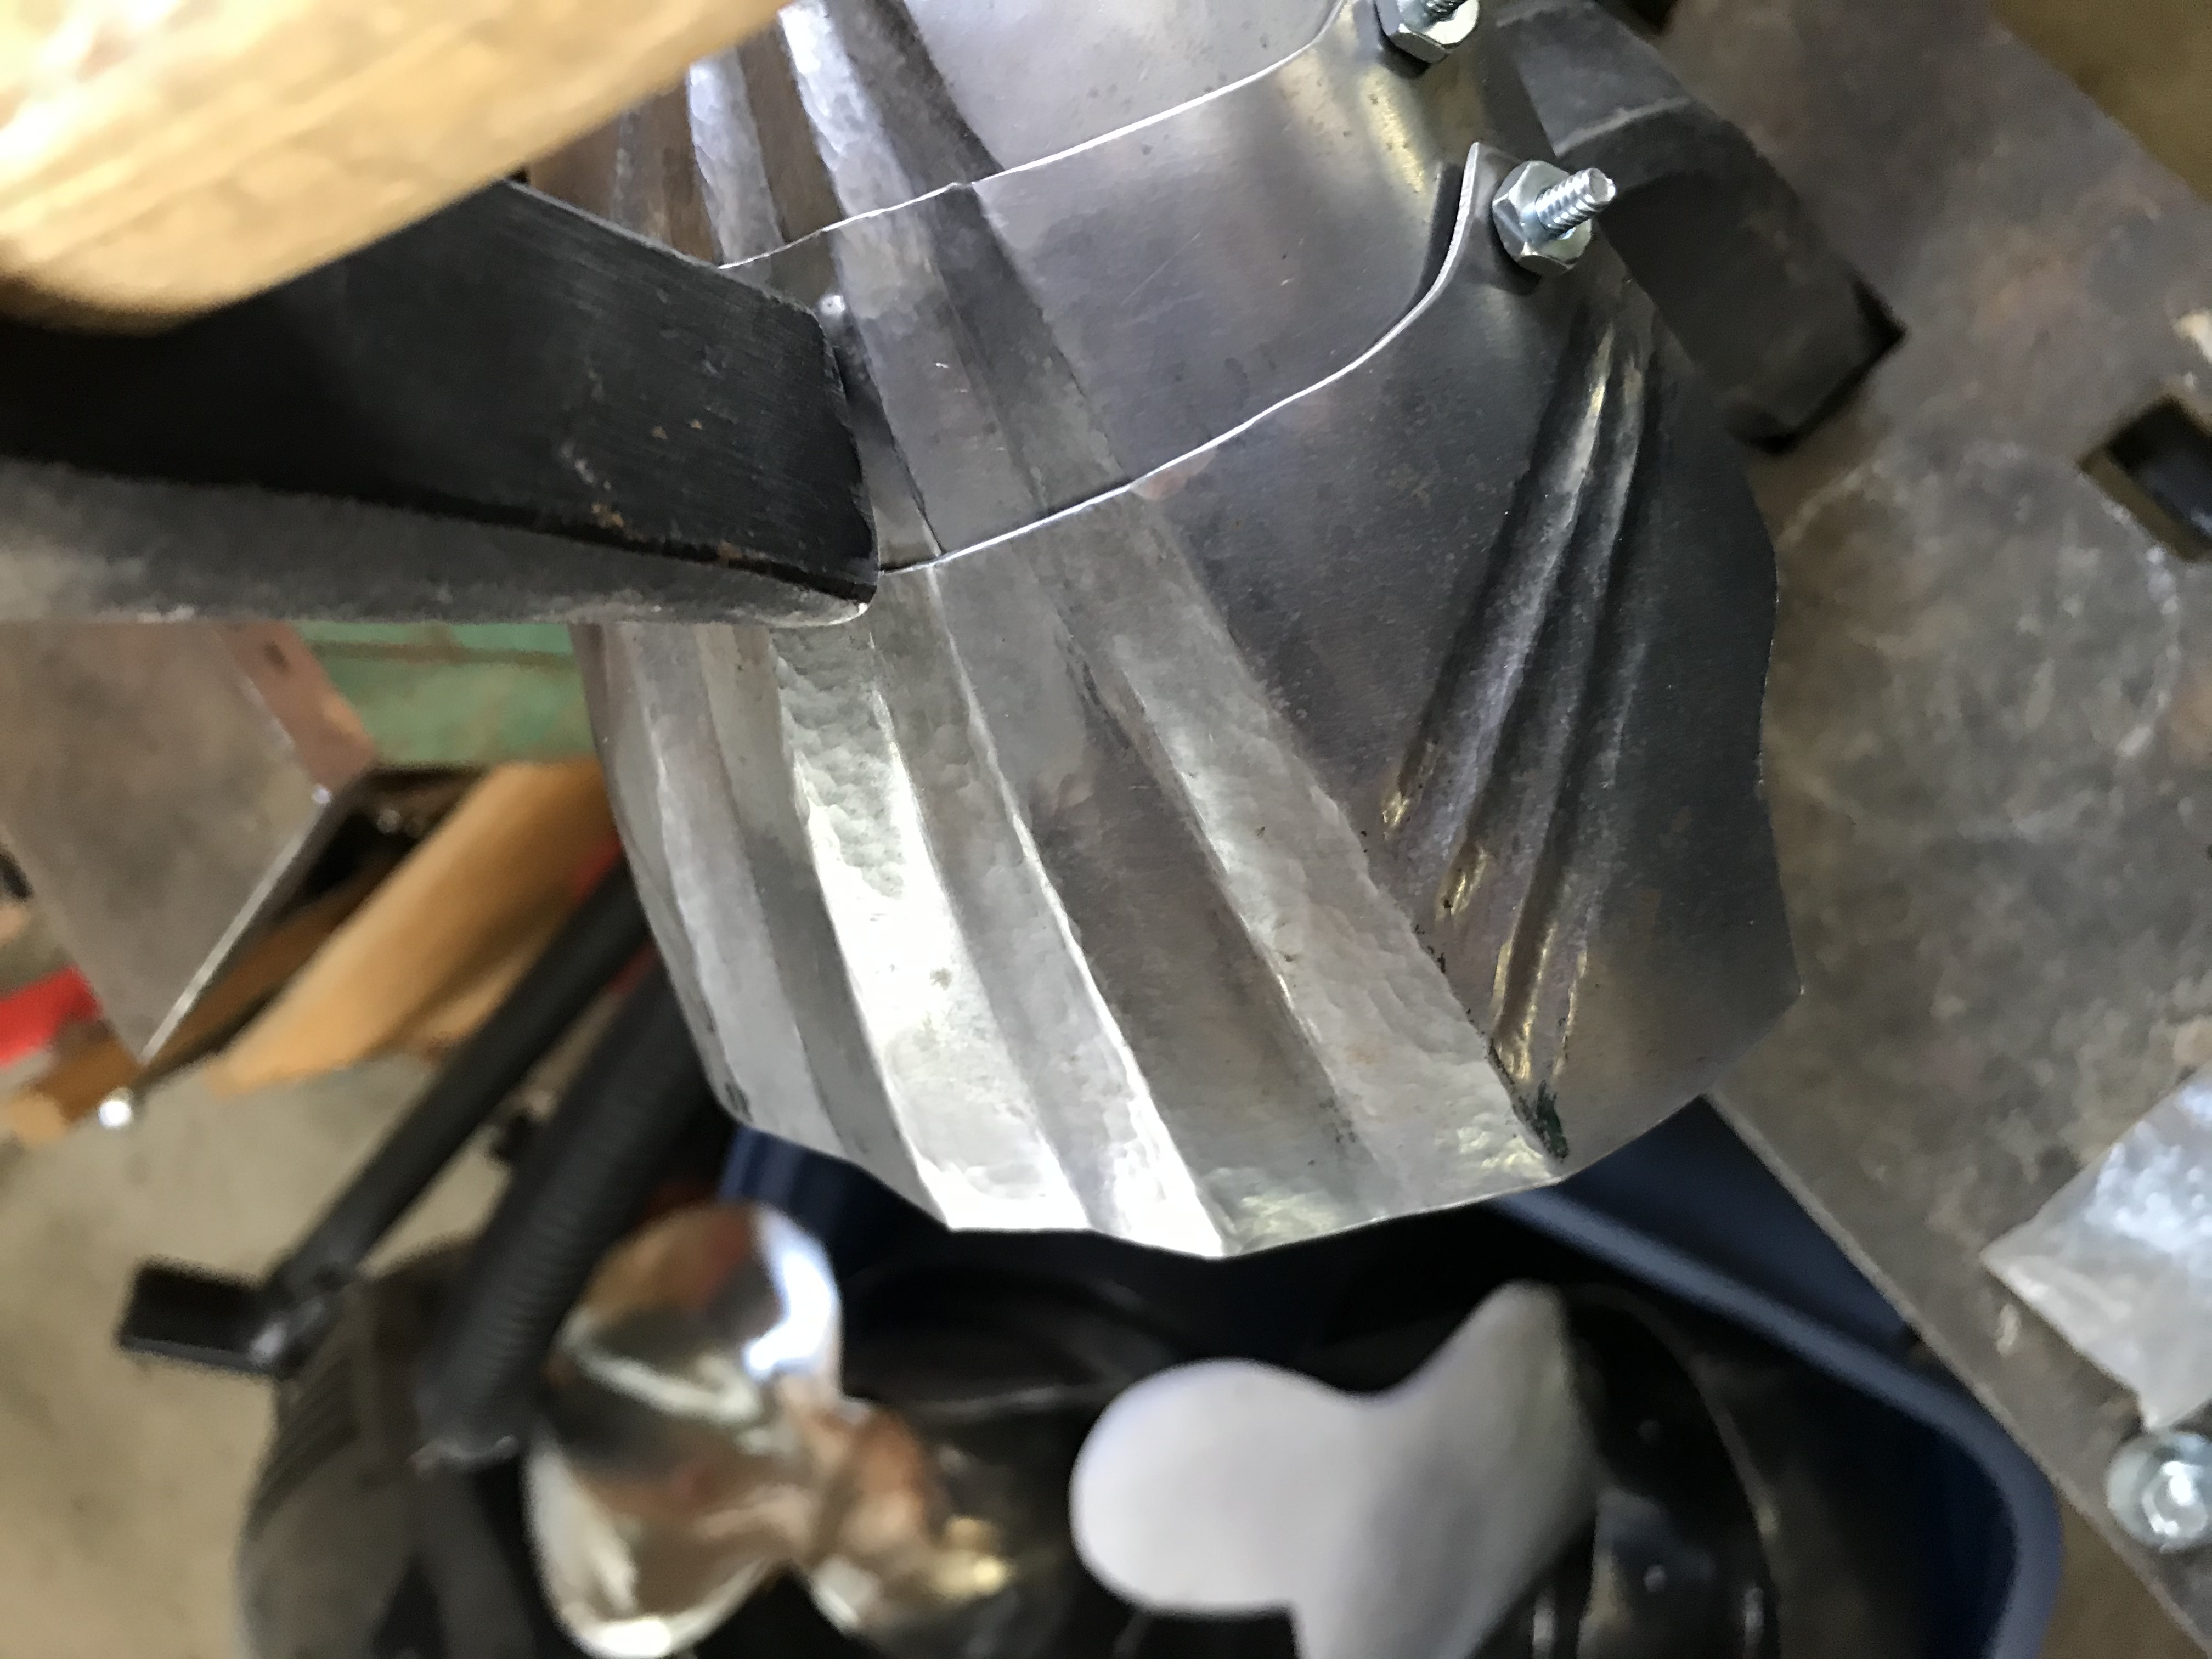
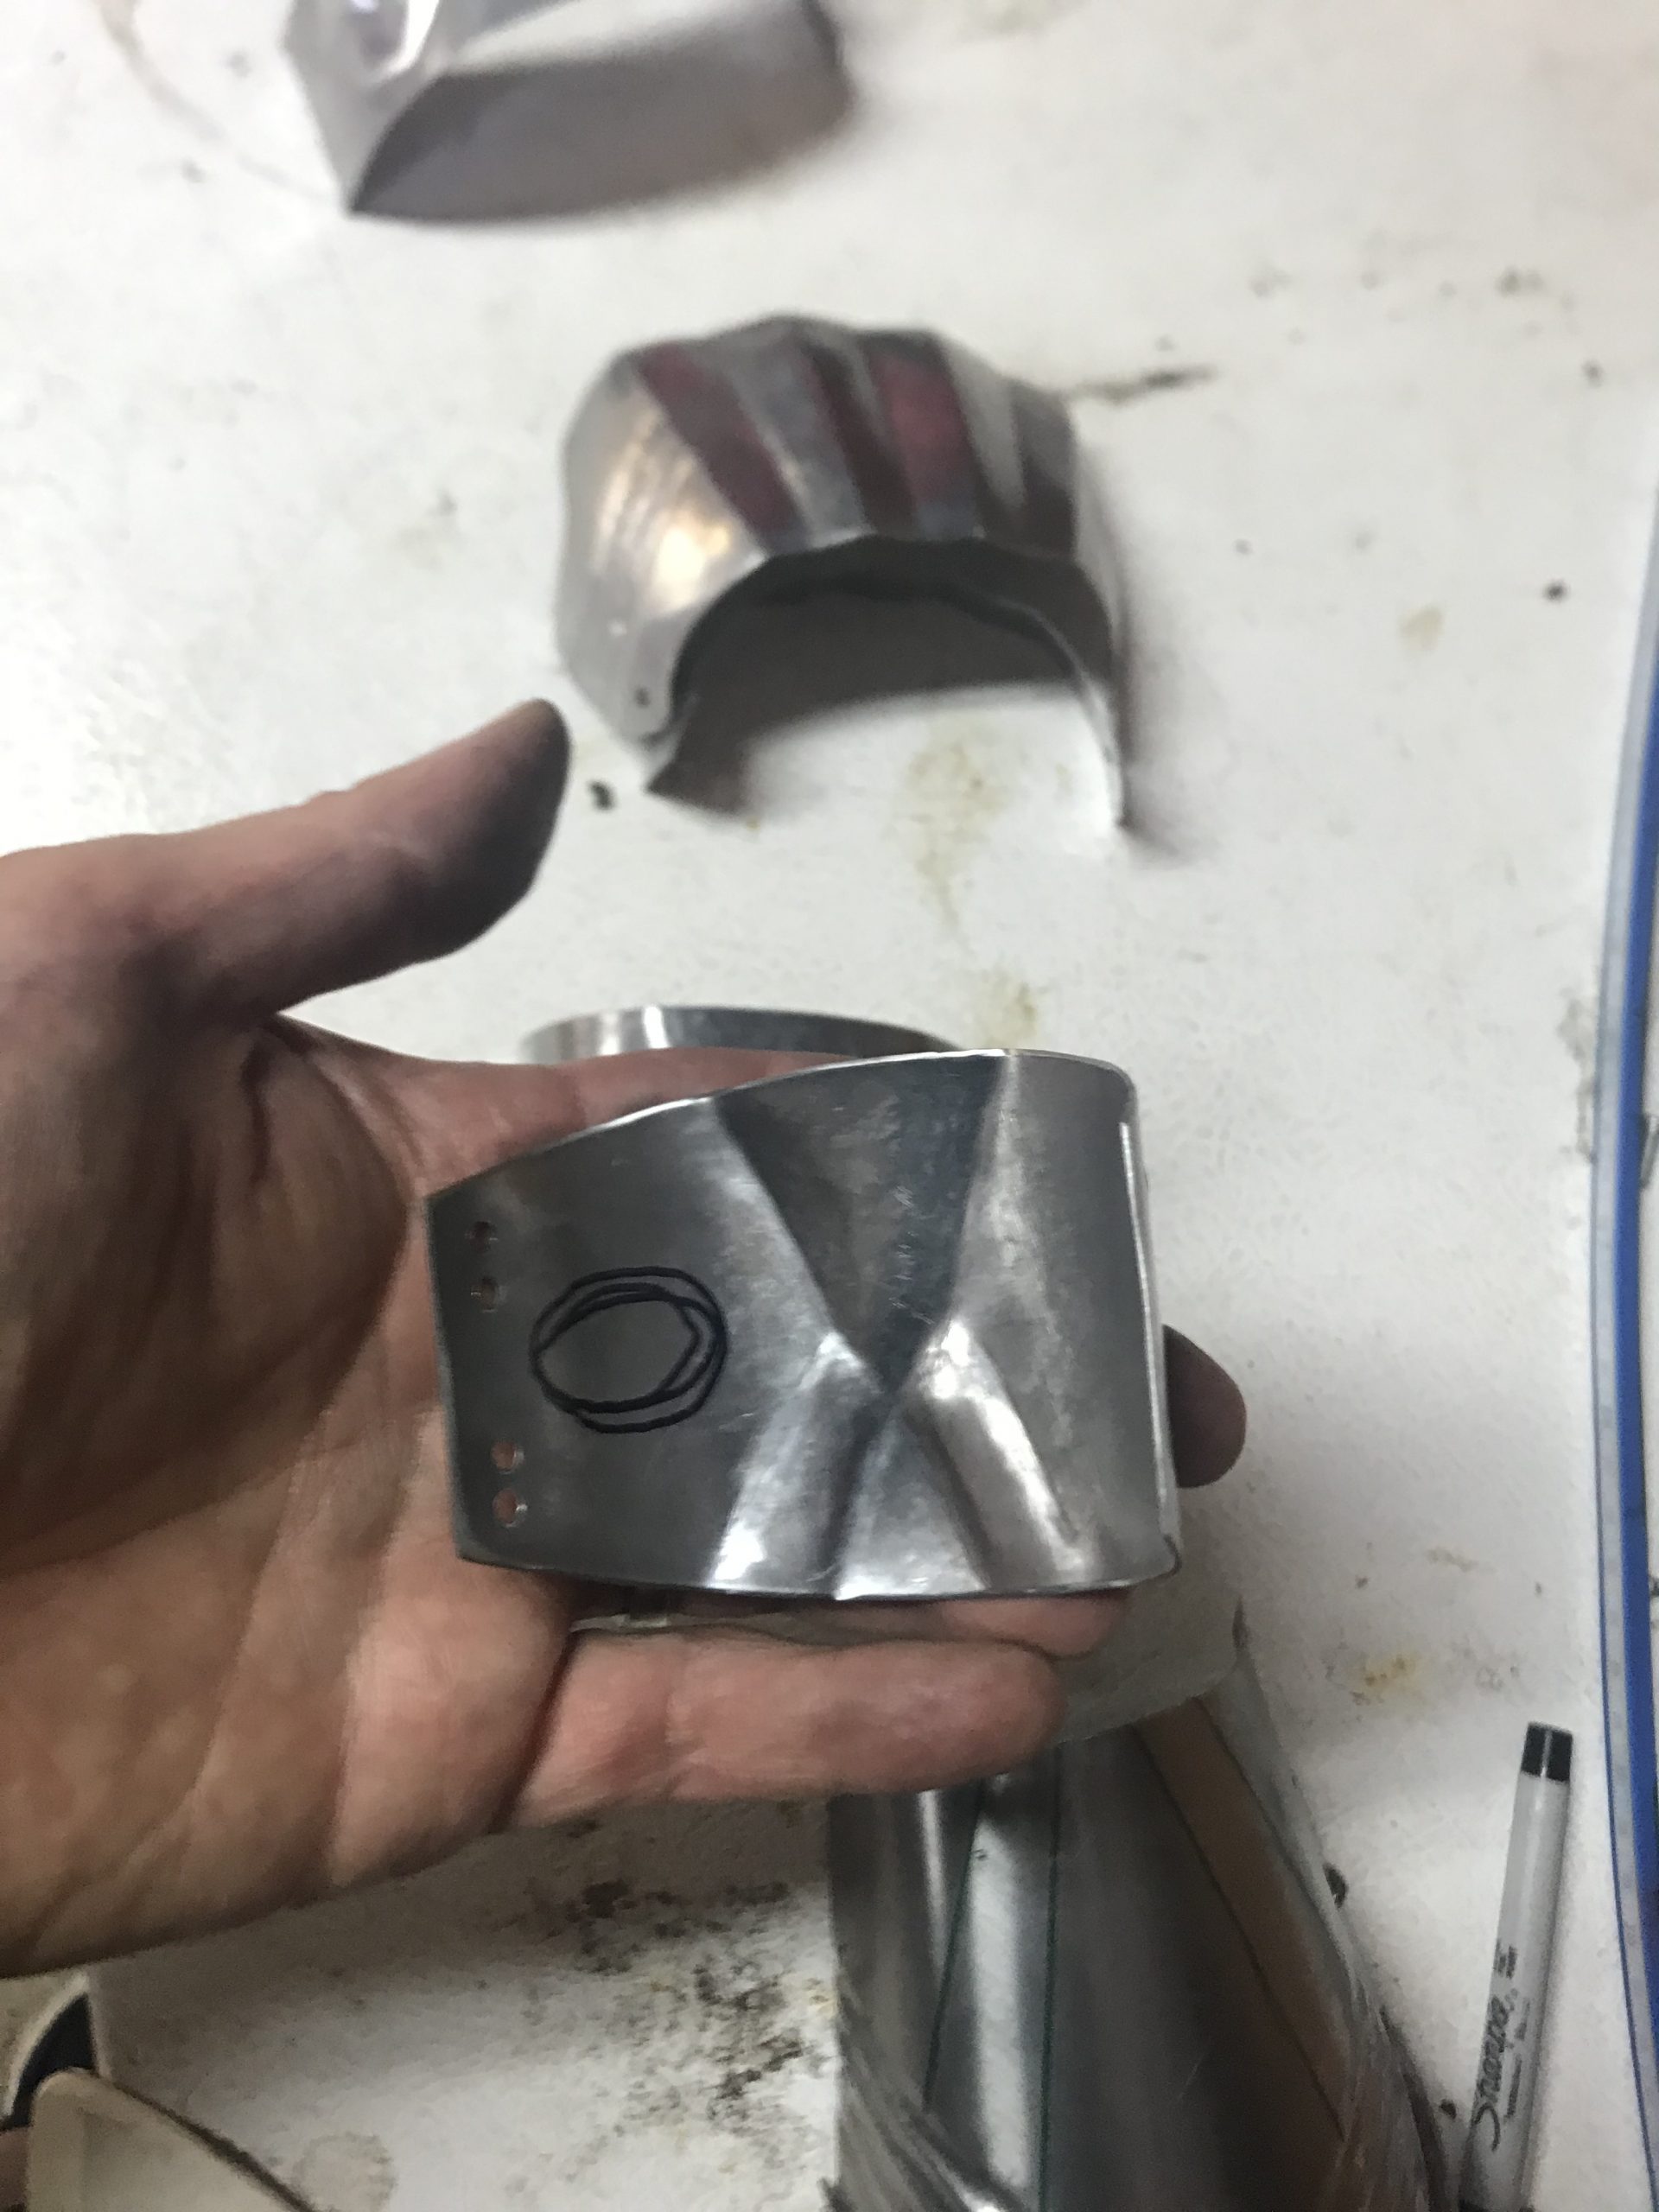
Popular shapes in period were spikes (Lornez Helmschmied favored these) cones and Pyramids. I favor pyramidal shape which echoes the shape I use for the Gadlings. To form these I use a 24 ounce ball pien into a lead block for the rough shaping, and then a pyramidal punch, again into lead, to shape the projection. Once this is done I use a rawhide mallet and a bar to make sure that this properly articulates with the other elements – and sometimes need to “convince” the plates by bolting them together and hammering them into conformance on a ball stake. Photos of the rough bulge and then the pyramidal punch are shown below. If you need more guidance I’d recommend looking at the article on how to make Gadlings.
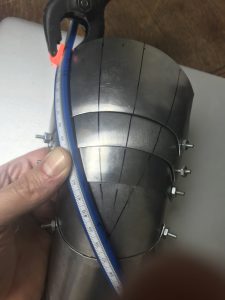
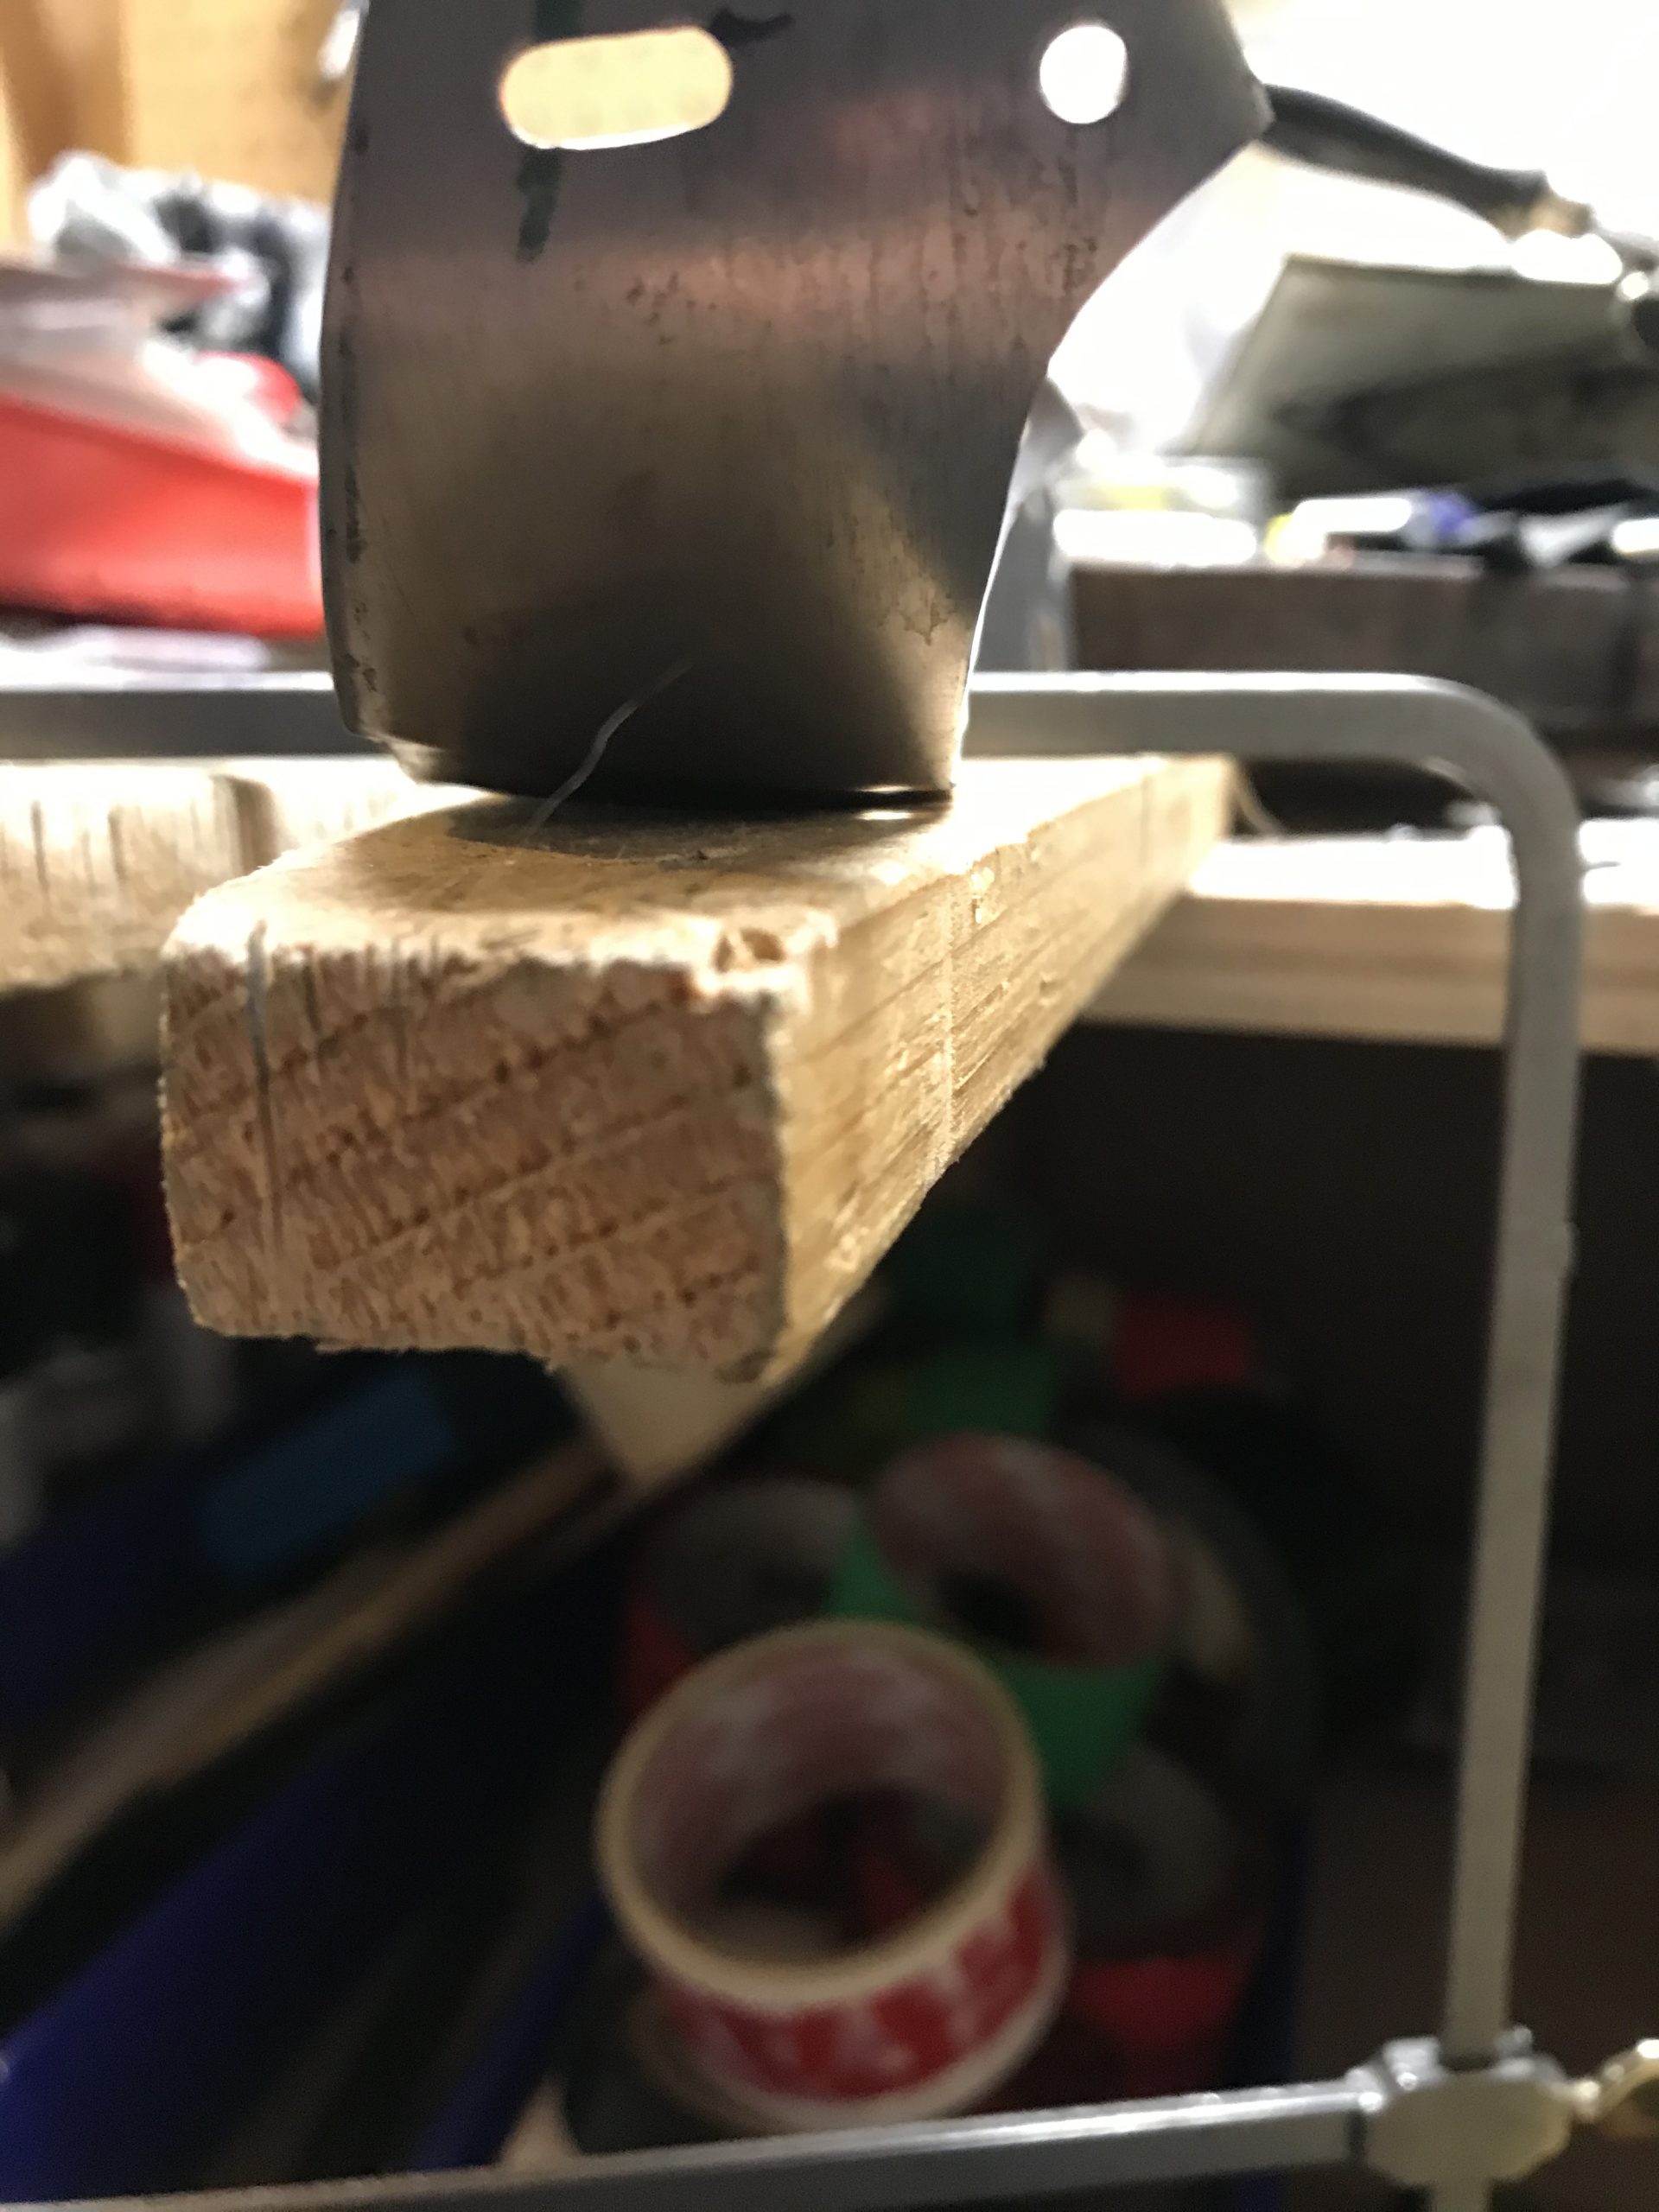
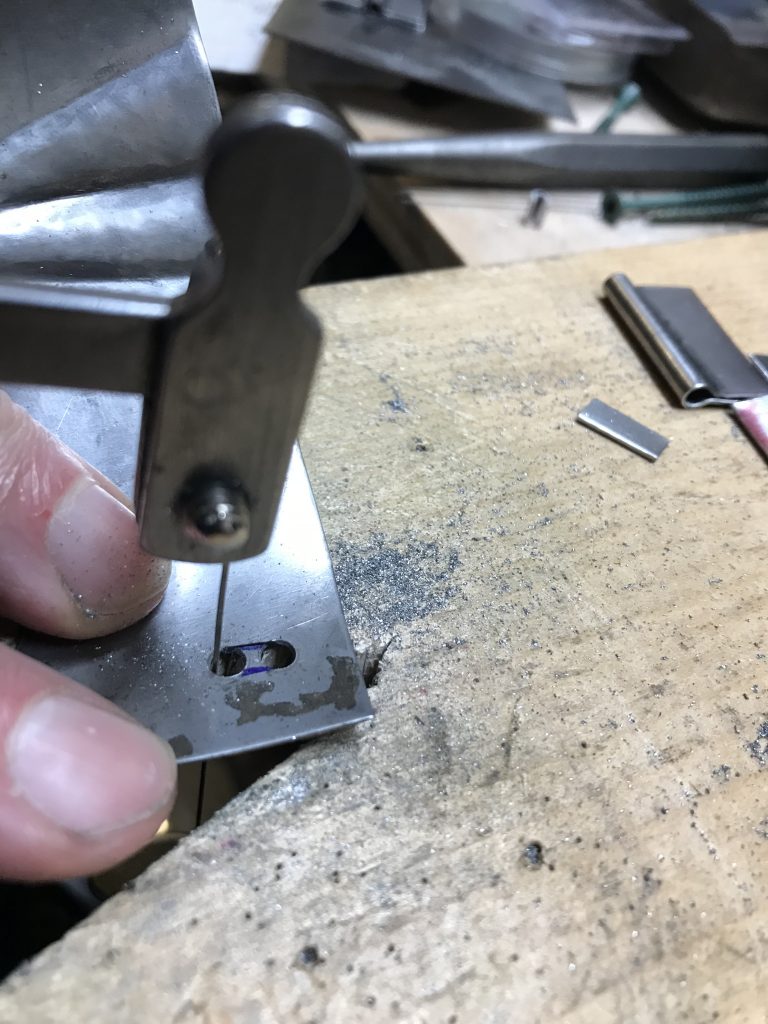
Once the wrist plate is embossed and the cuff is integrated, I will use a jewelers saw to cut between the pairs of holes for the slotted rivets to create the slot. The actual technique would have been to use a chisel and punch then file this, but a jewelers saw takes me 1-2 minutes per slot and requires no clean-up, so this is my preferred technique
Given the length (and number of pictures) of this post, I’ll stop here, and follow up with an article on making and integrating the cuff.