I just had a bunch of folks drop by my shop, and I realized that there are a lot of small fabrications that I take for granted – particularly my “consumables”. I thought that I should spend a bit of time to post how to make some of these, since it’s quite easy, and without the right components, your armour will end up looking more than a little funny. A lot of folks have realized that standard rivets are bad at making leather to metal connections for strapping and “soft” articulations (such as used in gorgets and pauldrons) and many people have used roofing nails as a much better solution than rivets and washers.
Unfortunately, for most leather attachments and particularly gorgets, the head of a roofing nail is too wide. It is also worth noting that roofing nails are often quite asymmetric, so making “precise” connections (again, critical for gorgets with integral hinges) is problematic. To solve this, I have a process for making “arming nails” that gives consistent results (and nice connectors) and takes about ~30 seconds per rivet. It should be noted that I tend to do a hundred or so at a time, and have a little container of these which I periodically refill when it gets empty. This prompted the question that triggered this article when I was working on a gorget “Where did you get those?”

I start with a lot of nails – the nails in the container are a few more than those in the small container on the right. The head size for these is about 5/16″ – roughly halfway between a standard 1/8″ rivet head (a flathead or truss 1/8″ rivet head will be 1/4″ diameter, round heads are slightly smaller) and the diameter of a standard roofing nail (generally about 3/8″). The container is from Lee valley – they sell a lot of useful containers:here is a direct link to all sizes of these containers
Suggested Materials
- Roofing Nails
- Bench grinder
- Cordless Drill with adjustable (quick release) chuck
- Fine (mill) file
- Linesmans pliers (Milwakee brand preferred)
I’ll add some notes on the front end on these materials. I start with regular roofing nails and get them annealed (put in a forge to heat to ~1,500 degrees and cool slowly). I buy these as short as possible since they will be clipped to be just long enough to go through a piece of 18 Gauge material, a piece of leather and have a bit of extra (about 1/8″) to pean over. You don’t need the quick release chuck, but if you don’t have this it will change your time from ~30 seconds per nail to several minutes per nail, and you will probably want to skip using the grinder. I also recommend Milwakee brand linesmans pliers, since these are the best so far (hands down) that I have found for easily clipping hundreds of 1/8″ chunks of steel. If I had these for my first Wisby coat of plates I could have used my hands the day after building it – but that’s another story.
Procedure
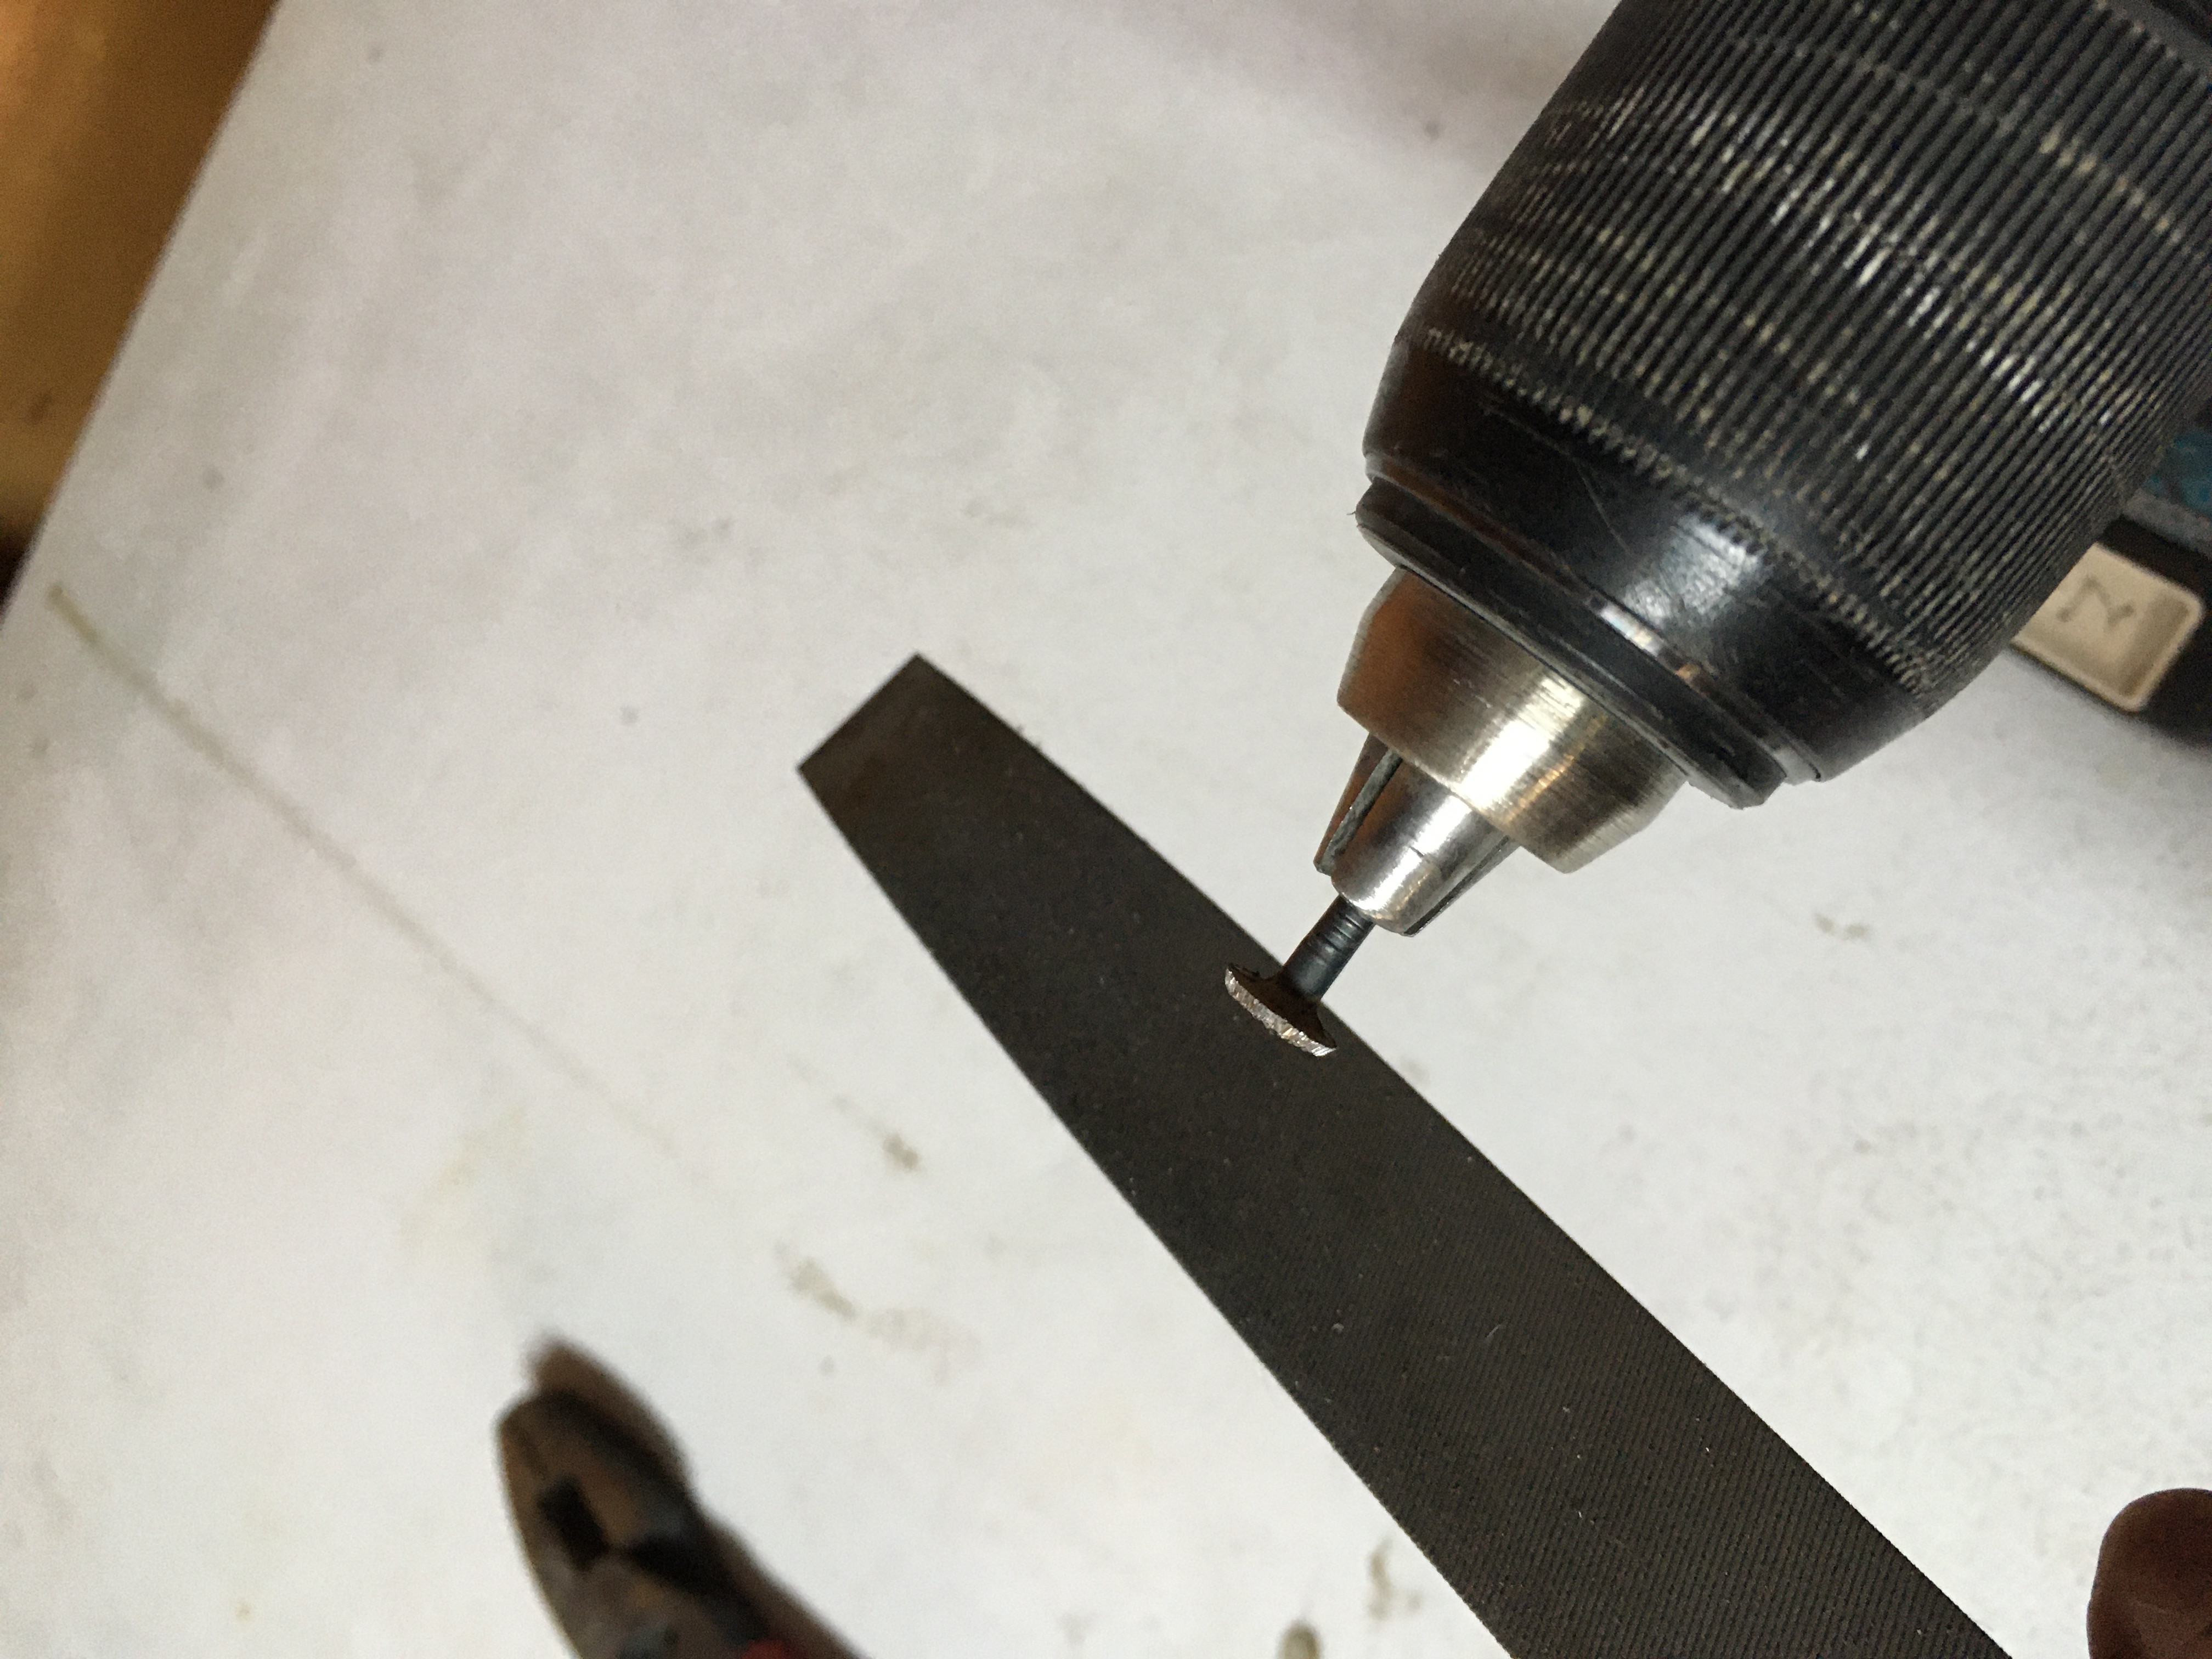
I start by using a grinder to rough off the additional head material – note that I point the top of the rivet in the direction the grinder is moving, so that all of the grinder burr is on the TOP of the rivet – this makes cleaning them up later easier. When I am making these I find that a 6 count (about 4 seconds) is an appropriate amount of time on the wheel. it is important to have the drill spinning when you make contact with the grinding wheel, and that it is still spinning when you leave contact with the wheel – if not, you will generally deform one side of the head. This is less of an issue if your nails are not annealed, but then cutting to length (and peaning) will be much more difficult. The majority of the time taken is getting the nail on and off the drill.
Once you have a pile of these grab a fine (mill) file and use it to clean the heads. Note that if you have any heads that “caught” the grinder wheel (generally because I stopped the drill while in contact with the grinder) these will pull a chunk of the head out of plane. I just throw these out, since cleaning them up takes longer than grinding a new one. when you file the head make sure that you file the top, or you will have rough flashing on the top, where it will be uncomfortable and abrade arming clothes (or the wearer) of the armour.
Note that the nail on the left is distorted on the left side, while the one on the right is fairly symmetric. they both have a slight bevel angle, which I find makes for a more comfortable fit. If your drill has a chuck, then I would either skip the grinder and use a coarse (bastard) file to remove stock, and then a mill file to smooth the final, or have a file next to the grinder so that you don’t have to rechuck the nail between operations.
One I have a nice pile of smooth nails, I trim them to size using a pair of linesmans pliers. my shaft is generally about 4mm (about 3/16″) but you should find the length that works best for you. You can trim as you assemble armour, but this requires a LOT more storage space, and another tool when you are doing the leather fitting.

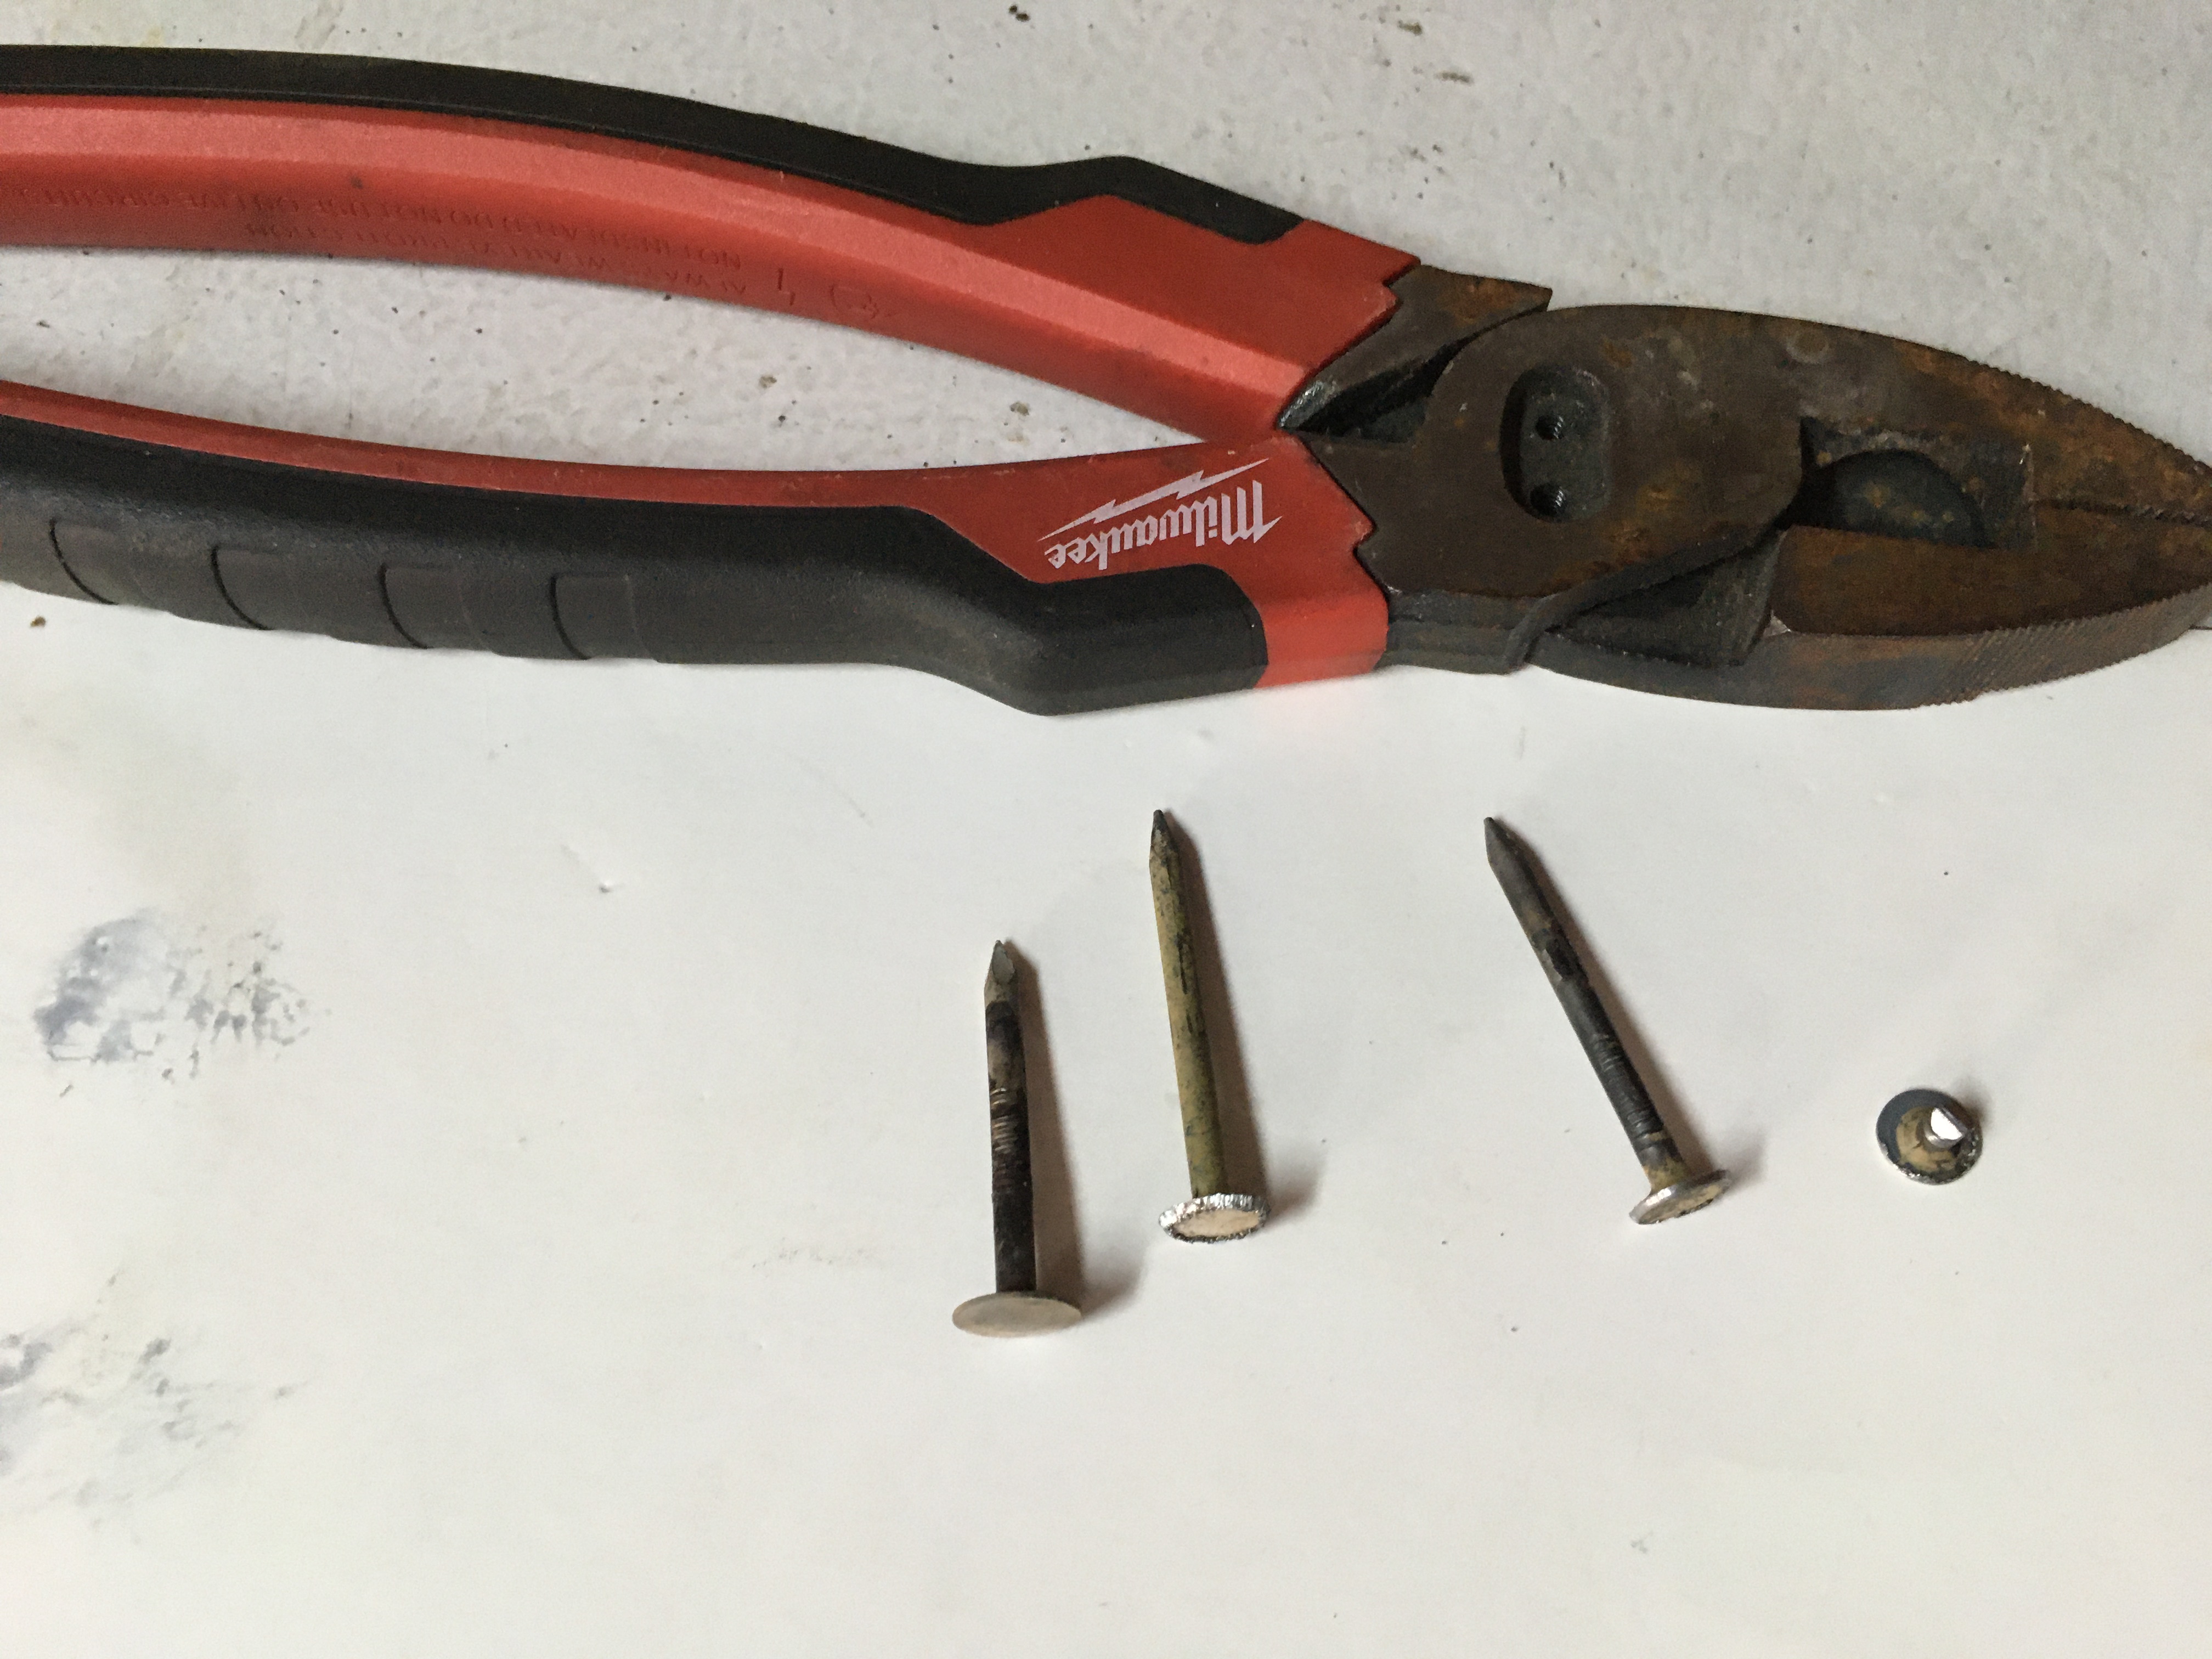
The last photo is a picture of what these look like from start to finish: The annealed nail, course ground nail, filed nail and trimmed to length. This underscores the volume, since the full length nail is about 5x the volume of the trimmed ones.
1 thought on “Making Arming Nails”