Monthly Archives: June 2020

Prototyping Obsessions

While it may not be a requirement to be obsessive when prototyping armour, I’d argue that it helps. “Prototyping” may be the wrong word since much of the armour I’m working on building was “perfected” hundreds of years ago, but it is definitely an iterative process.

  • Try a pattern and a set of techniques
  • learn a new technique, or modify one you have been using
  • realize that this changes the pattern
  • Update the pattern and or set of techniques
  • …repeat…

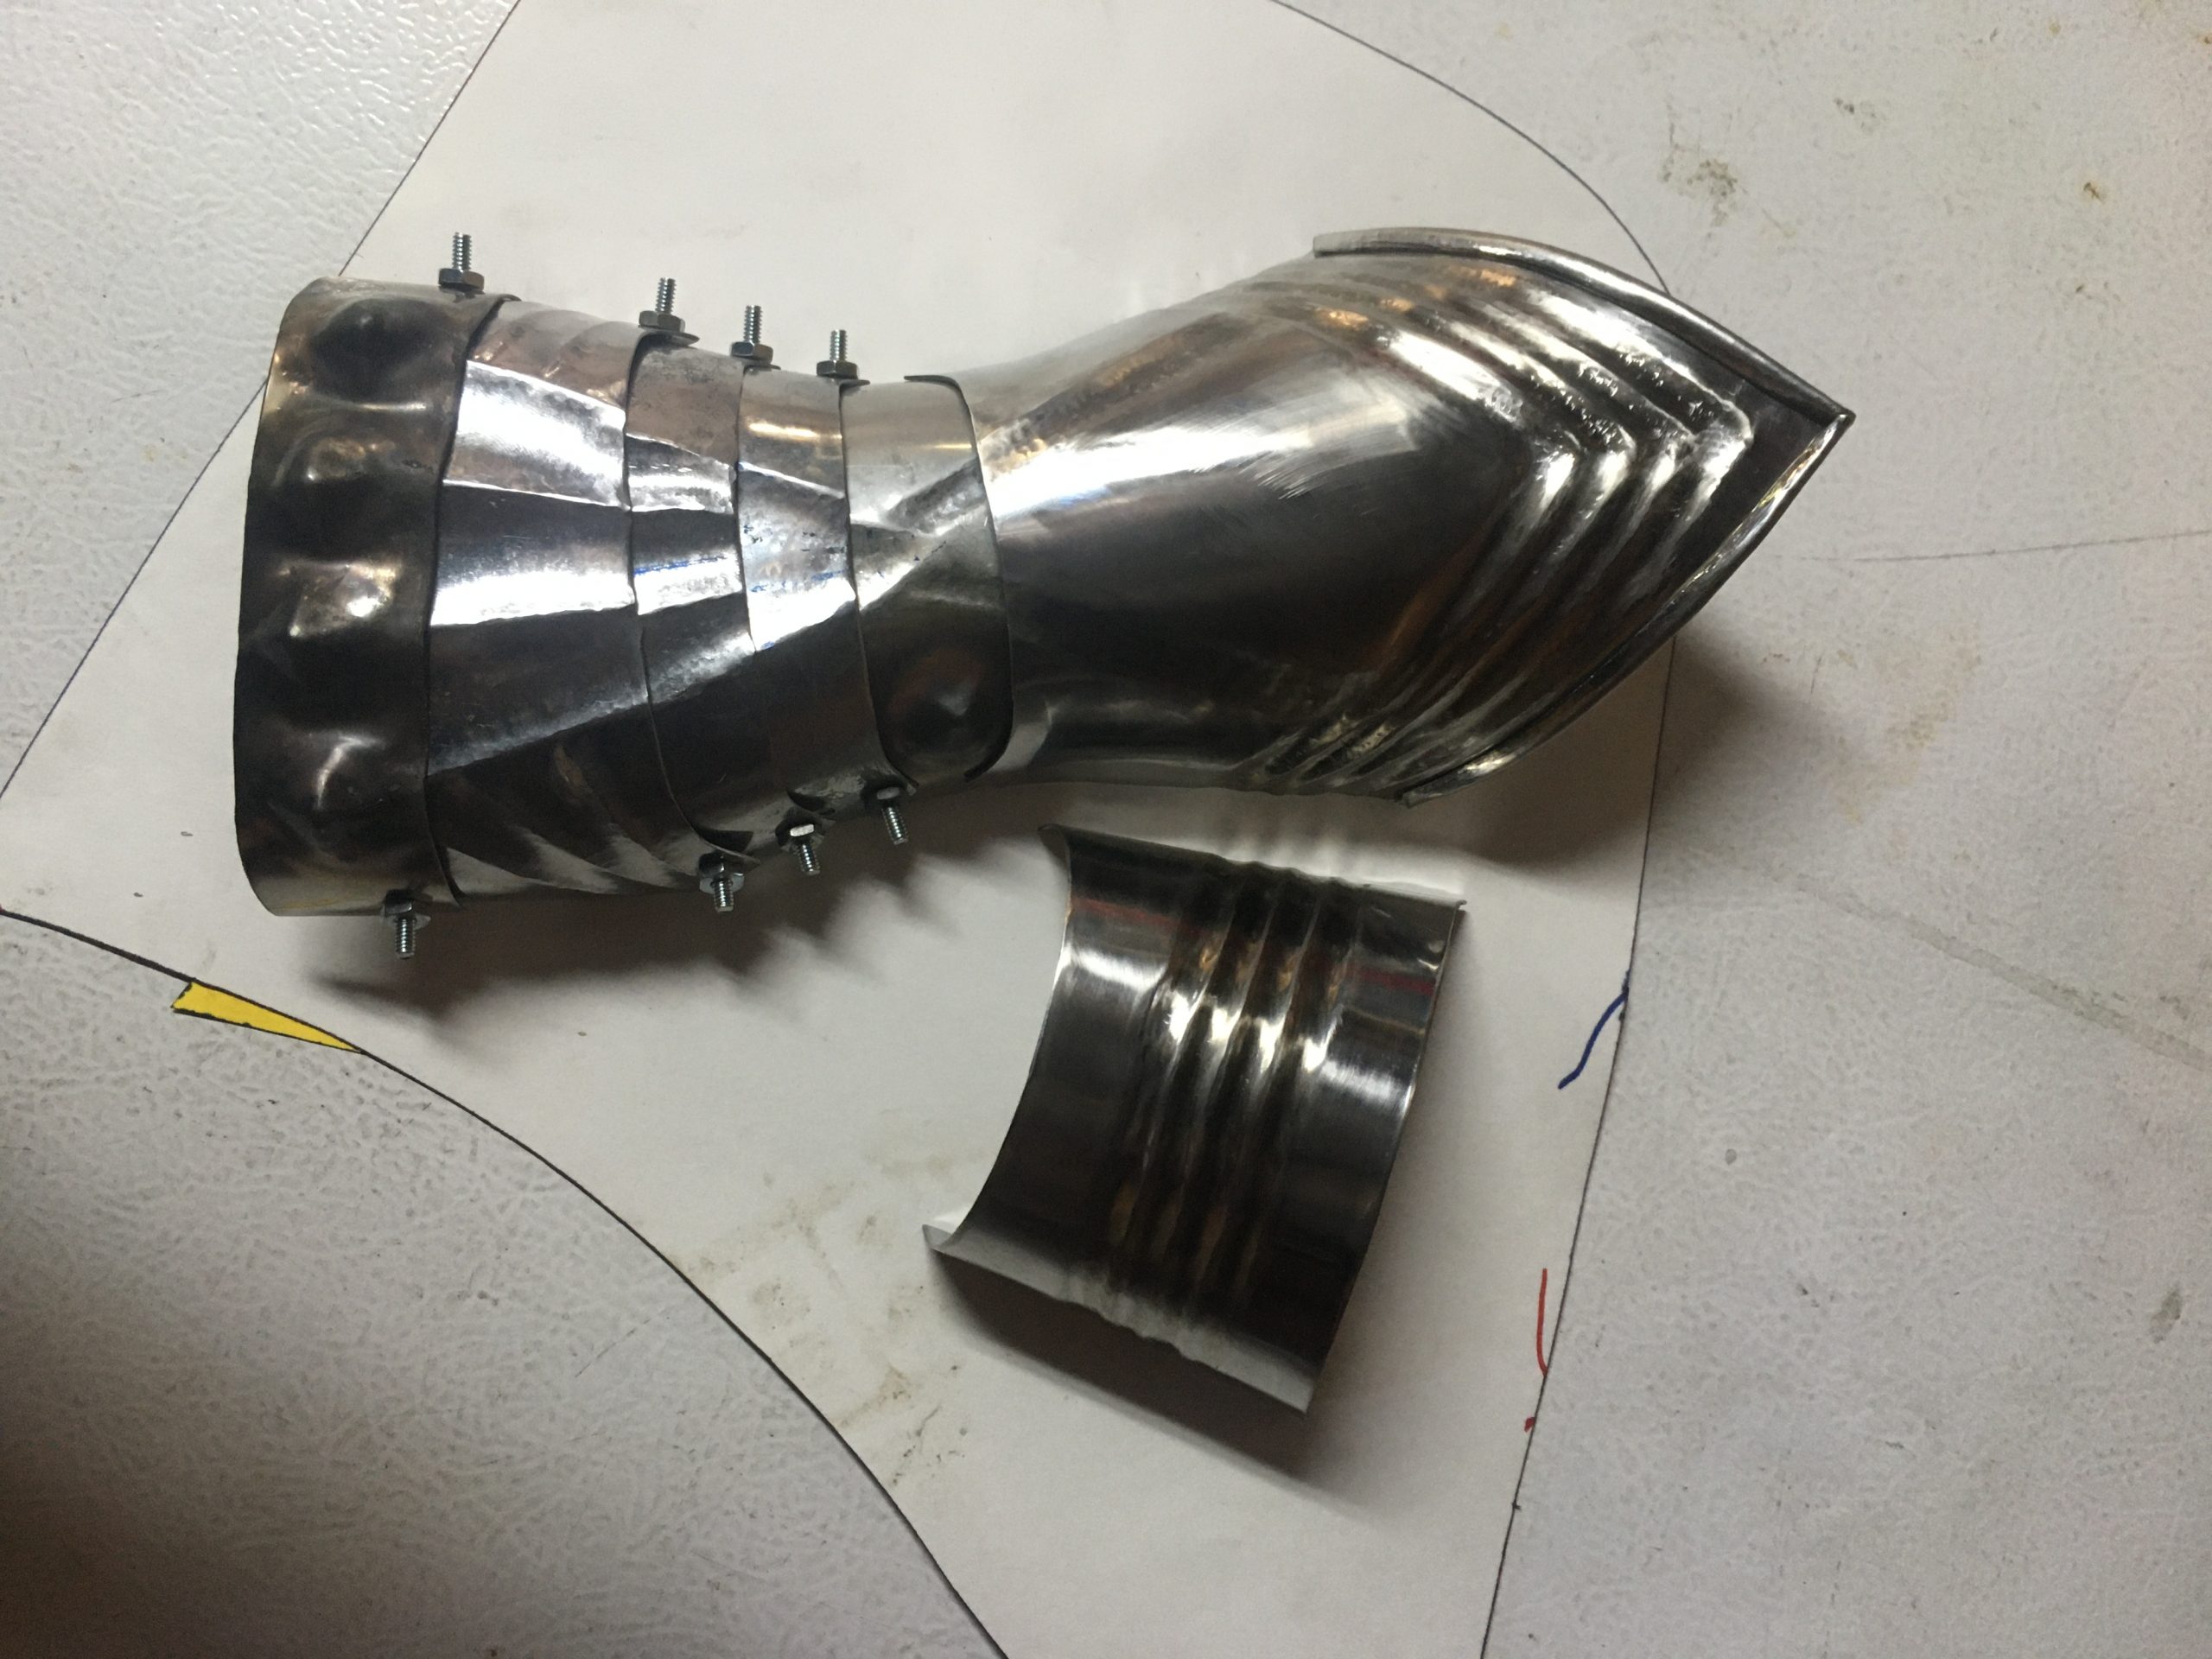
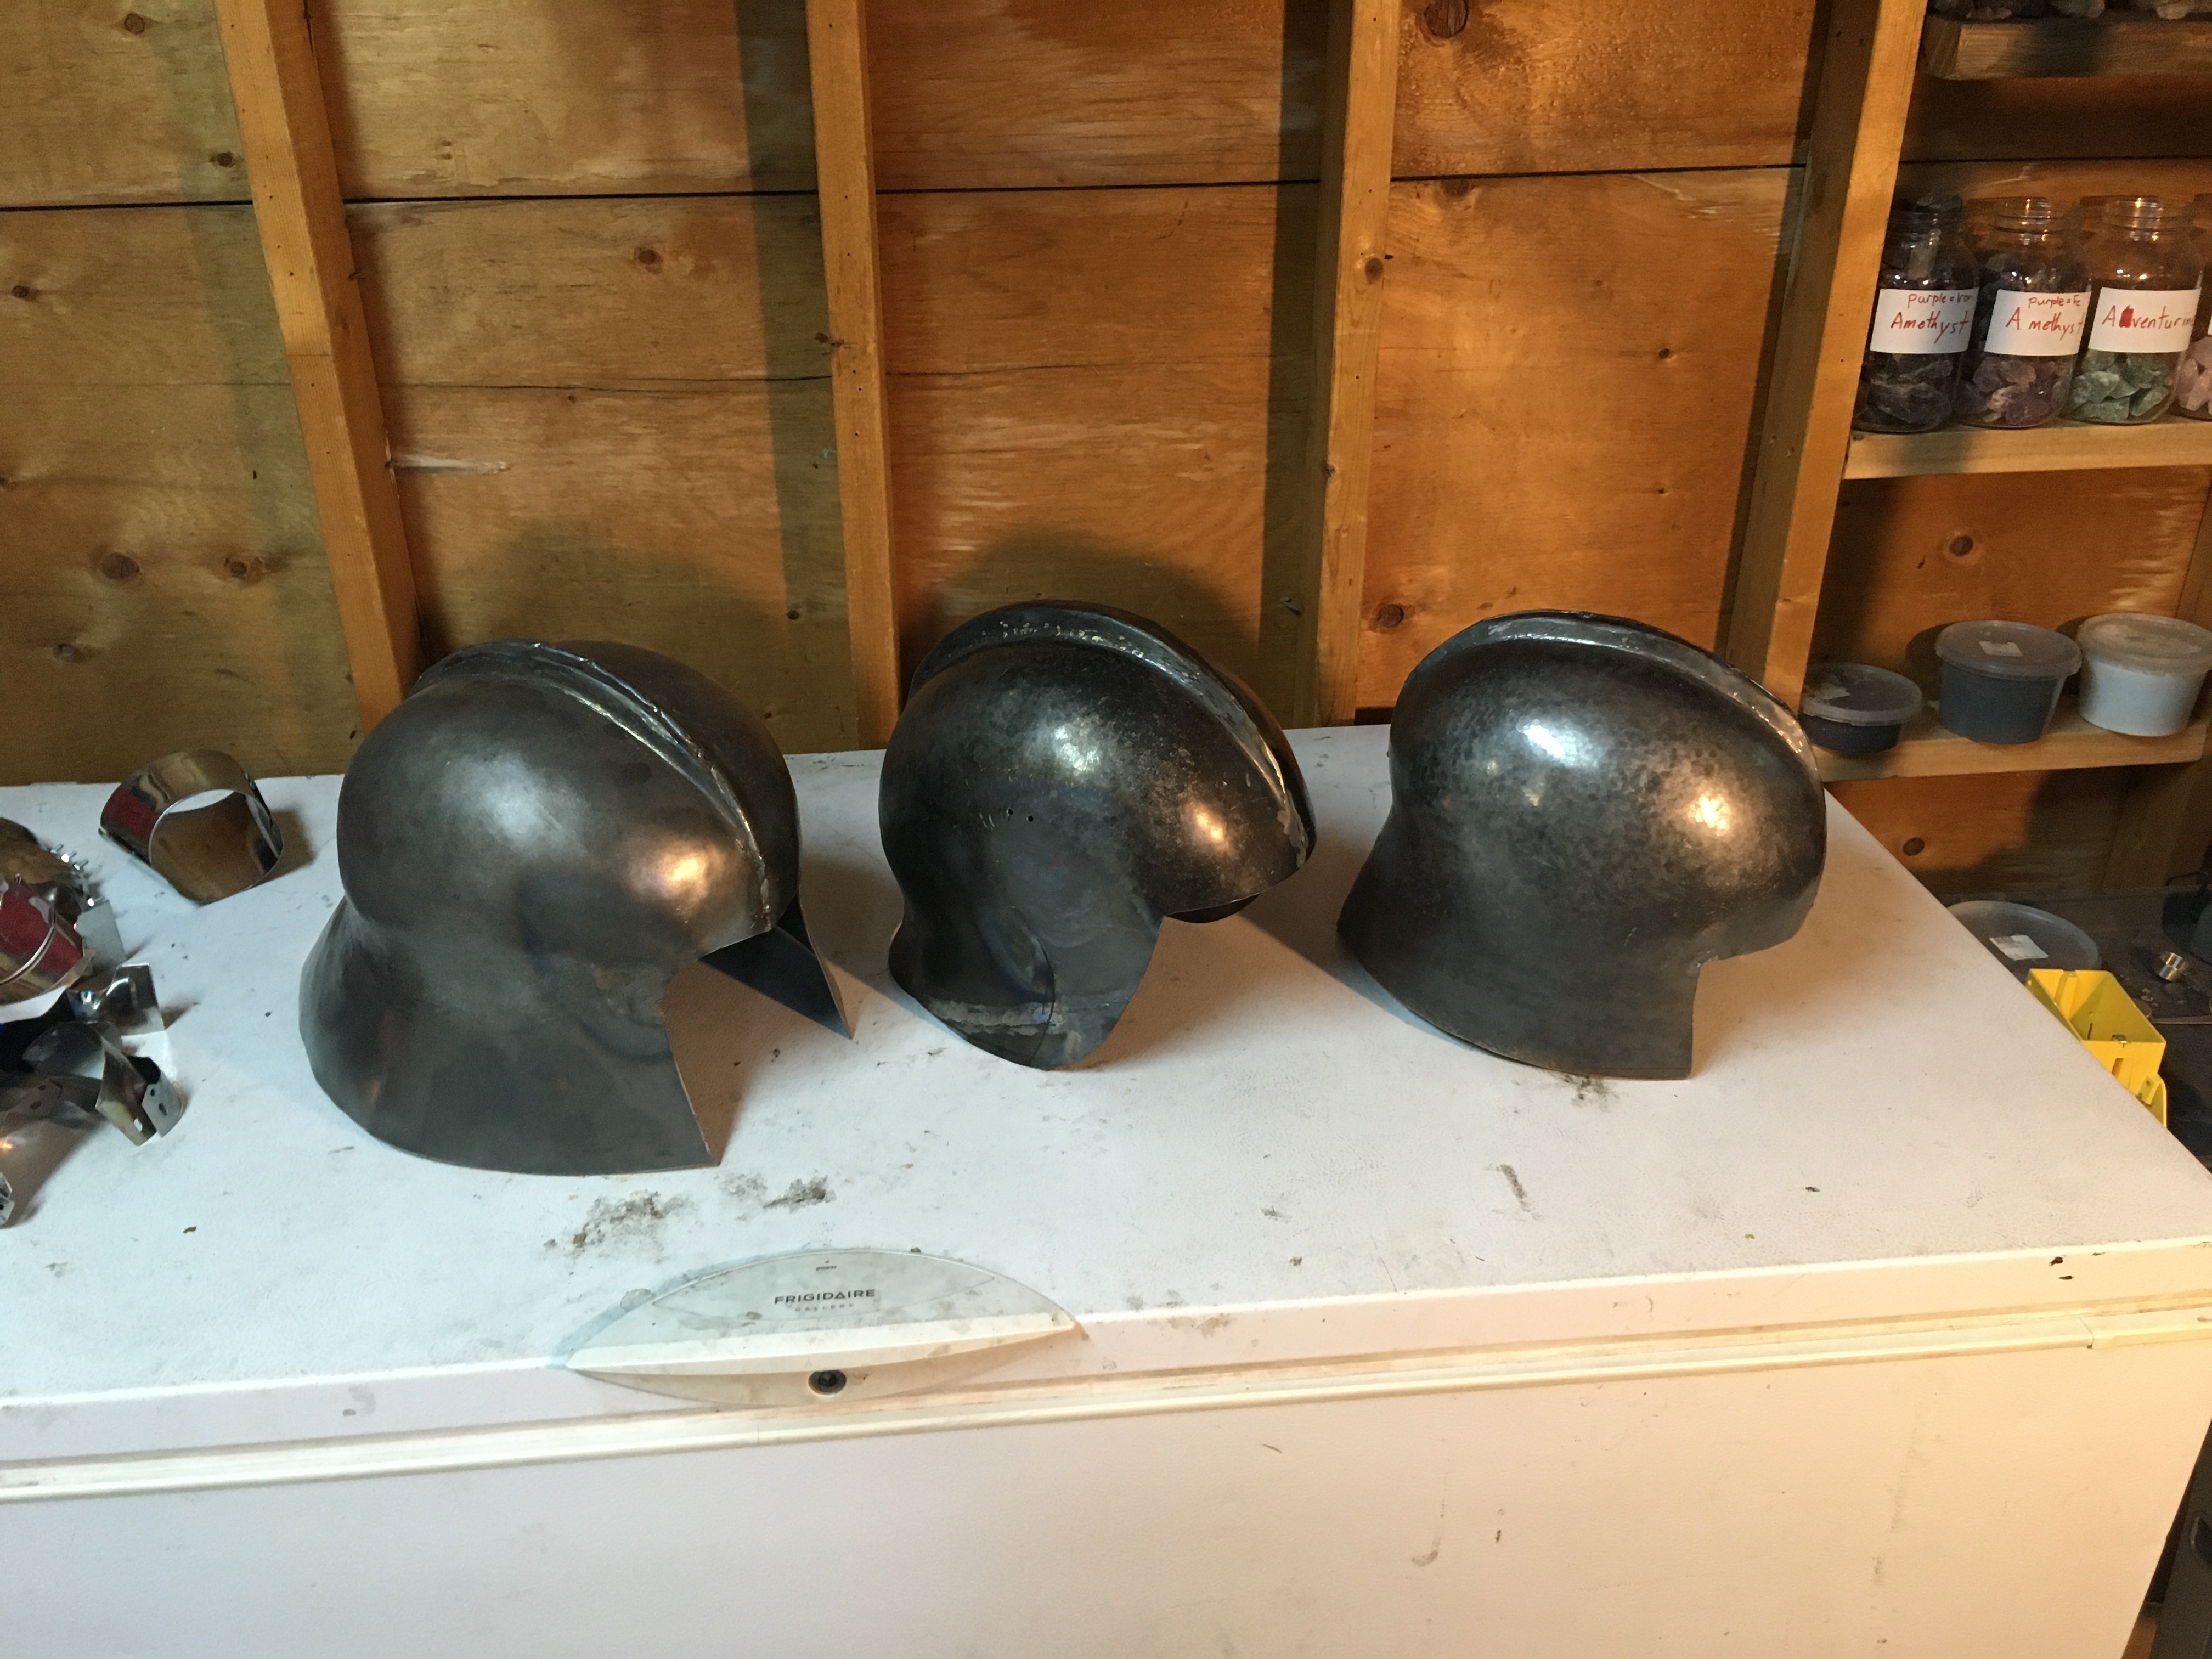
Part of doing this well (or at least not doing it badly) is recognizing when you know that you need to do multiple iterations, and determining what this specific iteration is trying to refine. I’m just about ready to finalize the gauntlet pattern that I’ve been working on for almost 20 years, so I thought that I’d share a picture of the latest few iterations

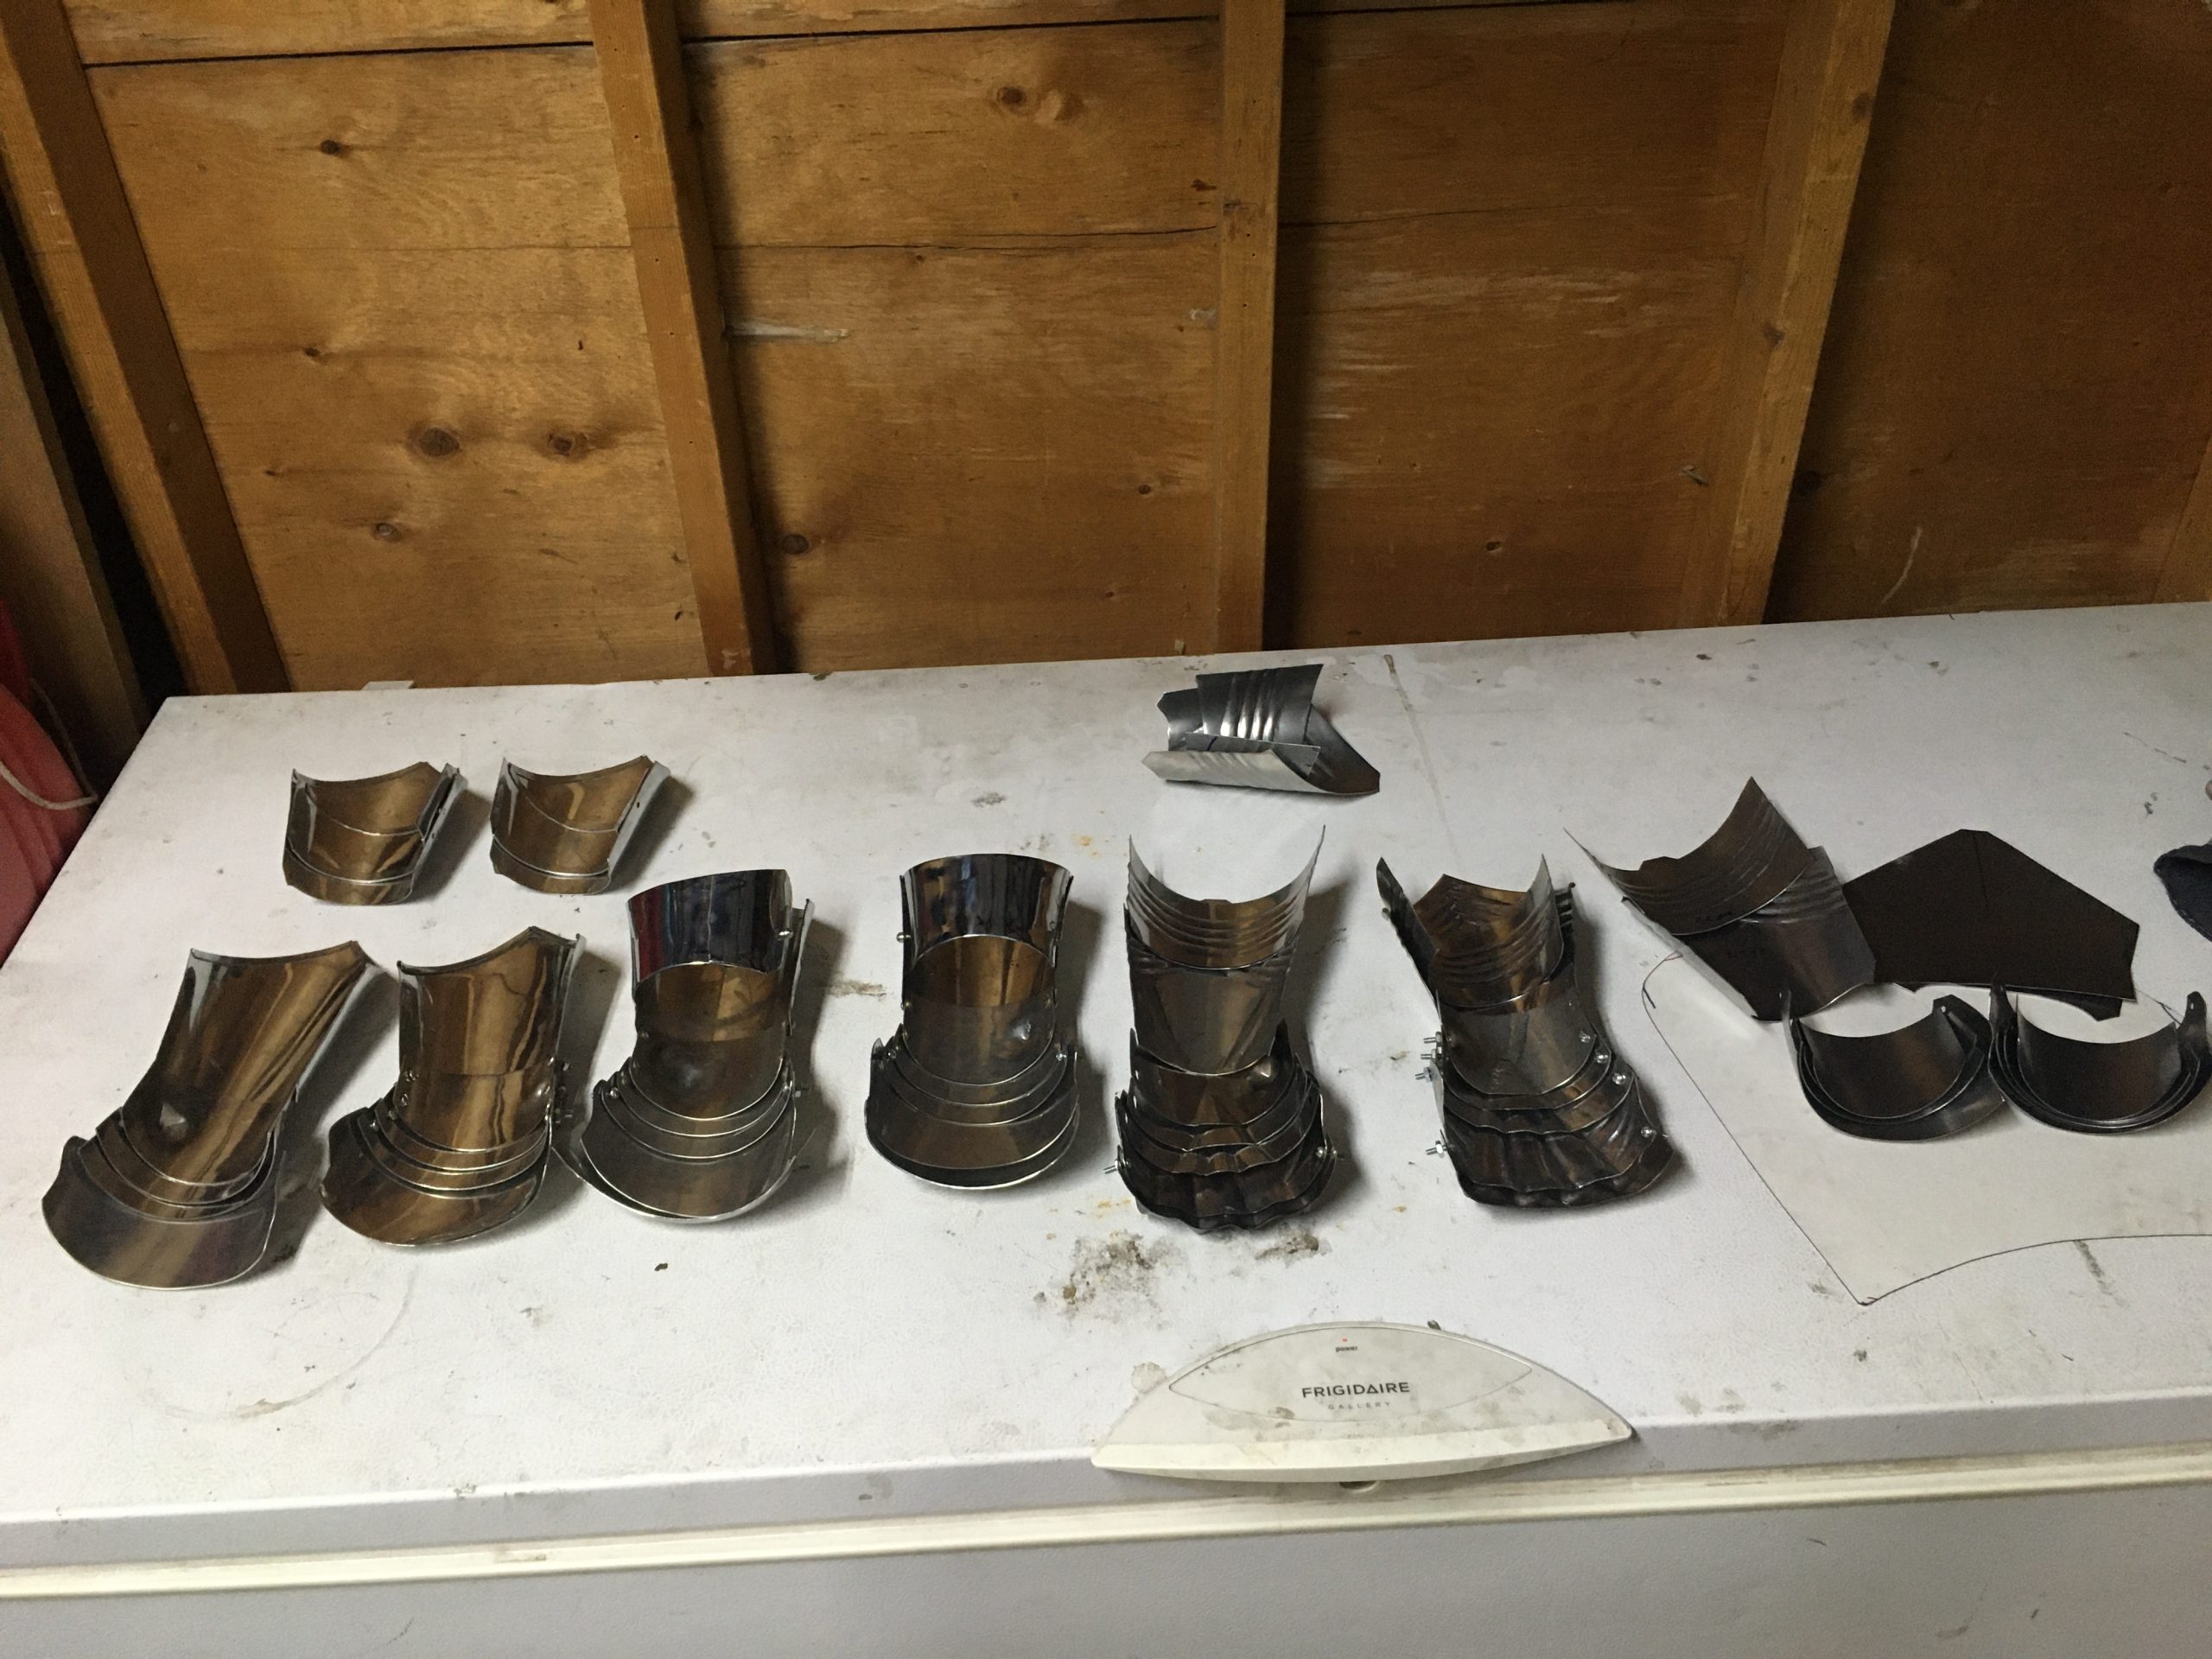
So what’s going on here? On the far left are gauntlets where I was refining the ulnar bump, along with some spare cuff plates since I realized partway in that this pattern (which I hadn’t changed for over a decade) needed to be fixed. The four gauntlets on the left are a “simplified” gothic pattern in stainless steel. These will probably be finished up and used as “loaner” gauntlets, provided as gifts or prizes, or sold.

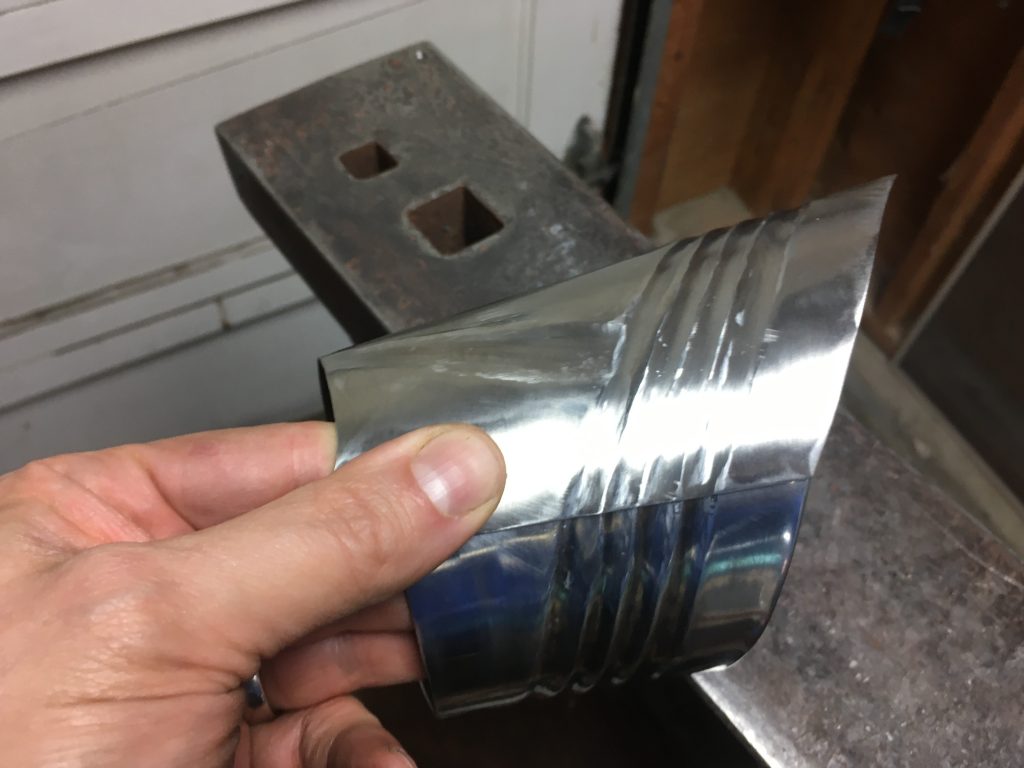
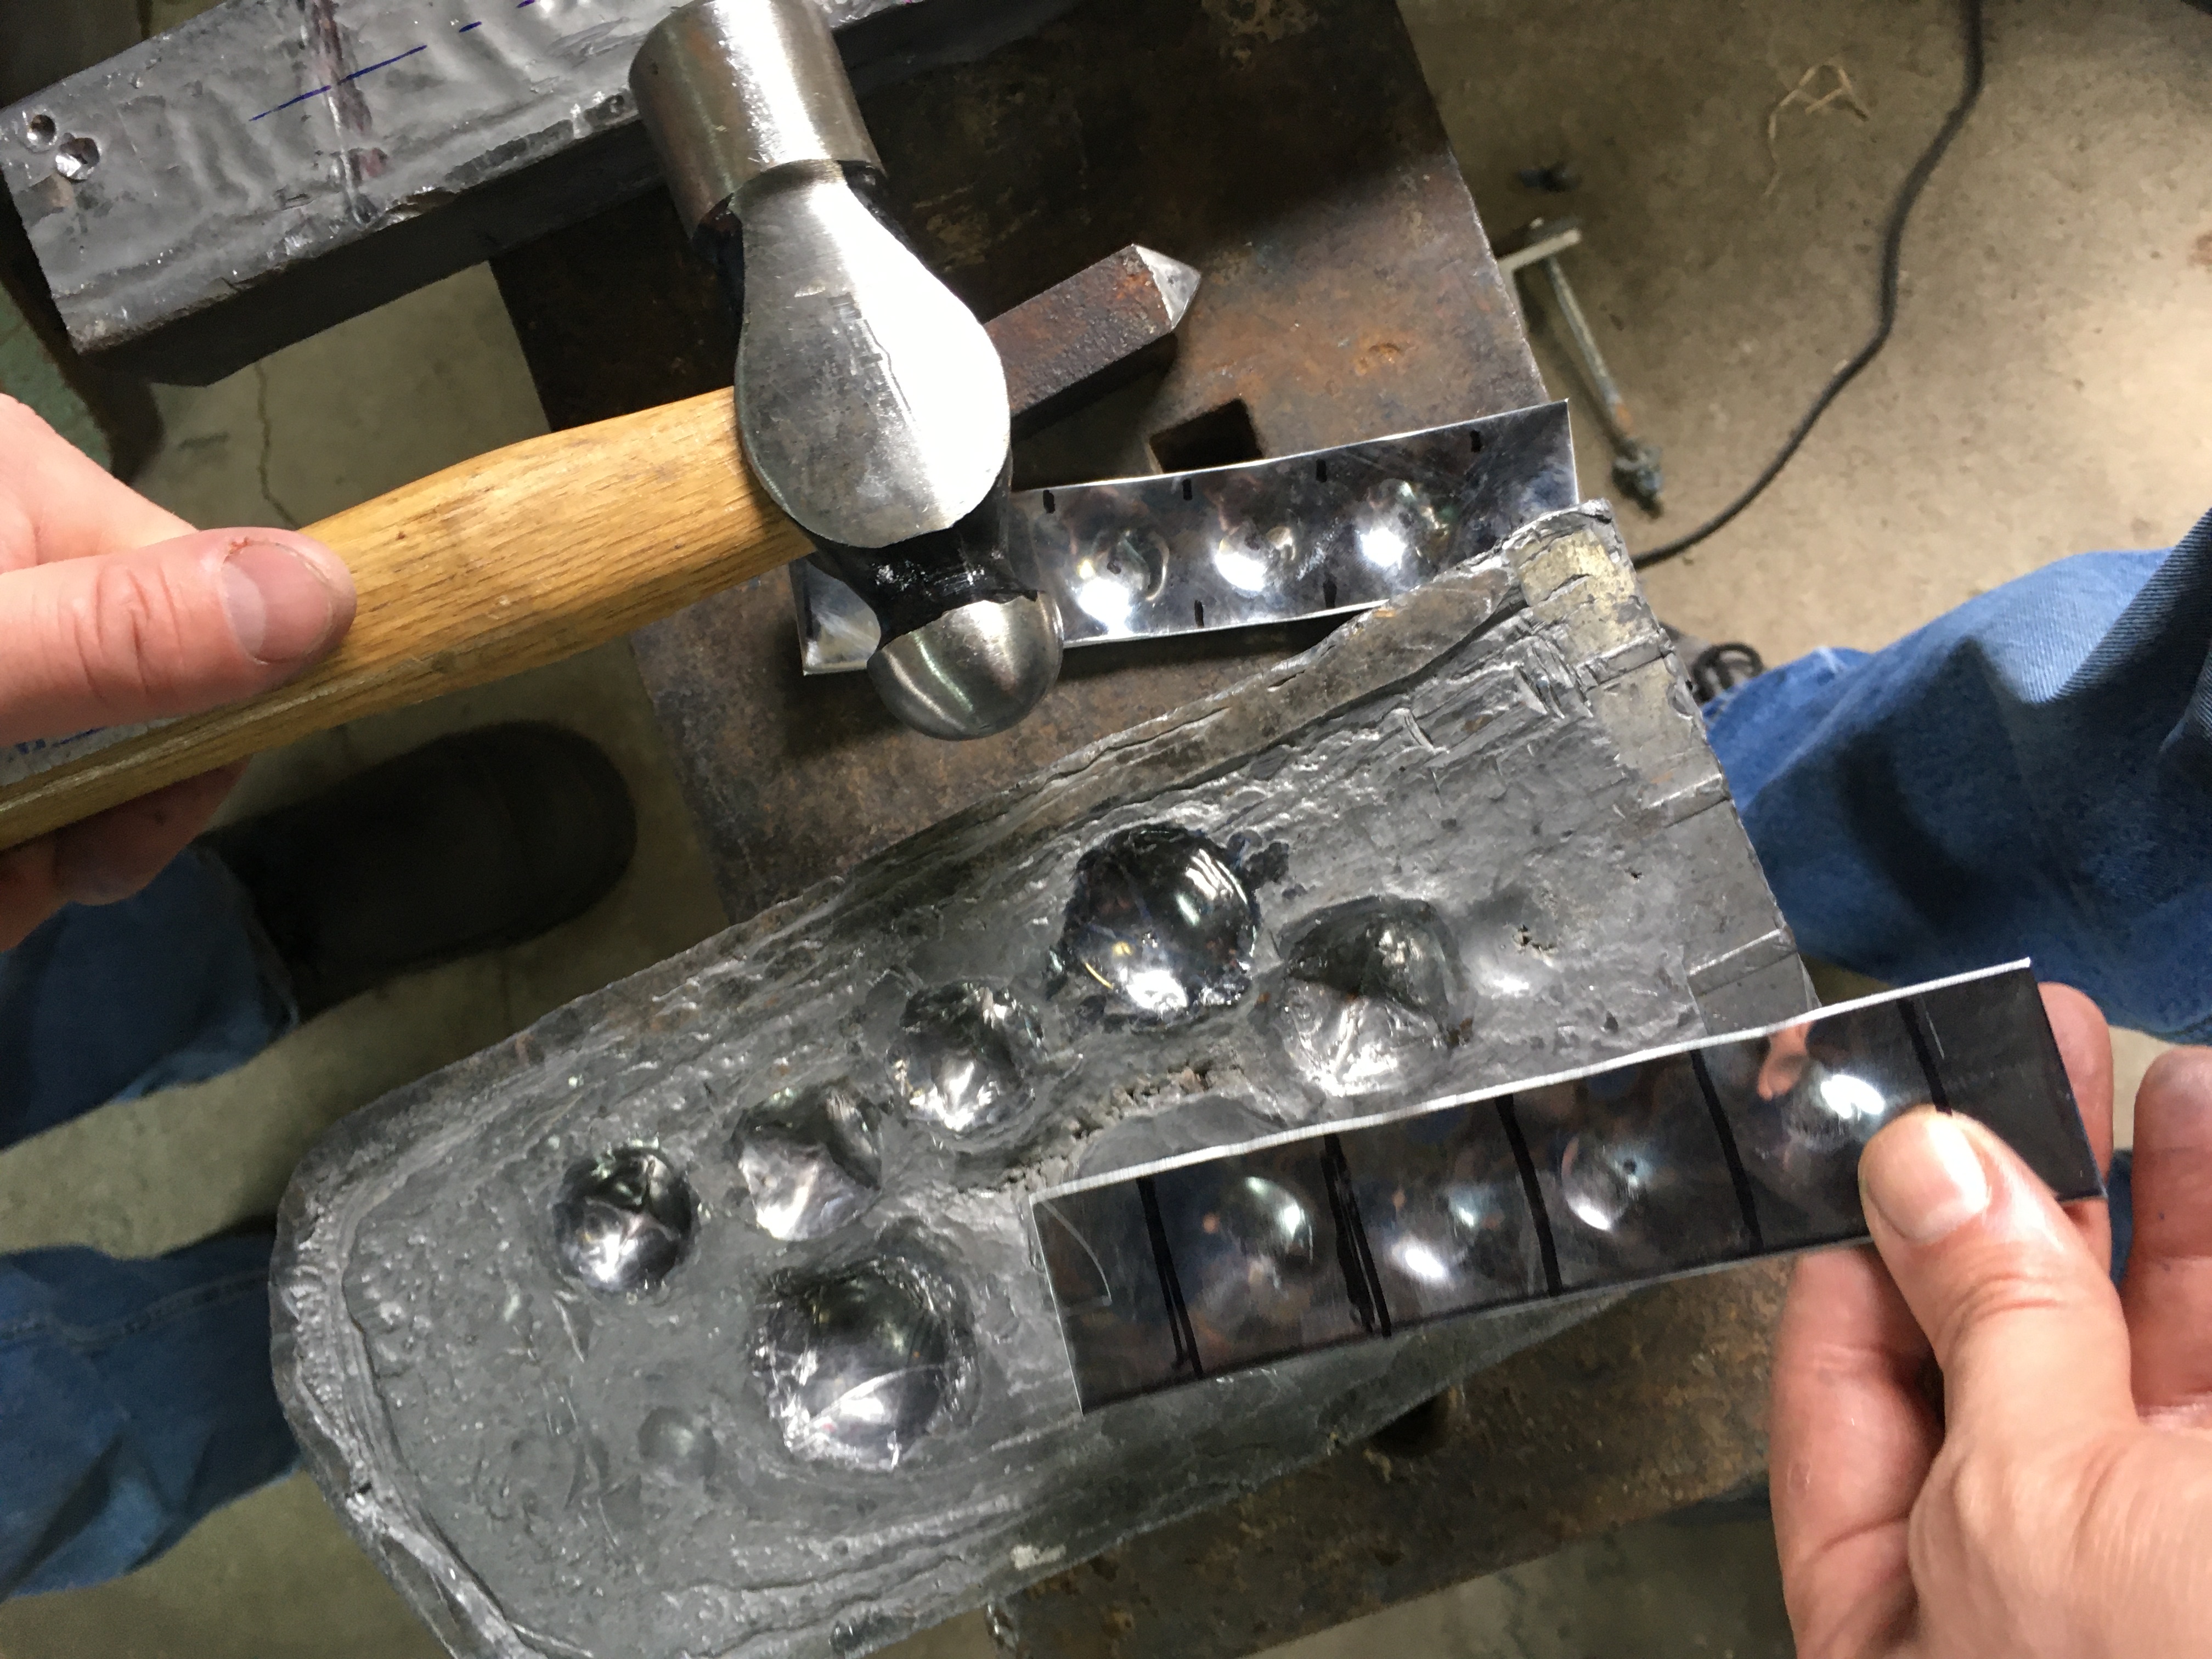
The gauntlets in the middle (largely complete) are my experiments at the proper gothic fluting and shaping, as well as the knuckle plate design and technique refinement. These are 20 Gauge (0.040″ / 1mm) stainless steel and are reasonably serviceable, although the fluting is rougher than I would like both because I was learning a new technique and needed to figure out how much I needed to round the edges of my fluting hammer and still be able to make crisp “centers” for the chevron fluting. These are likely to be my “practice” combat gauntlets .

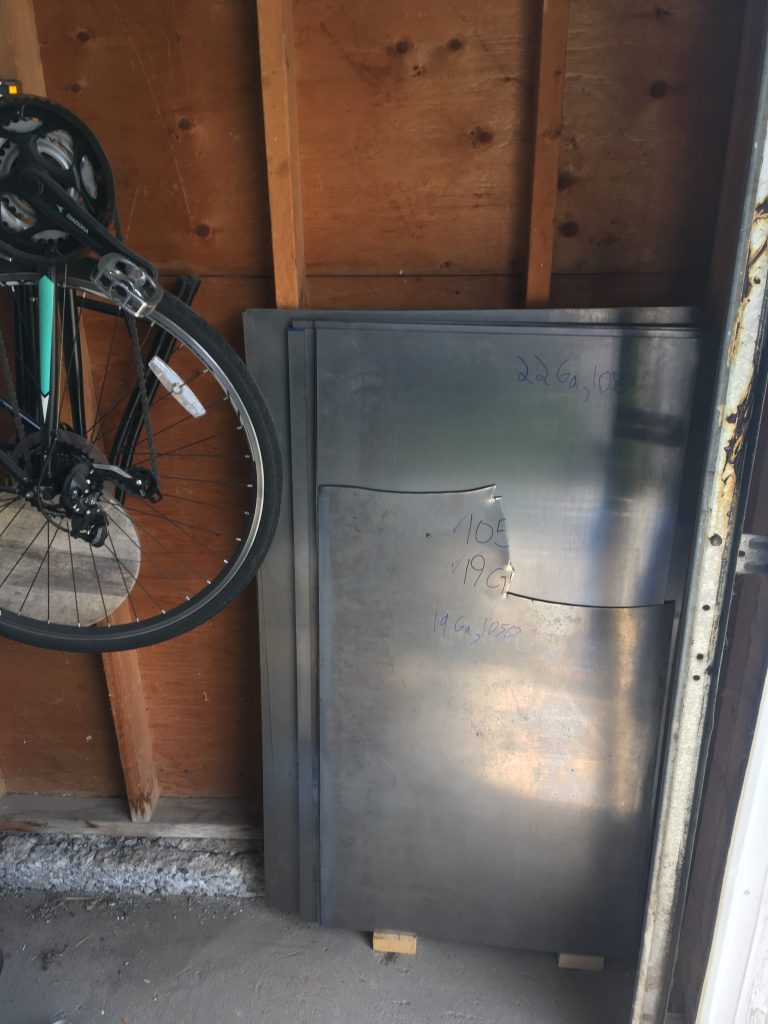
The remaining gauntlet pieces are carbon steel: the cuffs in the back of the picture in the middle are 20 Ga 1050, and when heat treated and tempered are likely to be fairly bulletproof. The gauntlets to the right (which are in the early stage of construction) are 22 Ga 1050 (0.032″ / 0.8mm) and are very close to medieval thickness. Assuming that I can do decent heat treatment on these this is likely to be my “production” gauntlet design, and the first two will probably be my “tournament” gauntlets both because they will be pretty, but also because they will be very close the medieval weight, and I’m hoping they will come in at under a pound, a fraction of the weight of most medieval gauntlets.

1050 Steel Arrives from Chicago

My moderately large pile of steel just arrived from Chicago (Admiral Steel). It’s amazing how little space 600 pounds of steel takes, this is a stack of 2′ x 4′ sheets of various thicknesses ranging from 14 Ga (0.80″ / 2mm) down to 22 ga (0.032″ / 0.8mm). Interestingly the (nominally) 20 Ga sheets which are supposed to be 0.040″ (1mm) thick came in at a hair over that thickness, so I have a lot of material (20 2′ x 4′ sheets) that is very close to this thickness. Fortunately, this is the range of thickness that most medieval armour sits in (breastplates, helmets and gorgets are thicker, some gauntlet components are thinner) so I anticipate that I will go through this in a year or three.

A pile of steel in the garage

The whole stack is about 2″ thick, with the thicker material in the back since it gets used less. I’m currently working on some gauntlets, so I’ll try these in the 1 mm thickness first (so that I have material that I can lose to abrasives when I “clean up” my hammer scuffs) and I will then test the medieval thickness which is generally on the order of 0.030″ (0.75mm) and see if it makes a significant difference in how it moves – gauntlets made of 16 Ga (1.5mm) material are very “clunky” because the plates are thick enough that the “stepping” for articulations is noticable: this is mostly alleviated in 20 Ga material (1mm) but may be even better with the “correct” thickness used.

Gauntlet Progress

I’ve been refining my gothic gauntlet pattern, and I’m coming down the home stretch on the current pair, with most of the fluting done. It’s time to start cleaning up the pieces, polishing and assembling. Here is how the pieces are coming together (bolted together) before any sanding or polishing.

Gauntlet under construction -

The cuff is fairly rough. I have since modified the hammer, since the “corners” are what was causing the scarring that can be seen, so the “wrapper” is a lot cleaner. The alignment of the cuff and wrapper worked fairly well: note that this is the other cuff and wrapper – before hemming the edges:

gauntlet cuff showing fluting alignment

I probably need to tighten the fluting, since the wrapper has minimal space for an edge roll on the leading edge – tightening the spacing up by 1/16″ (from 3/8″ to 5/16″) will clear me an additional 1/4″ on the cuff edge, which is coincidentally the amount of material I need for a tight roll.

It’s interesting how rapidly you learn to flute: the gauntlet pictured here was my second attempt at close laid flutes. My 6th piece (in carbon steel) will have no scarring that won’t sand out, and I could probably go directly to polish and not have it look too bad – and probably better than any armour I made in my first 5 years!

Updates and instructions (including final pattern layouts) to follow soon(ish)

A Few Hammers

My wife thinks that I have too many hammers, since the last time we moved she counted over 50 – and I didn’t mention the dozen that were at a friends’ house…

Here are a few of the hammers in my shop – one of the boxes (not sacks) of hammers that I filled while cleaning up my shop. My currently most used hammers are a modified 8 oz ball pien, a couple of autobody planishing hammers, and a peddinghaus that I am using a lot for fluting right now. The pedinghause hammers and one of the autobody hammers can be seen in the middle of the photo above (click on it to get a full sized pic) – they were all on my “finishing” bench while I was doing the shop clean up so the went in last.

I’ll have to post a follow up showing a few of the specialty hammers that I use on a regular basis, and why I use these in preference to other options. It will also help explain why I have so many hammers, and which ones I have multiples of so that I can keep one at each of several stations like the aformentioned 8 oz ballpien, which is an excellent “tight areas” hammer as well as being my most useful riveting hammer.

Refining Armour Patterns

There is a common misconception that once you hit a certain level of ability, it’s suddenly easy to make patterns for armour. Another common misconception is that once you have the pattern for a piece of armour it’s easy to make that piece. Neither of these is true, and in one way I am fortunate that when I was learning to build armour there weren’t any armourers in the area that I could get patterns from.

I’ll take these in reverse order. To build armour from a pattern, you need the pattern and the methodology used to build armour. In the early days or armour reproduction when the techniques were simple, it was reasonable to be able to take anyone’s pattern and be able to build their armour. As more advanced techniques developed, it started to be important to know how the armour was built. The pattern for a raised sallet is generally some variation on a circle – a milanese sallet will be close to a circle, while a gothic sallet with a tail will be a teardrop. The reason that I don’t generally provide armour patterns is because without having a set of instructions, they are really a bit of an exercise in frustration. That said, I’m workng on providing patterns and instruction sets so that it is possible for people to learn from my numerous mistakes and save a considerable amount of time (years) from their development as a plattner.

Here are some pictures of the last 3 sallets I have built, as I have been working on a 2-piece sallet pattern for a number of years:

3 sallets - oldest to newest
Continue reading Refining Armour Patterns

Gothic Gauntlet Knuckle Plates

The knuckle plate is a fairly complex piece, and it took me a number of tries to figure out a simple way of making these using the tools that I built for making the finger gadlings. The base pattern for this is a rectangular strip of steel 1 1/4″ in width roughly 6″ wide (38mm x 150mm) Mark the center line, and 2 lines on each side 1 1/8″ to either side, these delineate the outer edges of the knuckles. Mark the center of these since this is where they will be domed. I use a lead block for most of the shaping, but pewter or firm clay will also work, although the clay will not provide as clean an impression.

Setup

The “pattern” for the knuckle plate is a rectangle 1 1/4″ wide by 6″ (or a bit more) long. This will be trimmed later, so the length isn’t terribly important. the 1 1/4″ width is slightly wider than it needs to be, but it’s easier to grind down a bit of extra material than to have to make a new plate if your punch locations aren’t perfect. Mark the middle of the sheet and mark at 1 1/8″ intervals from this centerline. If your hands are large, you will need to increase this spacing, if they are small you can decrease it. this will give you 4 “squares”, and if you put a mark in the middle of each one you can use this to line it up on your dapping block. Below are a couple of pictures, one of the “marked” knuckle plate aligned on the striking block, the second showing the lines I used to align the punch depression. The hammer I use is a 24 oz ball pien, and it has an almost spherical “ball” which is why I chose it for this forming.

Knuckle Plate dome set Marked Plate

Once I have set the hammer I strike the ball pien hammer with an 8 lb (4kg) sledge hammer with a cut down handle to allow it to be swung with a single hand. Because the “alignment” punches are fairly “light” and relatively shallow (about 1/8″ deep) and supported by the rest of the lead block they leave the rest of the plate flat, and ready for the major forming operations to follow. The following pictures show the first punch, and the series of 4 demonstrating that the plate is still flat following the alignment punches.

first knuckle set ready to dome Continue reading Gothic Gauntlet Knuckle Plates